|
通过VBA自动将表格格式快速设置为要求的格式,减少手工调整的时间。这个程序还有部份功能未实现,在数字列中文字右对齐,数字添加千位分隔符,强调的行添加背景色等内容。 原始表格格式如下:  设置格式后格式如下: 设置格式后格式如下: 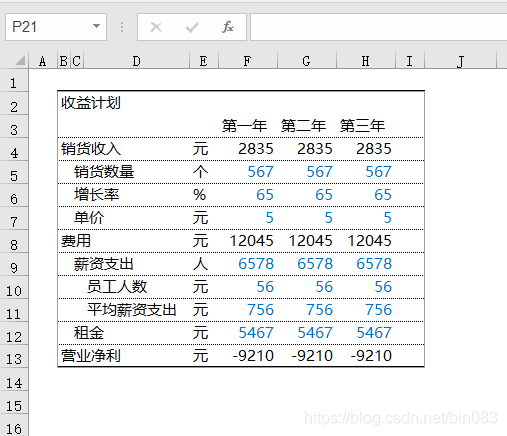 打印预览: 打印预览: 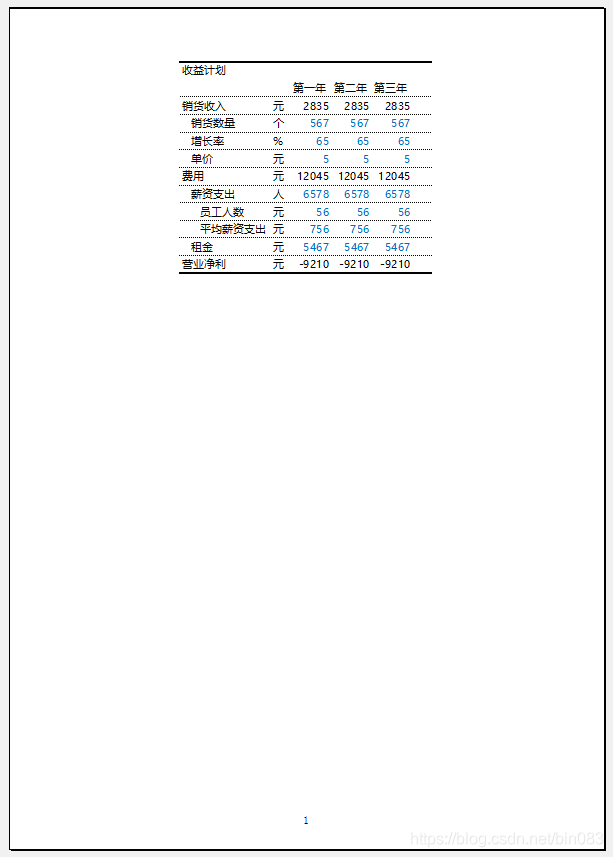 具体VBA代码如下: 具体VBA代码如下:
Option Explicit
Sub 设置表格格式()
'
'自动设置表格格式的宏
'
'
'关闭屏幕刷新
Application.ScreenUpdating = False
'如果第一行不为空,插入一行空行
If Not WorksheetFunction.CountA(Rows(1)) = 0 Then
Cells(1, 1).EntireRow.Insert shift:=xlShiftDown
End If
'如果第一列不为空,插入一列空列
If Not WorksheetFunction.CountA(Columns("A")) = 0 Then
Cells(1, 1).EntireColumn.Insert shift:=xlShiftToRight
End If
Cells.Select
With Selection.Font
.Name = "微软雅黑" '设置字体为微软雅黑
.Size = 11 '设置字号为11
End With
Selection.RowHeight = Selection.Font.Size * 1.6 '设置行高为字号的1.6倍
'消除已设置的边框
Selection.Borders(xlDiagonalDown).LineStyle = xlNone
Selection.Borders(xlDiagonalUp).LineStyle = xlNone
Selection.Borders(xlEdgeLeft).LineStyle = xlNone
Selection.Borders(xlEdgeTop).LineStyle = xlNone
Selection.Borders(xlEdgeBottom).LineStyle = xlNone
Selection.Borders(xlEdgeRight).LineStyle = xlNone
Selection.Borders(xlInsideVertical).LineStyle = xlNone
Selection.Borders(xlInsideHorizontal).LineStyle = xlNone
'取得最后一个非空单元格行号列号
Dim maxR As Integer
Dim maxC As Integer
'Debug.Print ActiveSheet.UsedRange.Cells(ActiveSheet.UsedRange.Count).Address
'Debug.Print ActiveSheet.UsedRange.Columns.Count
maxR = ActiveSheet.UsedRange.Rows.Count + 1 '之前插入了一行空白行+1
maxC = ActiveSheet.UsedRange.Columns.Count + 1 '之前插入了一列空白列+1
Range(Cells(2, 2), Cells(maxR, maxC + 1)).Select '选择B2单位格到最后一个非空单元格,并选多一列空白列
'ActiveSheet.UsedRange.Select
'设置自动列宽
Selection.EntireColumn.AutoFit
'数字格式的单元格设置为蓝色,添加千位分隔符
Dim rng As Range
For Each rng In ActiveSheet.UsedRange
If rng.HasFormula Then '判断单元格是否有公式,有公式则将字体设置为黑色
rng.Font.Color = RGB(0, 0, 0)
Else
If VarType(rng) = 5 Then '判断单元格类型是否为数字
rng.Font.Color = RGB(0, 112, 192) '设置为蓝色(或-4165632)
'rng.Style = "Comma" '添加千位分隔符
'rng.NumberFormatLocal = "_ * #,##0_ ;_ * -#,##0_ ;_ * ""-""??_ ;_ @_ "
End If
End If
Next
'设置选择单元格区域的边框
With Selection.Borders(xlEdgeTop)
.LineStyle = xlContinuous
.ColorIndex = xlAutomatic
.TintAndShade = 0
.Weight = xlMedium
End With
With Selection.Borders(xlEdgeBottom)
.LineStyle = xlContinuous
.ColorIndex = xlAutomatic
.TintAndShade = 0
.Weight = xlMedium
End With
With Selection.Borders(xlInsideHorizontal)
.LineStyle = xlContinuous
.ColorIndex = xlAutomatic
.TintAndShade = 0
.Weight = xlHairline
End With
'设置所选区域第一行的底边框为无边框
'Debug.Print Selection.Rows(1).Address
Selection.Rows(1).Borders(xlEdgeBottom).LineStyle = xlNone
'第一列和最后一列空白列设置宽度为3
Columns("A").ColumnWidth = 3
'Debug.Print ActiveSheet.UsedRange.Columns.Count
Columns(ActiveSheet.UsedRange.Columns.Count + 1).ColumnWidth = 3
'不显示网格线
ActiveWindow.DisplayGridlines = False
'设置打印页面
With ActiveSheet.PageSetup
.CenterFooter = "&P" '页脚设置页码
.CenterHorizontally = True '水平居中打印
.PrintArea = Selection.Address '设置打印区域
End With
'打开屏幕刷新
Application.ScreenUpdating = True
End Sub
向右缩进的代码,要先选择需要向右缩进的单元格,再执行代码
Sub 向右缩进一列()
'
'选中单元格区域向右缩进一列
'
Dim rng As Range
Selection(1).Offset(0, 1).EntireColumn.Insert shift:=xlShiftToRight '右边插入一列
For Each rng In Selection
rng.Offset(0, 1).Value = rng.Value '将值复制到右边一个单元格中
rng.ClearContents '删除原单元格内容
Next
Selection(1).EntireColumn.ColumnWidth = 1 '设置原单元格所在列列宽为1
End Sub
|