基于python |
您所在的位置:网站首页 › excel制作答题器 › 基于python |
基于python
|
答题系统的设计
首先我们需要一个题库,这个题库可以采用数据库 ,也可以使用execl,这里我们由于execl笔记方便的。所以我们使用execl,execl的设计。
界面设计类 class App: def __init__(self, win): self.win = win # 设置窗口大小 self.width = 900 self.height = 600 # 获取屏幕尺寸以计算布局参数,使窗口居屏幕中央 self.screenwidth = win.winfo_screenwidth() self.screenheight = win.winfo_screenheight() alignstr = '%dx%d+%d+%d' % (self.width, self.height, (self.screenwidth - self.width) / 2, (self.screenheight - self.height) / 2) self.win.geometry(alignstr) # 大小不可变,更改为True则可变 self.win.resizable(width=False, height=False) # 设置标题 self.win.title('答题系统') self.img = tk.PhotoImage(file='./Little Program/Answer Square.gif') # 获取数据 self.data = r.get() self.text_topic = tk.StringVar() self.text_topic.set(self.data['题目']) self.text_A = tk.StringVar() self.text_A.set(self.data['A']) self.text_B = tk.StringVar() self.text_B.set(self.data['B']) # 点击下一题后进行的逻辑操作 def begin(self): print('*' * 50) print('下一题:1111') self.data = r.get() # self.text_topic = tk.StringVar() self.text_topic.set(self.data['题目']) # self.text_A = tk.StringVar() self.text_A.set(self.data['A']) # self.text_B = tk.StringVar() self.text_B.set(self.data['B']) self.canvas.delete(self.hint) self.canvas.delete(self.next) b1 = tk.Button(self.win, textvariable=self.text_A, font=("宋体", 20), image=self.img, bd=1, width=20, height=50, compound="center", wraplength=200,fg='#FFF', command=self.verify_A) b1.pack() self.cb1 = self.canvas.create_window(200, 350, width=200, height=100, window=b1) b2 = tk.Button(self.win, textvariable=self.text_B, font=("宋体", 20), image=self.img, bd=1, width=20, height=50, compound="center",wraplength=200,fg='#FFF', command=self.verify_B) b2.pack() self.cb2 = self.canvas.create_window(700, 350, width=200, height=100, window=b2) def run(self): self.canvas = tk.Canvas(self.win, width=1100, height=600, bd=0, highlightthickness=0) imgpath = './Little Program/bg96.gif' img = Image.open(imgpath) photo = ImageTk.PhotoImage(img) self.canvas.create_image(self.width/2, self.height/2, image=photo) self.canvas.pack() topic = Label(self.win, textvariable=self.text_topic, font=("华文行楷", 20), wraplength=500, width=500, height=120, anchor="w", justify=tk.CENTER) topic.pack() self.canvas.create_window(450, 100, width=500, height=120, window=topic) photo2 = tk.PhotoImage(file='./Little Program/Answer Square.gif') b1 = tk.Button(self.win, textvariable=self.text_A, font=("宋体", 20), image=photo2, bd=1, width=20, height=50, compound="center",wraplength=200,fg='#FFF', command=self.verify_A) b1.pack() self.cb1 = self.canvas.create_window(200, 350, width=200, height=100, window=b1) b2 = tk.Button(self.win, textvariable=self.text_B, font=("宋体", 20), image=photo2, bd=1, width=20, height=50, compound="center",wraplength=200,fg='#FFF', command=self.verify_B) b2.pack() self.cb2 = self.canvas.create_window(700, 350, width=200, height=100, window=b2) self.win.mainloop() def verify_create(self): self.canvas.delete(self.cb1) self.canvas.delete(self.cb2) # photo3 = tk.PhotoImage(file='./Little Program/Answer Square.gif') b3 = tk.Button(self.win, text='下一题', font=("宋体", 20), bd=2, width=20, height=50, compound="center", command=self.begin) self.next = self.canvas.create_window(450, 400, width=200, height=100, window=b3) def verify_A(self): print('你的A') if self.data['T'] == 'A': print('恭喜你答对了。') self.hint = self.canvas.create_text(435, 230, # 使用create_text方法在坐标(302,77)处绘制文字 text='恭喜你,答对了!' # 所绘制文字的内容 , fill='green', font=("微软雅黑", 25)) self.canvas.delete(self.cb1) self.canvas.delete(self.cb2) # photo3 = tk.PhotoImage(file='./Little Program/Answer Square.gif') b3 = tk.Button(self.win, text='下一题', font=("宋体", 20), bd=2, width=20, height=50, compound="center", command=self.begin) self.next = self.canvas.create_window(450, 400, width=200, height=100, window=b3) else: print('打错了') self.hint = self.canvas.create_text(435, 230, # 使用create_text方法在坐标(302,77)处绘制文字 text='你回答错了!' # 所绘制文字的内容 , fill='red', font=("微软雅黑", 25)) self.verify_create() def verify_B(self): print('你的B') if self.data['T'] == 'B': print('恭喜你答对了。') self.hint = self.canvas.create_text(435, 230, # 使用create_text方法在坐标(302,77)处绘制文字 text='恭喜你,答对了!' # 所绘制文字的内容 , fill='green', font=("微软雅黑", 25)) self.verify_create() else: print('打错了') self.hint = self.canvas.create_text(435, 230, # 使用create_text方法在坐标(302,77)处绘制文字 text='你回答错了!' # 所绘制文字的内容 , fill='red', font=("微软雅黑", 25)) self.verify_create()数据获取类* class Read_excel: def __init__(self): self.data = {} self.df = pd.read_excel('./Little Program/题库.xlsx', sheet_name=0) def get(self): global flag if flag == 4: flag = 0 self.df = pd.read_excel('./Little Program/题库.xlsx', sheet_name=flag) index = random.randint(0, len(self.df['题目编号']) - 1) print(self.df.iloc[index]) self.data['题目'] = str(flag+1)+". "+str(self.df.iloc[index]['题干']) self.data['A'] = 'A.' + str(self.df.iloc[index]['A']) self.data['B'] = 'B.' + str(self.df.iloc[index]['B']) self.data['T'] = self.df.iloc[index]['正确答案'] flag += 1 return self.data 运行截图
做的不好,请多多指教(没有,什么技术性,并且代码冗余度太高,娱乐而已) 源码下载地址:https://download.csdn.net/download/qq_39410845/12010776 |

 提示信息:根据答对与否,提示相应的信息。‘ 下一题:仅在答完题后显示,下一题
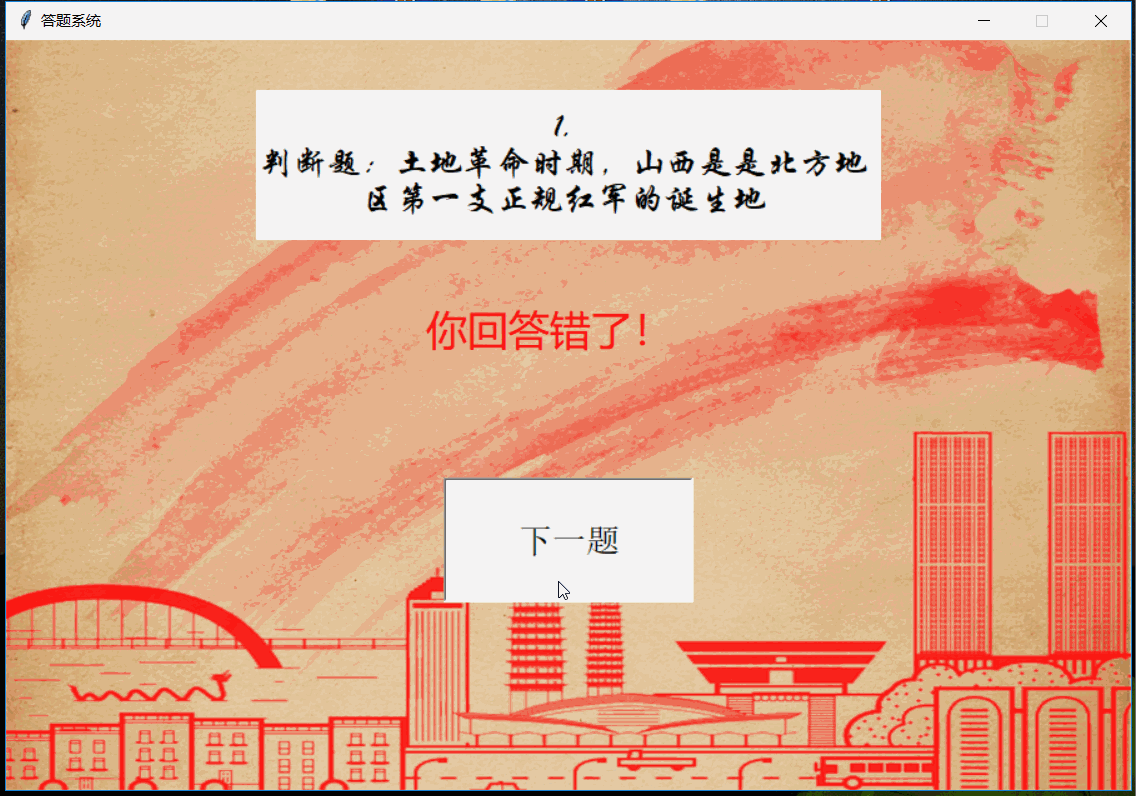
【本文地址】
今日新闻 |
推荐新闻 |