|
小知识,大挑战!本文正在参与“程序员必备小知识”创作活动。
介绍
我们每天要和接口打交道,接口传递参数的方式有很多种,搞得我们眼花缭乱,今天简单介绍下 常见的
query、body、path、FormData格式的参数前端如何传递,后端如何接收。
此次讲解通过 Postman 测试请求,前端使用流行的 axios 请求库来模拟参数传入,后端使用node-koa2 来接收传递的参数。
注: 底部有源码链接
Query String Parameters -- query参数
Query String Parameters 俗称: query 参数
这种类型的参数,常见于 Get 请求,参数会以 url string 的形式进行传递。
通过 postman 请求
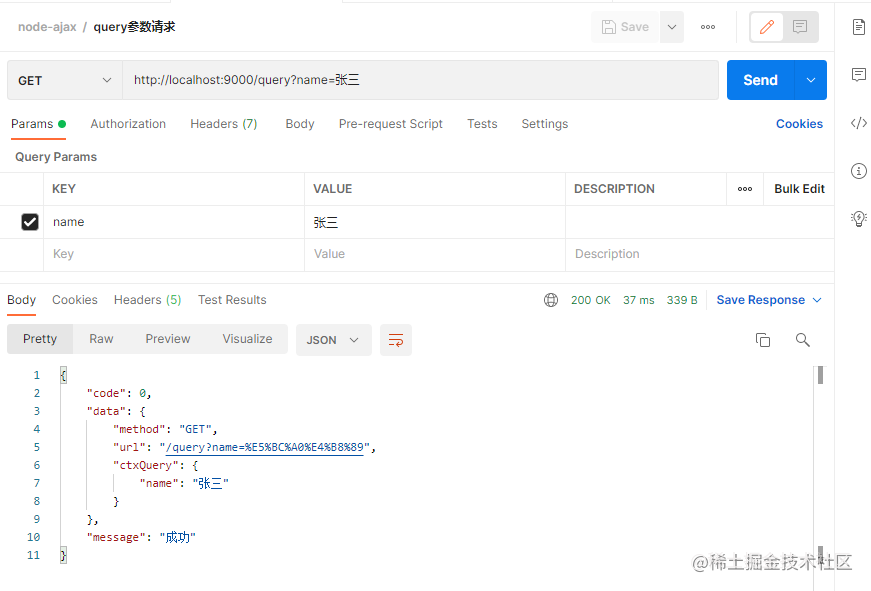 接口中返回的 ctxQuery 就是我们传入的参数
通过 axios 请求
axios({
method: 'get',
url: '/query',
params: {
name: '张三'
}
});
复制代码
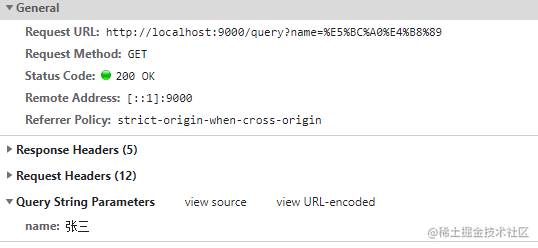
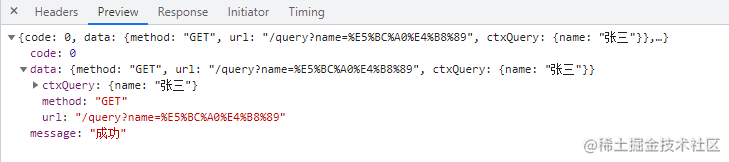
浏览器中查看接口详情
通过 koa 接收参数
router.get('/query', (ctx, next) => {
console.log(ctx.query); // 接收 query 参数
ctx.body = new SuccessRes({
method: ctx.requesthod,
url: ctx.request.url,
ctxQuery: ctx.query
})
})
复制代码
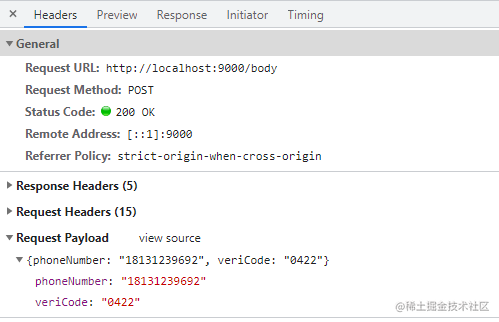
Request Payload - body 参数
Request Payload 俗称:body 参数
这种类型参数,常用于 post 请求,参数会以 json 格式传递
通过 postman 请求
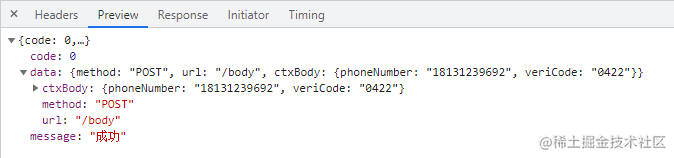
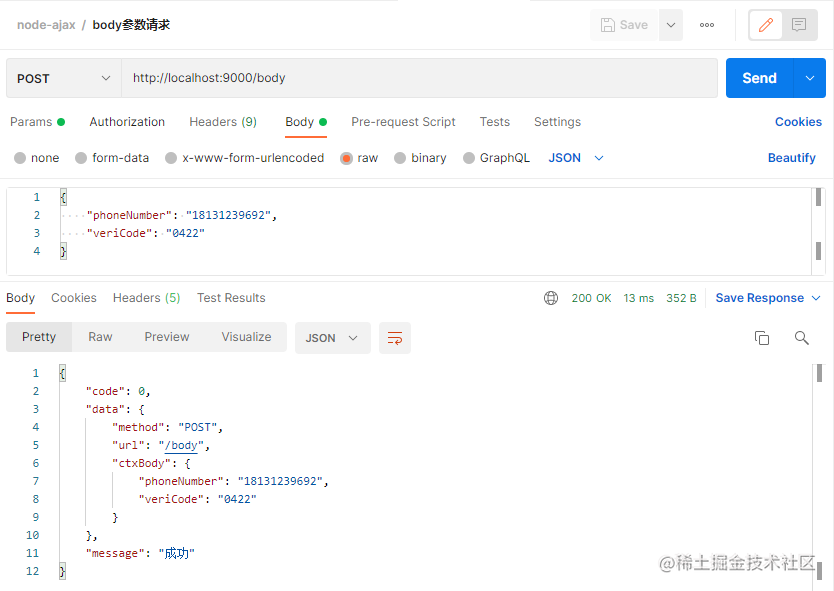 接口中返回的 ctxBody 就是我们传入的参数
通过 axios 请求
axios({
method: 'post',
url: '/body',
data: {
"phoneNumber": "18131239692",
"veriCode": "0422"
}
})
复制代码
浏览器中查看接口详情
通过 koa 接收参数
router.post('/body', async (ctx, next) => {
console.log(ctx.request.body);
ctx.body = new SuccessRes({
method: ctx.requesthod,
url: ctx.request.url,
ctxBody: ctx.request.body
})
})
复制代码
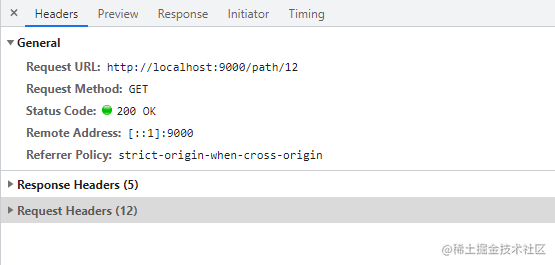
Path - path 参数
path 参数 也称为 路由参数,写过 vue 路由的可能见过这种形式的路由
const router = new VueRouter({
routes: [
// 动态路径参数 以冒号开头
{ path: '/user/:id', component: User }
]
})
复制代码
接口中的路由也是动态路由的意思
通过 postman 请求
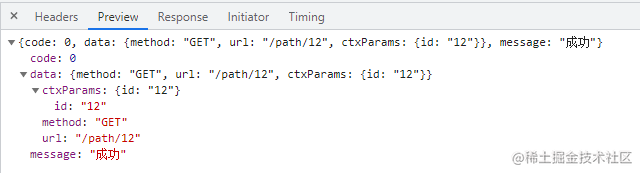
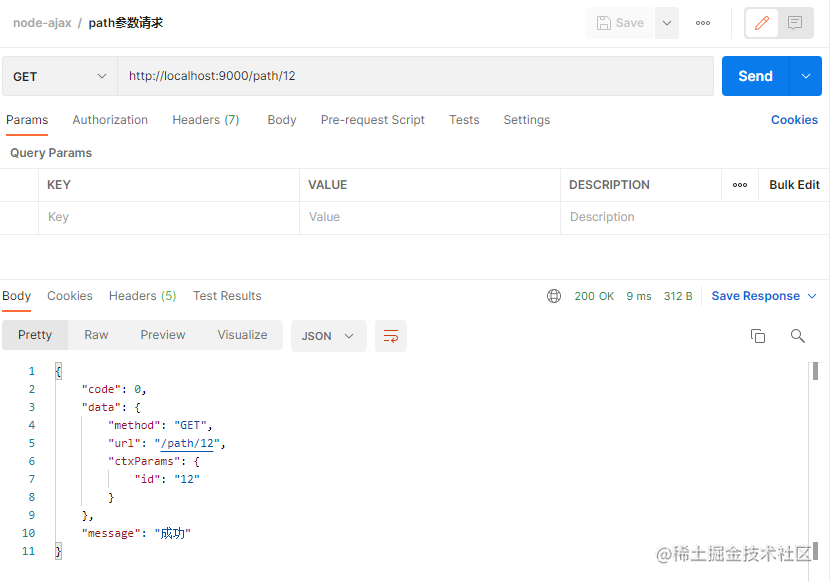 接口中返回的 ctxParams 就是我们传入的参数
通过 axios 请求
axios({
method: 'get',
url: '/path/12',
})
复制代码
浏览器中查看接口详情
通过 koa 接收参数
router.get('/path/:id', async (ctx, next) => {
console.log(ctx.params);
ctx.body = new SuccessRes({
method: ctx.requesthod,
url: ctx.request.url,
ctxParams: ctx.params
})
})
复制代码
Form Data - formData 参数
Form Data 俗称:表单参数
这种类型的参数是由早期网页表单通过 action 传递的参数,现在通常用于上传文件的接口。
通过 postman 请求
选择上传图片,和其他参数
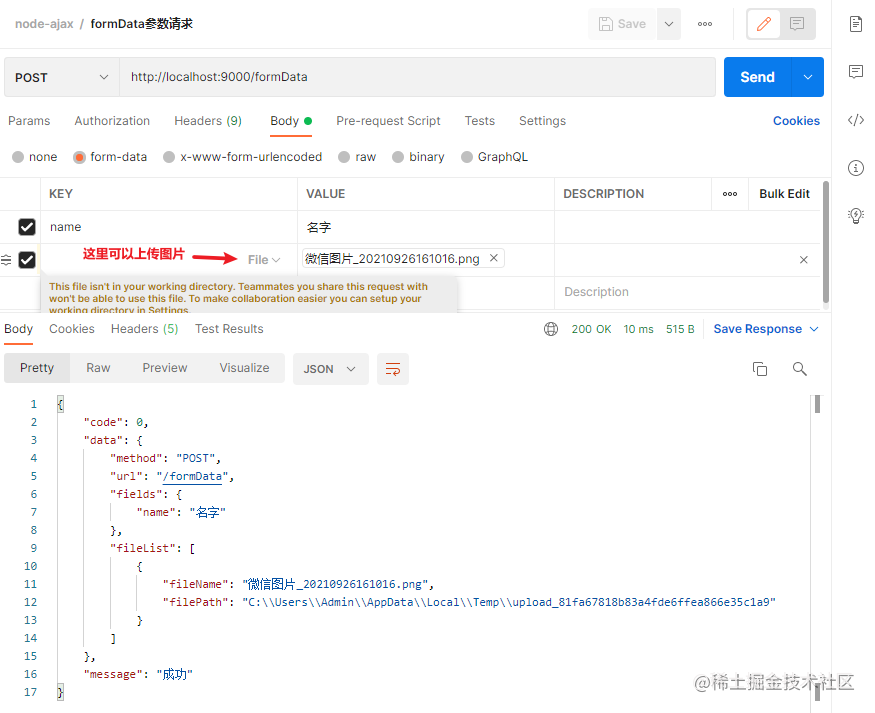
接口中返回的 fileList 是我们传入的文件,处理后的信息
接口中返回的 fields 是我们传入的其他表单信息
通过 axios 请求
let formData = new FormData()
formData.append('file', this.file) // 通过append向form对象添加数据
formData.append('name', '表单名字') // 添加form表单中其他数据
const res = await axios({
method: 'post',
url: '/formData',
headers: { 'Content-Type': 'multipart/form-data' },
data: formData
});
console.log(res.data);
复制代码
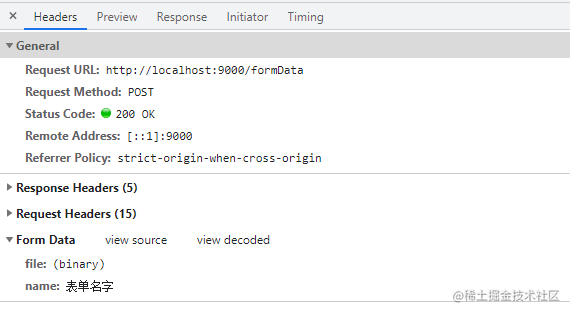
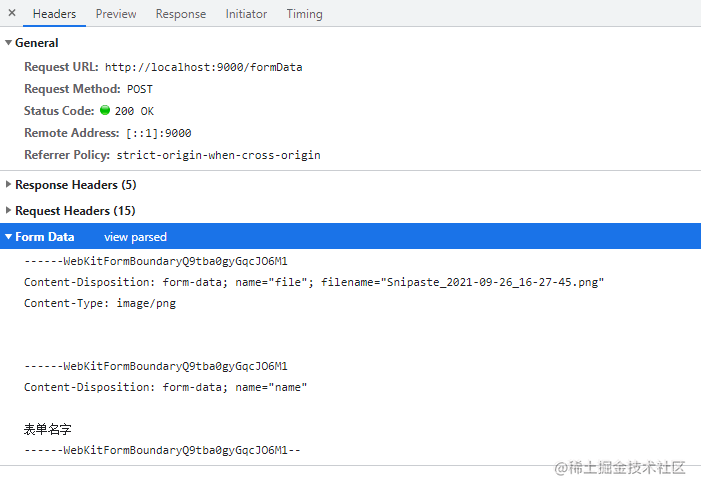
浏览器中查看接口详情

通过 koa 接收参数
const formidable = require('formidable')
router.post('/formData', async (ctx, next) => {
// console.log(ctx.req);
const res = await uploadFilesByFormidable(ctx.req)
console.log(res);
ctx.body = new SuccessRes({
method: ctx.requesthod,
url: ctx.request.url,
...res
})
})
function uploadFilesByFormidable(req) {
return new Promise((resolve, reject) => {
form.parse(req, (err, fields, files) => {
// console.log({ fields, files });
const filesKeys = Object.keys(files)
const fileList = filesKeys.map(name => {
const file = files[name]
return {
fileName: file.name || name,
filePath: file.path
}
})
resolve({
fields,
fileList
})
});
})
}
复制代码
多种类型参数混合请求
上面的接口请求类型可以组合使用,下面来看示例吧
通过 postman 请求
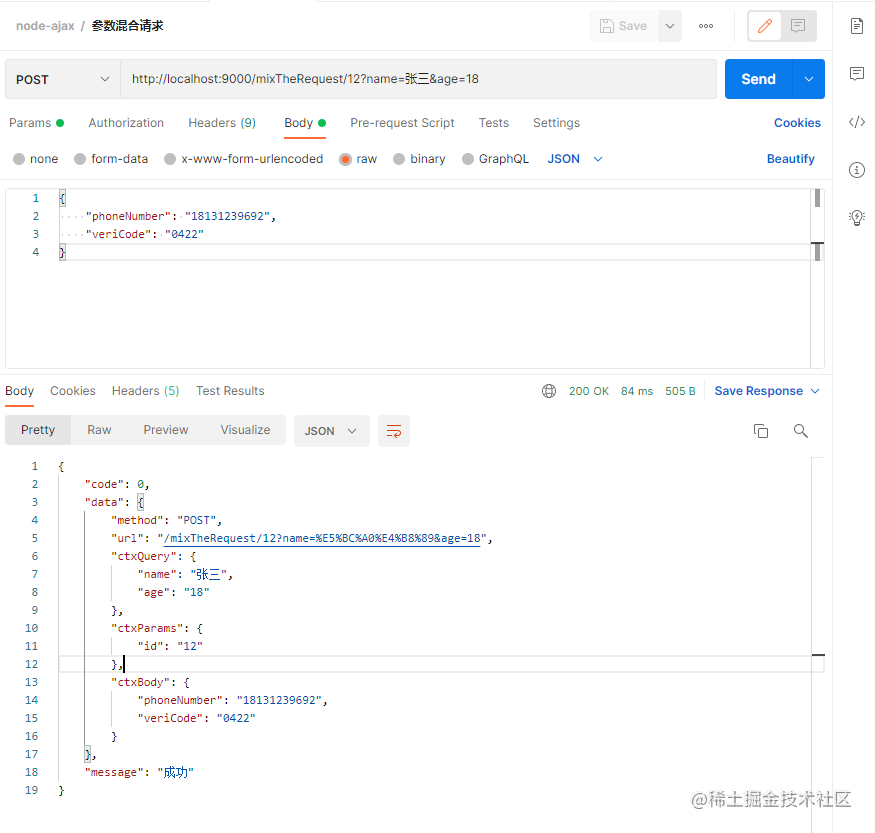
ctxQuery 是我们传递的 query 参数
ctxParams 是我们传递的 path 参数
ctxBody 是我们传递的 body 参数
为什么没有混合使用 form data 参数呢,formData 和 json(body参数)同属于 body 请求参数,所以只能出现一个。
通过 axios 请求
axios({
method: 'post',
url: '/mixTheRequest/12',
params: {
name: '张三',
age: 23
},
data: {
"phoneNumber": "18131239692",
"veriCode": "0422"
}
})
复制代码
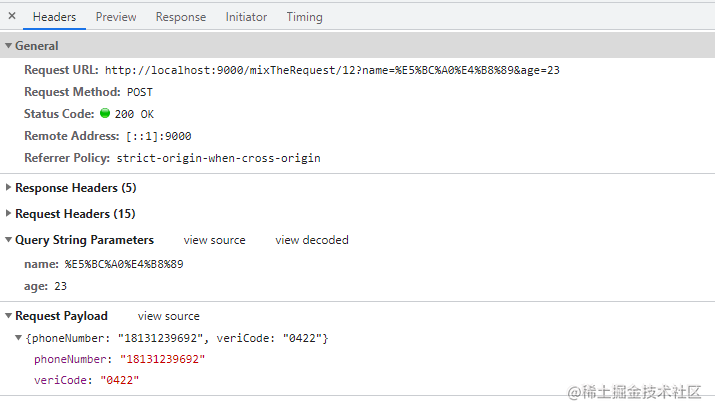
浏览器中查看接口详情

总结
以上就是 query、body、path、FormData格式的参数传递和接收的介绍,当然还有其他参数传递方式,这几种属于常见方式,其他方式大家可以继续探索。
github源码:github.com/ynzy/node-a…
|