简单使用TensorFlow.js在浏览器进行视频实时目标识别(基于COCO |
您所在的位置:网站首页 › coco浏览器 › 简单使用TensorFlow.js在浏览器进行视频实时目标识别(基于COCO |
简单使用TensorFlow.js在浏览器进行视频实时目标识别(基于COCO
|
!!! 完全忘记当时是怎么写了,我不会了 !!!
背景
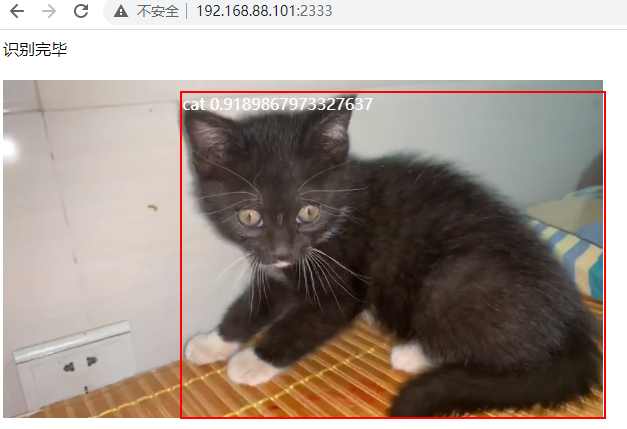
在GitHub查看 TensorFlow.js 的项目时, 发现的一个模型,觉得还不错,就试着运行了一下 GitHub地址: https://github.com/tensorflow/tfjs-models/tree/master/coco-ssd 运行原理使用 TensorFlow.js 导入训练好的 COCO-SSD 模型, 对视频或者图片进行检测,拿到对应的坐标之后显示. 在这里我是使用div绝对定位显示对于的框框. 大概流程: 使用video标签载入MP4文件 使用TensorFlow.js 载入 COCO-SSD 模型 调用模型检测方法,获取坐标并显示到页面 使用setTimeout进行延迟后进行下一次检测 (也可以requestAnimationFrame,不过有时会卡住) 运行效果截图:
gif:
相关文件我放到网盘和QQ群 群号: 492781269 城通网盘: https://306t.com/file/29360148-460317614 下面直接公示代码. TensorFlow.js Demo #big-box { position: relative; } #img-box { position: absolute; top: 0px; left: 0px; } #img-box .rect { position: absolute; border: 2px solid #f00; pointer-events: none; } #img-box .rect .className { position: absolute; top: 0; /* background: #f00; */ color: #fff; } #myPlayer { max-width: 600px; width: 100%; } 等待模型载入... var myModel = null; var V = null; var requestAnimationFrameIndex = null; var myPlayer = document.getElementById("myPlayer"); var videoHeight = 0; var videoWidth = 0; var clientHeight = 0; var clientWidth = 0; var modelLoad = false; var videoLoad = false; window.onload = function () { // 当视频准备好了就准备开始识别吧 myPlayer.addEventListener("canplay", function () { videoHeight = myPlayer.videoHeight; videoWidth = myPlayer.videoWidth; clientHeight = myPlayer.clientHeight; clientWidth = myPlayer.clientWidth; V = this; videoLoad = true; }) loadModel(); } // 载入模型文件 function loadModel() { if (modelLoad) { return; } // Load the model. cocoSsd.load().then(model => { var showBox = document.getElementById("showBox"); showBox.innerHTML = "载入成功"; myModel = model; detectImage(); modelLoad = true; }); } // 识别图片,并在页面展示 function detectImage() { var showBox = document.getElementById("showBox"); showBox.innerHTML = "识别中..."; if (videoLoad) { myModel.detect(V).then(predictions => { showBox.innerHTML = "识别完毕"; const $imgbox = document.getElementById('img-box'); $imgbox.innerHTML = "" predictions.forEach(box => { const $div = document.createElement('div') $div.className = 'rect'; var heightScale = (clientHeight / videoHeight); var widthScale = (clientWidth / videoWidth) var transformTop = box.bbox[1] * heightScale; var transformLeft = box.bbox[0] * widthScale; var transformWidth = box.bbox[2] * widthScale; var transformHeight = box.bbox[3] * heightScale; $div.style.top = transformTop + 'px' $div.style.left = transformLeft + 'px' $div.style.width = transformWidth + 'px' $div.style.height = transformHeight + 'px' $div.innerHTML = `${box.class} ${box.score}` $imgbox.appendChild($div) }) // detectImage(); setTimeout(function () { detectImage(); }, 10); }); } } 运行方式推荐放到web软件容器当中 例如: Nginx 我自己是使用 http-server 启动的web服务 然后访问相对应的地址就好了. 关于http-serverhttp-server需要先安装 Node.js 和 npm 然后运行npm安装命令: npm install http-server -g安装完之后,去指定文件夹运行命令,就可以启动一个静态文件服务器 例如 http-server . -p 2333其中的 . 代表当前目录 -p 指定端口,后面的 2333 表示使用 2333 端口 PS: 如有错误,还请多多指出来~ – Nick – 2020/09/05 |

【本文地址】
今日新闻 |
推荐新闻 |