vue+cesium实现模型按轨迹运动 |
您所在的位置:网站首页 › cesium加载glb模型 › vue+cesium实现模型按轨迹运动 |
vue+cesium实现模型按轨迹运动
|
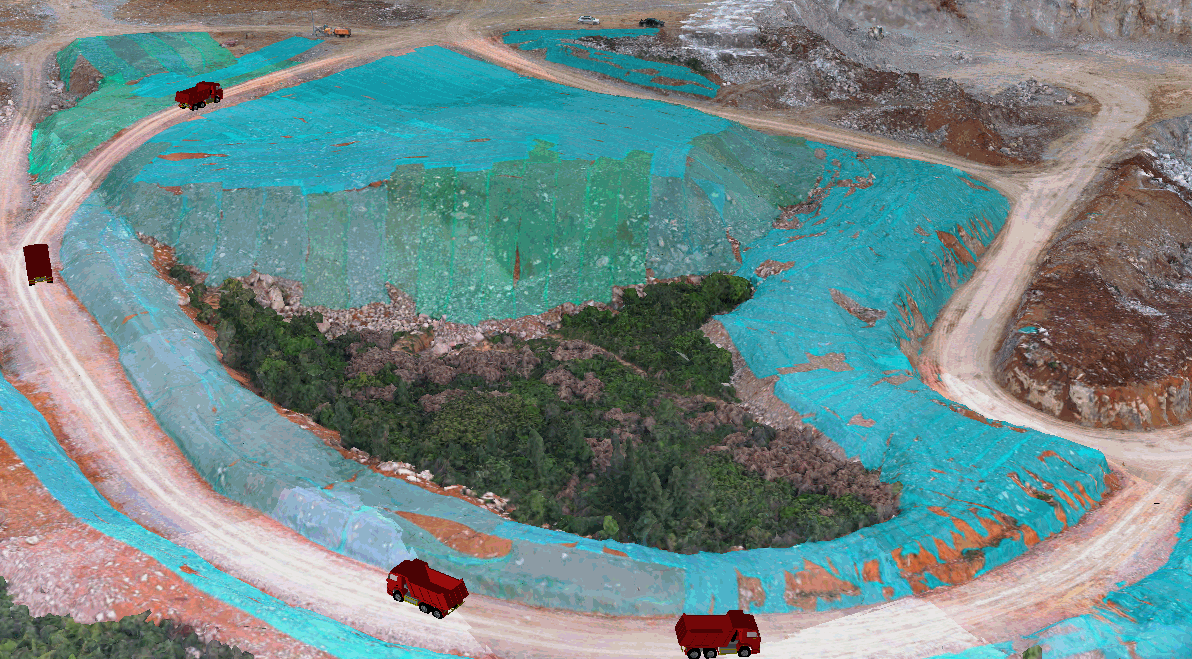
借助cesiumJs实现glb模型的加载及按轨迹运动,废话不多说直接上图!
首先需要准备的是glb模型、初始化地图容器viwer、cesium对象、3dtiles文件, 下列有关cesium的方法和参数不再做详细介绍,具体方法说明及参数说明可以参考Index - Cesium Documentation 一、创建viewer对象1.安装cesium这里就不做介绍了,自行搜索安装教程,这里使用的是 "cesium": "^1.94.3",2.使用前先导入 import "cesium/Build/Cesium/Widgets/widgets.css"; import * as Cesium from "cesium";3.初始化地图,containerName是初始化容器的名称,可以是模板中的一个 //初始化地图 function initMap(containerName) { Cesium.Ion.defaultAccessToken = "这里的token去cesium官网申请"; viewer = new Cesium.Viewer(containerName, { animation: false, //是否显示动画控件 shouldAnimate: true, homeButton: false, //是否显示home键 geocoder: false, //是否显示地名查找控件 如果设置为true,则无法查询 baseLayerPicker: false, //是否显示图层选择控件 timeline: true, //是否显示时间线控件 fullscreenButton: false, //是否全屏显示 infoBox: false, //是否显示点击要素之后显示的信息 sceneModePicker: false, //是否显示投影方式控件 三维/二维 navigationInstructionsInitiallyVisible: false, navigationHelpButton: false, //是否显示帮助信息控件 selectionIndicator: false, //是否显示指示器组件 orderIndependentTranslucency: false, terrainProvider: Cesium.createWorldTerrain({ requestWaterMask: false, // required for water effects requestVertexNormals: true // required for terrain lighting }), contextOptions: { webgl: { alpha: true } } }); //开启深度检测 viewer.scene.globe.depthTestAgainstTerrain = false; viewer.scene.backgroundColor = new Cesium.Color(0, 0, 0, 0); //添加背景色 // 如果为真,则允许用户旋转相机。如果为假,相机将锁定到当前标题。此标志仅适用于2D和3D。 viewer.scene.screenSpaceCameraController.enableRotate = true; // 如果为true,则允许用户平移地图。如果为假,相机将保持锁定在当前位置。此标志仅适用于2D和Columbus视图模式。 viewer.scene.screenSpaceCameraController.enableTranslate = true; // 如果为真,允许用户放大和缩小。如果为假,相机将锁定到距离椭圆体的当前距离 viewer.scene.screenSpaceCameraController.enableZoom = true; // 如果为真,则允许用户倾斜相机。如果为假,相机将锁定到当前标题。这个标志只适用于3D和哥伦布视图。 viewer.scene.screenSpaceCameraController.enableTilt = true; viewer.scene.globe.show = true; //是否显示地球 //去cesium logo水印 或 css viewer.cesiumWidget.creditContainer.style.display = "none"; viewer.timeline.container.style.display = "none"; let imageryLayers = viewer.imageryLayers; //添加底图 let map = new Cesium.UrlTemplateImageryProvider({ url: "https://webst02.is.autonavi.com/appmaptile?style=6&x={x}&y={y}&z={z}", //高德地图 minimumLevel: 3, maximumLevel: 16 // url: "http://www.google.com/maps/vt?lyrs=s@716&x={x}&y={y}&z={z}" //谷歌地图 }); imageryLayers.addImageryProvider(map); //添加地图贴图 } 二、创建cesiumMove.js模块实现glb模型加载移动的方法1.{viewer,cesium,data,glbName}参数表示viewer实例、cesium对象、data模型移动的经度longitude,维度latitude,高度height,time时间,name,id是模型名称,id可加可不加。其中data参数比较复杂这里直接列出示例,data对象中的属性由来是3dtiles上的打点坐标,教程获取鼠标点击坐标传送门。 let data = [ { longitude: 115.5310955104305,//起始点经度 latitude: 29.45941132782301,//起始点维度 height: 464.3558799552955,//起始点高度 time: 0//起始时间 }, { longitude: 115.53130228598145, latitude: 29.459378517206638, height: 466.1145881293518, time: 10 }, { longitude: 115.5313953769011, latitude: 29.459311296391423, height: 467.48996257505485, time: 20 }, { longitude: 115.53149832517173, latitude: 29.459228656016336, height: 469.9064236522573, time: 30 } ];2.move()移动方法 move() { // 设置始时钟始时间 this.viewer.clock.startTime = this.start.clone(); // 设置时钟当前时间 this.viewer.clock.currentTime = this.start.clone(); // 设置始终停止时间 this.viewer.clock.stopTime = this.stop.clone(); // 时间速率,数字越大时间过的越快 this.viewer.clock.multiplier = 2; // 时间轴 this.viewer.timeline.zoomTo(this.start, this.stop); // 循环执行,即为2,到达终止时间,重新从起点时间开始 this.viewer.clock.clockRange = this.Cesium.ClockRange.LOOP_STOP; let property = this.computeFlight(this.data); let modelPath = "/tiles/glb/" + this.glbName + ".glb"; //glb模型地址根据自己存放位置自行修改 // 添加模型 let planeModel = this.viewer.entities.add({ name: modelPath, // 设置时间轴关联 availability: new this.Cesium.TimeIntervalCollection([ new this.Cesium.TimeInterval({ start: this.start, stop: this.stop }) ]), position: property,//模型的位置属性 // 根据所提供的速度计算模型的朝向 orientation: new this.Cesium.VelocityOrientationProperty(property), // 模型数据 model: { id: this.id, name: this.name, uri: modelPath, scale: 0.001 } }); }3. computeTrack(source) 计算模型移动轨迹,为move()中position属性服务,返回的是cesium转换后的位置信息,传入对象属性为实际路径的打点坐标 computeTrack(source) { // 取样位置 相当于一个集合 let property = new this.Cesium.SampledPositionProperty(); for (let i = 0; i < source.length; i++) { let time = this.Cesium.JulianDate.addSeconds( this.start, source[i].time, new this.Cesium.JulianDate() ); let position = this.Cesium.Cartesian3.fromDegrees( source[i].longitude, source[i].latitude, source[i].height ); // 添加位置,和时间对应 property.addSample(time, position); } return property; }4.cesiumMove模块全部代码!!! export class CesiumMove { /** * @description: 模型运动 * @param {viewer,cesium,data,glbName} arg * @return {*} */ constructor(arg) { this.viewer = arg.viewer; this.Cesium = arg.cesium; this.id = arg.id || null; this.name = arg.name || "model"; this.data = arg.data || null; this.glbName = arg.glbName || null; // 起始时间 this.start = this.Cesium.JulianDate.fromDate(new Date(2023, 2, 6)); // 结束时间 this.stop = this.Cesium.JulianDate.addSeconds( this.start, 30, new this.Cesium.JulianDate() );//这里的30表示单次循环的时间,可以根据传入参数data对象中的time属性值的最大时间做调整 } move() { // 设置始时钟始时间 this.viewer.clock.startTime = this.start.clone(); // 设置时钟当前时间 this.viewer.clock.currentTime = this.start.clone(); // 设置始终停止时间 this.viewer.clock.stopTime = this.stop.clone(); // 时间速率,数字越大时间过的越快 this.viewer.clock.multiplier = 2; // 时间轴 this.viewer.timeline.zoomTo(this.start, this.stop); // 循环执行,即为2,到达终止时间,重新从起点时间开始 this.viewer.clock.clockRange = this.Cesium.ClockRange.LOOP_STOP; let property = this.computeTrack(this.data); //console.log(property) // let modelPath = "../glb/" + this.glbName + ".glb"; let modelPath = "/tiles/glb/" + this.glbName + ".glb"; // 添加模型 let planeModel = this.viewer.entities.add({ name: modelPath, // 和时间轴关联 availability: new this.Cesium.TimeIntervalCollection([ new this.Cesium.TimeInterval({ start: this.start, stop: this.stop }) ]), position: property, // 根据所提供的速度计算模型的朝向 orientation: new this.Cesium.VelocityOrientationProperty(property), // 模型数据 model: { id: this.id, name: this.name, uri: modelPath, scale: 0.001 } }); } /** * 计算飞行 * @param source 数据坐标 * @returns {SampledPositionProperty|*} */ computeTrack(source) { // 取样位置 相当于一个集合 let property = new this.Cesium.SampledPositionProperty(); for (let i = 0; i < source.length; i++) { let time = this.Cesium.JulianDate.addSeconds( this.start, source[i].time, new this.Cesium.JulianDate() ); let position = this.Cesium.Cartesian3.fromDegrees( source[i].longitude, source[i].latitude, source[i].height ); // 添加位置,和时间对应 property.addSample(time, position); } return property; } } 三、运行上述方法,这里放在vue模板中运行 import "cesium/Build/Cesium/Widgets/widgets.css"; import * as Cesium from "cesium"; import { CesiumMove } from "@/utils/cesiumMove"; export default { name: "TestMap", data() { return { viewer: null, }; }, mounted() { this.initMap("cesiumContainer"); this.addTiles("/tiles/4086666/tileset.json"); //这里的tiles地址根据自己的更换 this.move(this.viewer, Cesium, "truck"); //初始化地图 // viewer._cesiumWidget._creditContainer.style.display = "none"; }, methods: { initMap(containerName) { Cesium.Ion.defaultAccessToken = "cesium官网申请token"; this.viewer = new Cesium.Viewer(containerName, { animation: false, //是否显示动画控件 shouldAnimate: true, homeButton: false, //是否显示home键 geocoder: false, //是否显示地名查找控件 如果设置为true,则无法查询 baseLayerPicker: false, //是否显示图层选择控件 timeline: true, //是否显示时间线控件 fullscreenButton: false, //是否全屏显示 infoBox: false, //是否显示点击要素之后显示的信息 sceneModePicker: false, //是否显示投影方式控件 三维/二维 navigationInstructionsInitiallyVisible: false, navigationHelpButton: false, //是否显示帮助信息控件 selectionIndicator: false, //是否显示指示器组件 orderIndependentTranslucency: false, terrainProvider: Cesium.createWorldTerrain({ requestWaterMask: false, // required for water effects requestVertexNormals: true, // required for terrain lighting }), contextOptions: { webgl: { alpha: true, }, }, }); //开启深度检测 this.viewer.scene.globe.depthTestAgainstTerrain = false; // 如果为真,则允许用户旋转相机。如果为假,相机将锁定到当前标题。此标志仅适用于2D和3D。 this.viewer.scene.screenSpaceCameraController.enableRotate = true; // 如果为true,则允许用户平移地图。如果为假,相机将保持锁定在当前位置。此标志仅适用于2D和 Columbus视图模式。 this.viewer.scene.screenSpaceCameraController.enableTranslate = true; // 如果为真,允许用户放大和缩小。如果为假,相机将锁定到距离椭圆体的当前距离 this.viewer.scene.screenSpaceCameraController.enableZoom = true; // 如果为真,则允许用户倾斜相机。如果为假,相机将锁定到当前标题。这个标志只适用于3D和哥伦布视图。 this.viewer.scene.screenSpaceCameraController.enableTilt = true; this.viewer.scene.globe.show = true; //是否显示地球 //去cesium logo水印 或 css this.viewer.cesiumWidget.creditContainer.style.display = "none"; this.viewer.timeline.container.style.display = "none"; let imageryLayers = this.viewer.imageryLayers; //添加底图 let map = new Cesium.UrlTemplateImageryProvider({ url: "https://webst02.is.autonavi.com/appmaptile?style=6&x={x}&y={y}&z={z}", //高德地图 minimumLevel: 3, maximumLevel: 16, // url: "http://www.google.com/maps/vt?lyrs=s@716&x={x}&y={y}&z={z}" //谷歌地图 }); imageryLayers.addImageryProvider(map); }, //增加3dTiles addTiles(uri) { let url = location.origin + uri; let tileset; //样例地址 tileset = new Cesium.Cesium3DTileset({ url: url, maximumScreenSpaceError: 64, //maximumScreenSpaceError 最大屏幕空间差,值越小渲染精度越高,对硬件性能消耗就越高,反之则越低,当出现崩溃时可将这个值调大。 maximumNumberOfLoadedTiles: 1024, // maximumMemoryUsage:2048 }); this.viewer.scene.primitives.add(tileset); // 定位 tileset.readyPromise.then((layer)=> { // tileset的边界球 let boundingSphere = layer.boundingSphere; // 跳到边界球范围 this.viewer.camera.flyToBoundingSphere(boundingSphere, { duration: 0 }); // 绑定相机所在的位置:必须设置,否则左键移动变成单点定位 this.viewer.camera.lookAtTransform(Cesium.Matrix4.IDENTITY); }); }, move(viewer, cesium, glbName) { let data = [ { longitude: 115.52994424074933, latitude: 29.459105909823382, height: 454.88085396146187, time: 0, }, { longitude: 115.529856650683, latitude: 29.458938398773732, height: 453.16520326269983, time: 10, }, { longitude: 115.52987149382784, latitude: 29.458865345201072, height: 452.55285760944577, time: 20, }, { longitude: 115.5299035568186, latitude: 29.4586574882546, height: 450.8408671767045, time: 30, }, ]; const entity = new CesiumMove({ viewer: this.viewer, cesium, data: data, glbName, id: 1, name: "卡车1", }).move(); }, }, }; #cesiumContainer { position: relative; width: 100vw; height: 100vh; margin: 0; padding: 0; overflow: hidden; }到这里基本上模型就可以动起来了,创作不易,希望看官点一点赞关注一波,非常感谢! gitee仓库地址:cesium-test: 用于cesium学习测试的仓库 glb文件和3dtiles文件由于版权问题暂未上传,请自行搜索! 声明: 博客借鉴地址:cesium轨迹回放,按路径飞行_A873054267的博客-CSDN博客_cesium车辆跟踪、轨迹回放 第一次写相关部分博客有写的不好的地方欢迎指正和提出您宝贵的建议,如果涉及侵权等问题,请联系删除,联系qq:1711503830 |
【本文地址】
今日新闻 |
推荐新闻 |