|
目录
一、安装准备二、环境配置2.1 修改hosts文件2.2 关闭防火墙2.3 禁用Selinux设置2.4 配置yum源2.5 建立用户、用户组 ,设置密码2.6 建立目录2.7 Oracle 用户环境变量(进入Oracle用户)2.8 Linux内核参数调整2.9 Limits配置2.10 PAM调整
三、Oracle软件安装四、DBCA创建数据库五、Netca创建监听
一、安装准备
系统版本:CentOS Linux release 7.9.2009 (Core) (安装步骤见文章:https://blog.csdn.net/a2279338659/article/details/126346345)
Oracle 11.2.0.4 安装包: 下载地址: 链接:https://pan.baidu.com/s/1BOAL6HvMO-0fp44nOtWTGQ 提取码:0712
CentOS7镜像(见文章https://blog.csdn.net/a2279338659/article/details/126346345)
二、环境配置
2.1 修改hosts文件
[root@CentOS7 ~]# vi /etc/hosts
127.0.0.1 localhost localhost.localdomain localhost4 localhost4.localdomain4
::1 localhost localhost.localdomain localhost6 localhost6.localdomain6
192.168.198.130 CentOS7 CentOS7.localdamain
2.2 关闭防火墙
[root@CentOS7 ~]# systemctl status firewalld.service
● firewalld.service - firewalld - dynamic firewall daemon
Loaded: loaded (/usr/lib/systemd/system/firewalld.service; enabled; vendor preset: enabled)
Active: active (running) since Mon 2022-08-15 16:26:32 CST; 44min ago
Docs: man:firewalld(1)
Main PID: 822 (firewalld)
Tasks: 2
CGroup: /system.slice/firewalld.service
└─822 /usr/bin/python2 -Es /usr/sbin/firewalld --nofork --nopid
Aug 15 16:26:30 CentOS7 systemd[1]: Starting firewalld - dynamic firewall d.....
Aug 15 16:26:32 CentOS7 systemd[1]: Started firewalld - dynamic firewall daemon.
Aug 15 16:26:33 CentOS7 firewalld[822]: WARNING: AllowZoneDrifting is enable....
Hint: Some lines were ellipsized, use -l to show in full.
[root@CentOS7 ~]# systemctl stop firewalld.service
[root@CentOS7 ~]# systemctl disable firewalld.service
Removed symlink /etc/systemd/system/multi-user.target.wants/firewalld.service.
Removed symlink /etc/systemd/system/dbus-org.fedoraproject.FirewallD1.service.
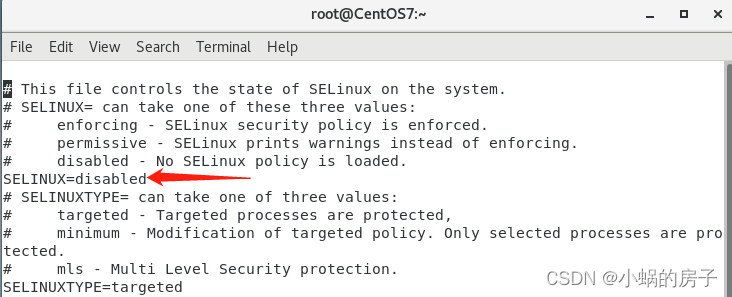
2.3 禁用Selinux设置
[root@CentOS7 ~]# vi /etc/selinux/config
2.4 配置yum源
[root@CentOS7 yum.repos.d]# cd /etc/yum.repos.d/
[root@CentOS7 yum.repos.d]# rm -rf /etc/yum.repos.d/(这里加一个*号)
[root@CentOS7 yum.repos.d]# echo > /etc/yum.repos.d/server.repo
[root@CentOS7 yum.repos.d]# vi /etc/yum.repos.d/server.repo
[Server]
name=Server
baseurl=file:///mnt
enabled=1
gpgcheck=0
[root@CentOS7 yum.repos.d]# mount -o loop /soft/CentOS-7-x86_64-DVD-2009.iso /mnt //先将镜像文件上传到soft文件,然后挂载。
mount: /dev/loop0 is write-protected, mounting read-only
[root@CentOS7 yum.repos.d]# yum clean all
[root@CentOS7 yum.repos.d]# yum makecache
[root@CentOS7 yum.repos.d]# yum clean all
[root@CentOS7 yum.repos.d]# yum repolist all
[root@CentOS7 yum.repos.d]# yum install -y bc
yum install -y compat-libcap1*
yum install -y compat-libcap*
yum install -y binutils
yum install -y compat-libstdc++-33
yum install -y elfutils-libelf
yum install -y elfutils-libelf-devel
yum install -y gcc
yum install -y gcc-c++
yum install -y glibc-2.5
yum install -y glibc-common
yum install -y glibc-devel
yum install -y glibc-headers
yum install -y ksh libaio
yum install -y libaio-devel
yum install -y libgcc
yum install -y libstdc++
yum install -y libstdc++-devel
yum install -y make
yum install -y sysstat
yum install -y unixODBC
yum install -y unixODBC-devel
yum install -y binutils*
yum install -y compat-libstdc*
yum install -y elfutils-libelf*
yum install -y gcc*
yum install -y glibc*
yum install -y ksh*
yum install -y libaio*
yum install -y libgcc*
yum install -y libstdc*
yum install -y make*
yum install -y sysstat*
yum install -y libXp*
yum install -y glibc-kernheaders
yum install -y net-tools-*
2.5 建立用户、用户组 ,设置密码
[root@CentOS7 ~]# groupadd -g 1001 oinstall
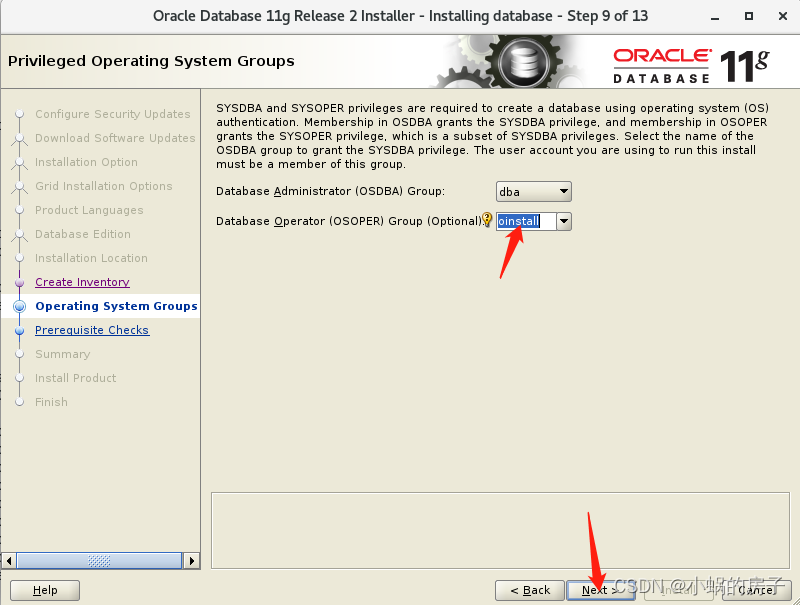
[root@CentOS7 ~]# groupadd -g 1002 dba
[root@CentOS7 ~]# groupadd -g 1003 oper
[root@CentOS7 ~]# useradd -u 501 -g oinstall -G dba,oper oracle
[root@CentOS7 ~]# passwd oracle
Changing password for user oracle.
New password:
BAD PASSWORD: The password is shorter than 8 characters
Retype new password:
passwd: all authentication tokens updated successfully.
2.6 建立目录
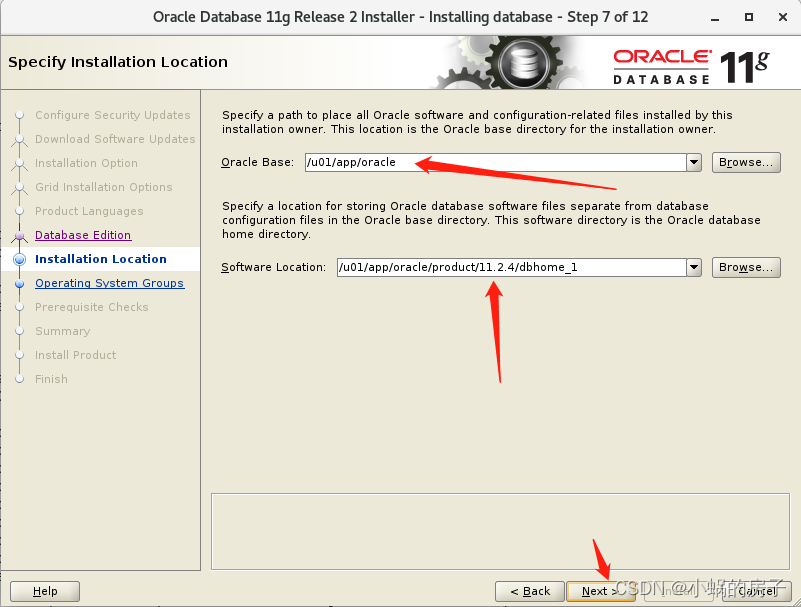
[root@CentOS7 ~]# mkdir -p /u01/app/oracle/product/11.2.4/dbhome_1
[root@CentOS7 ~]# chown -R oracle:oinstall /u01/app/
[root@CentOS7 ~]# chmod -R 775 /u01/app/
2.7 Oracle 用户环境变量(进入Oracle用户)
[root@CentOS7 ~]# su - oracle
[oracle@CentOS7 ~]$ vi /home/oracle/.bash_profile
export ORACLE_SID=orcl //实例名
export ORACLE_BASE=/u01/app/oracle
export ORACLE_HOME=$ORACLE_BASE/product/11.2.4/dbhome_1
export ORACLE_TERM=xterm
export BASE_PATH=/usr/sbin:$PATH
export PATH=$ORACLE_HOME/bin:$ORACLE_HOME/OPatch:$BASE_PATH
export LD_LIBRARY_PATH=$ORACLE_HOME/lib:/lib:/usr/lib
export CLASSPATH=$ORACLE_HOME/JRE:$ORACLE_HOME/jlib:$ORACLE_HOME/rdbms/jlib
export NLS_LANG="AMERICAN_AMERICA.ZHS16GBK"
[oracle@CentOS7 ~]$ source /home/oracle/.bash_profile
2.8 Linux内核参数调整
[root@CentOS7 ~]# vi /etc/sysctl.conf //root用户下
//参数根据内存大小调整,具体数值可自己搜索,这里为8G内存
fs.aio-max-nr = 1048576
fs.file-max = 6815744
kernel.shmall = 2097152
kernel.shmmax = 4294967295
kernel.shmmni = 4096
kernel.sem = 250 32000 100 128
net.ipv4.ip_local_port_range = 9000 65500
net.core.rmem_default = 262144
net.core.rmem_max = 4194304
net.core.wmem_default = 262144
net.core.wmem_max = 1048576
#net.ipv4.conf.eth0.rp_filter = 1
#net.ipv4.conf.eth1.rp_filter = 2
[root@CentOS7 ~]# sysctl -p //指令生效
2.9 Limits配置
[root@CentOS7 ~]# vi /etc/security/limits.conf
oracle soft nproc 2047
oracle hard nproc 16384
oracle soft nofile 1024
oracle hard nofile 65536
2.10 PAM调整
[root@CentOS7 ~]# vi /etc/pam.d/login
session required /lib/security/pam_limits.so
session required pam_limits.so
三、Oracle软件安装
文件上传: 将安装包p13390677_112040_Linux-x86-64_1of7.zip和p13390677_112040_Linux-x86-64_2of7.zip上传到 /home/oracle目录下。
[oracle@CentOS7 ~]$ ll
total 2487200
-rwxrwxr-x. 1 oracle oinstall 1395582860 Aug 15 17:22 p13390677_112040_Linux-x86-64_1of7.zip
-rwxrwxr-x. 1 oracle oinstall 1151304589 Aug 15 17:22 p13390677_112040_Linux-x86-64_2of7.zip
解压文件:
[oracle@CentOS7 ~]$ unzip p13390677_112040_Linux-x86-64_1of7.zip
[oracle@CentOS7 ~]$ unzip p13390677_112040_Linux-x86-64_2of7.zip
[oracle@CentOS7 ~]$ ll
total 2487200
drwxr-xr-x 7 oracle oinstall 136 Aug 27 2013 database
-rwxrwxr-x. 1 oracle oinstall 1395582860 Aug 15 17:22 p13390677_112040_Linux-x86-64_1of7.zip
-rwxrwxr-x. 1 oracle oinstall 1151304589 Aug 15 17:22 p13390677_112040_Linux-x86-64_2of7.zip
进入database目录,安装Oracle软件:
[oracle@CentOS7 ~]$ cd database/
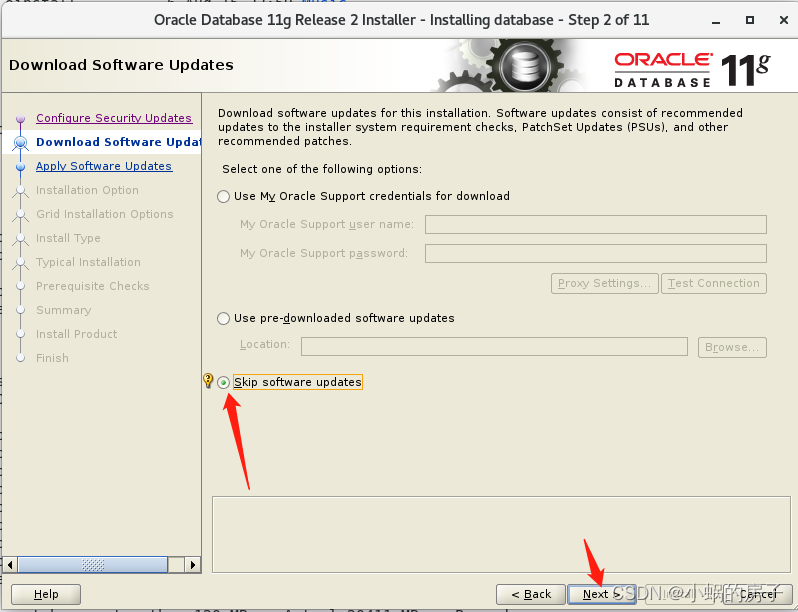
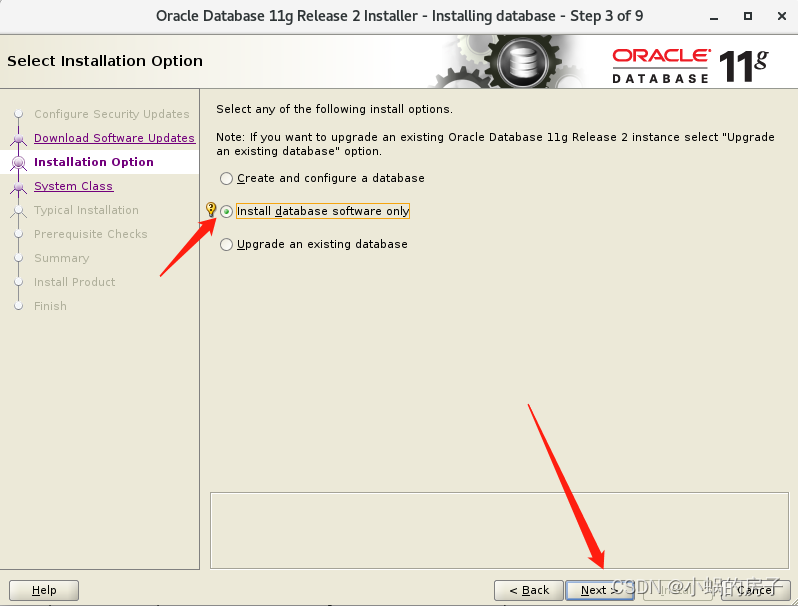
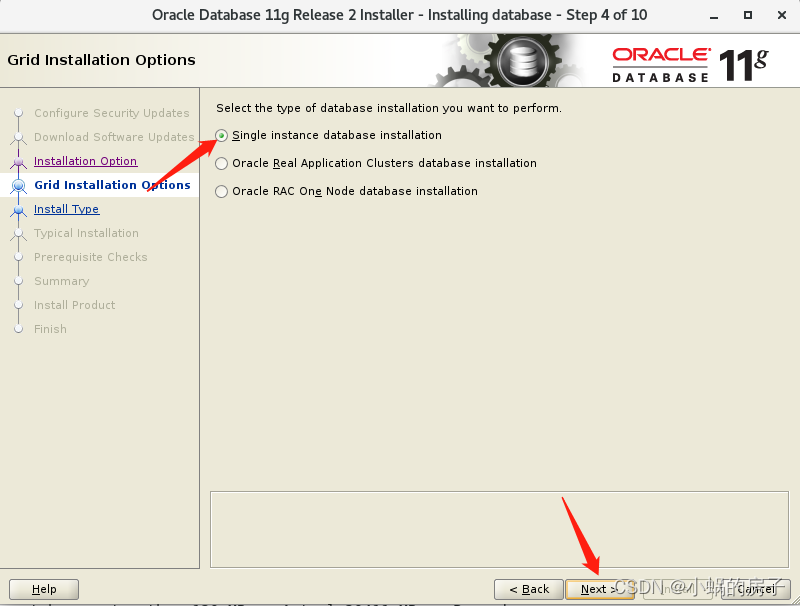
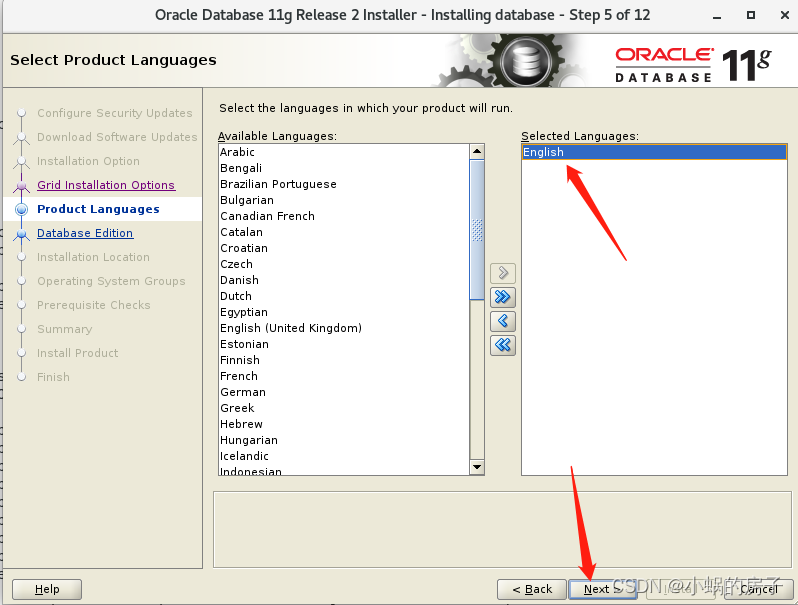
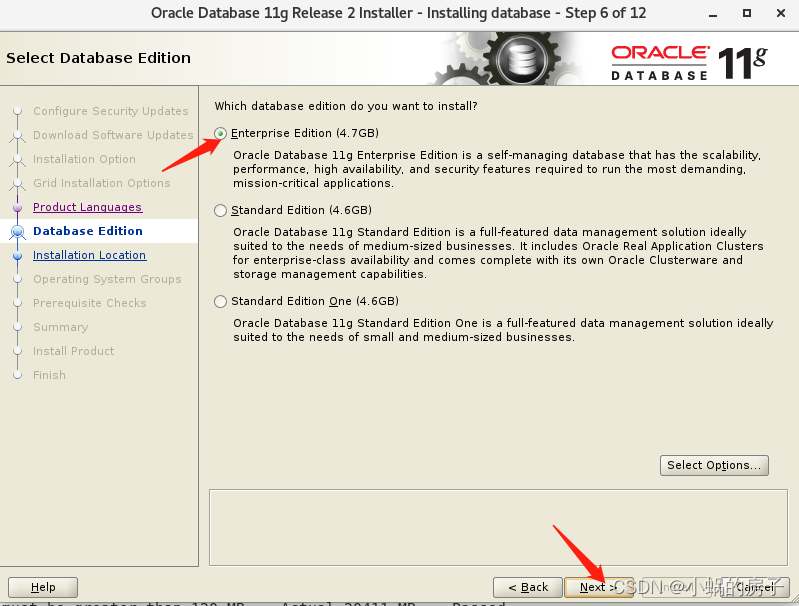
[oracle@CentOS7 database]$ ./runInstaller //若在安装过程中出现屏幕显示不全的问题可在后面街上 -jreLoc /usr/lib/jvm/jre-1.8.0
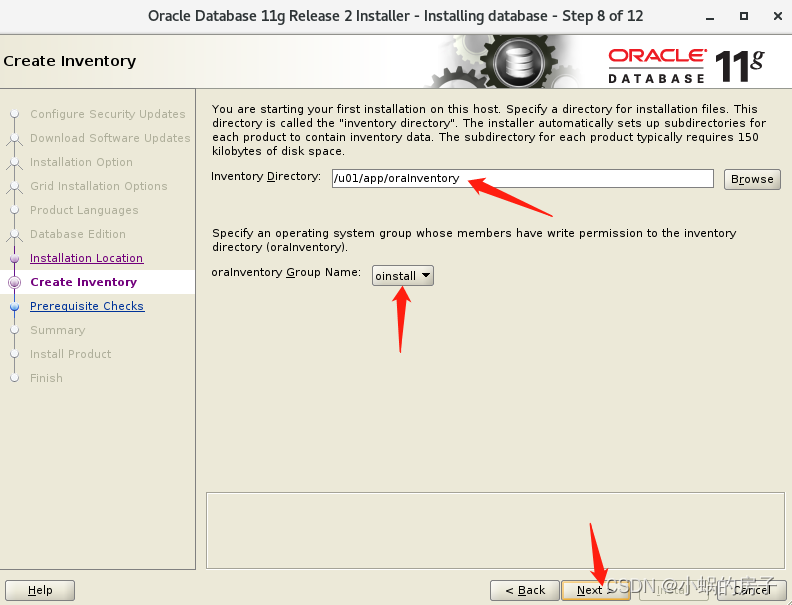
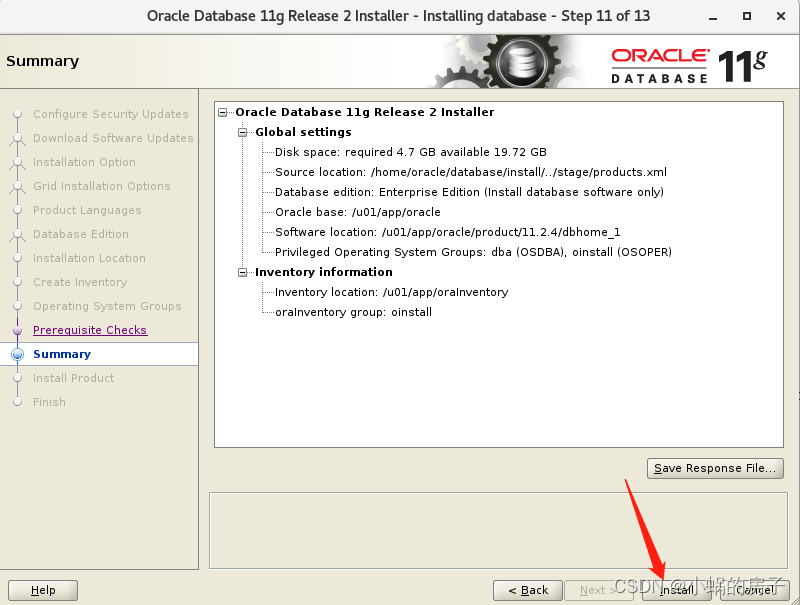
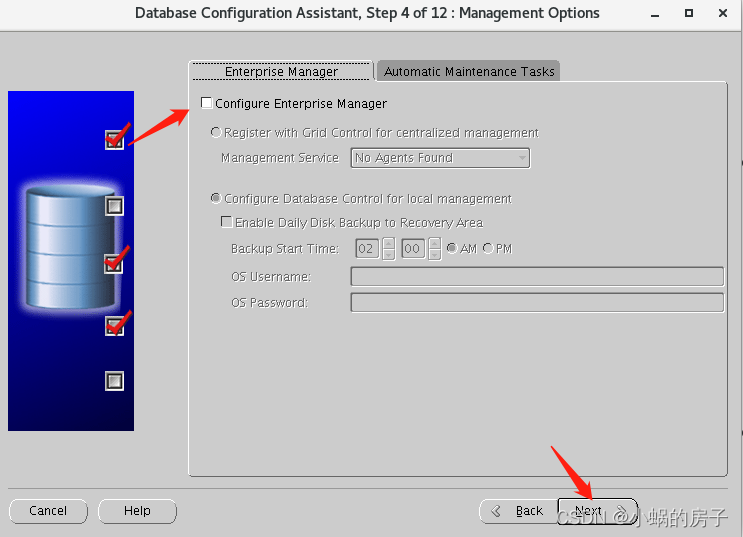
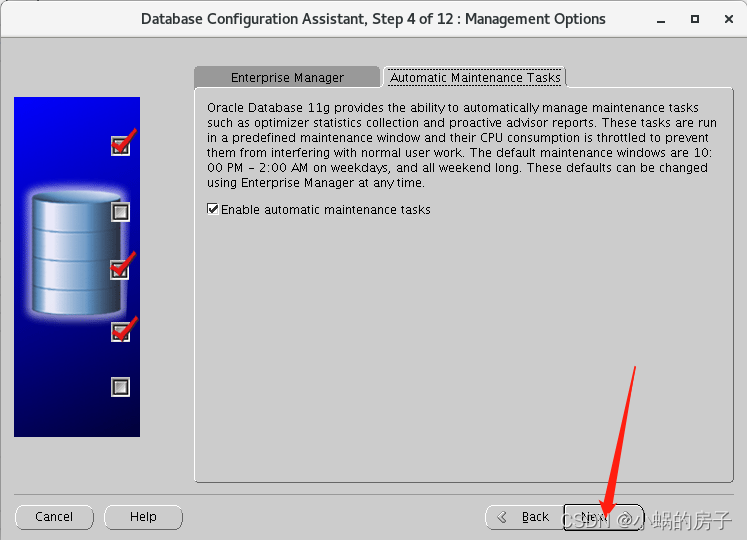
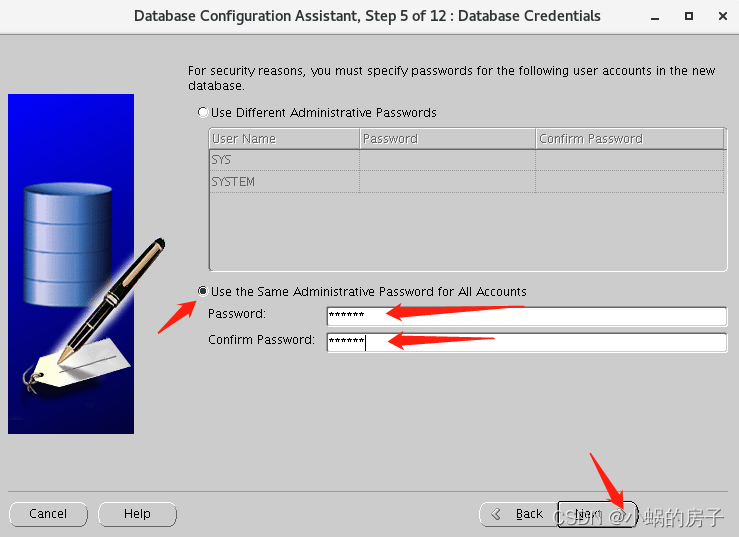
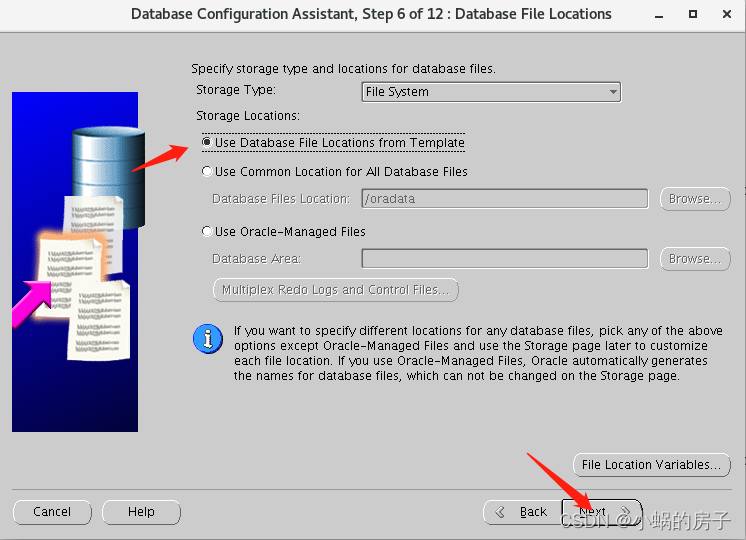
按照如图所示步骤安装: 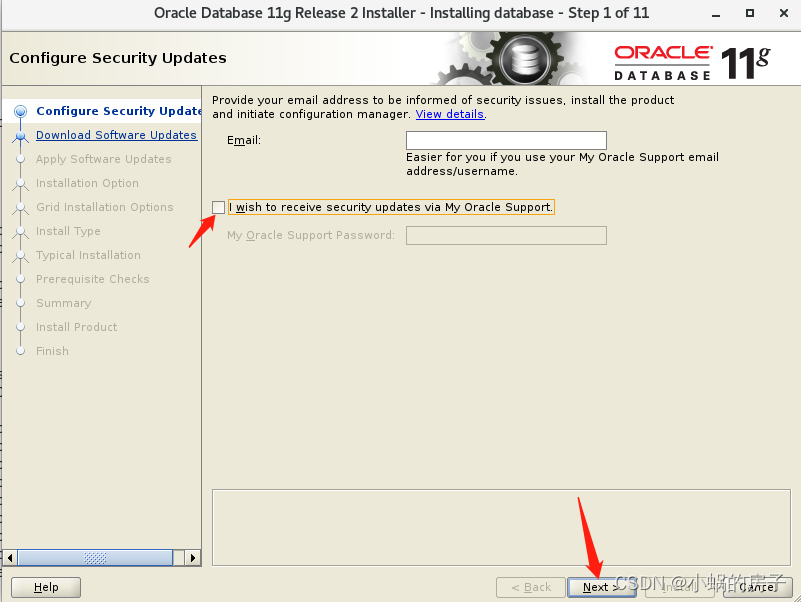 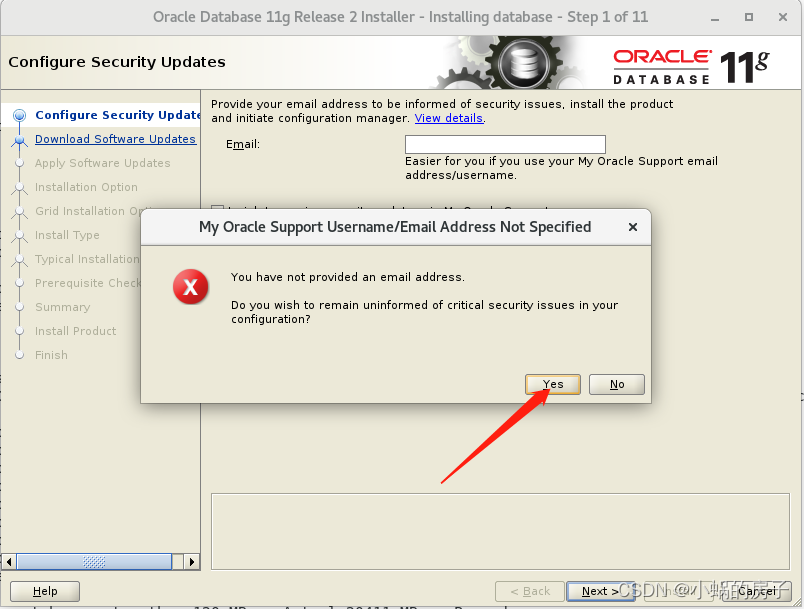
这里缺少的包可自己去网上找资源下载安装,也可以私聊我: 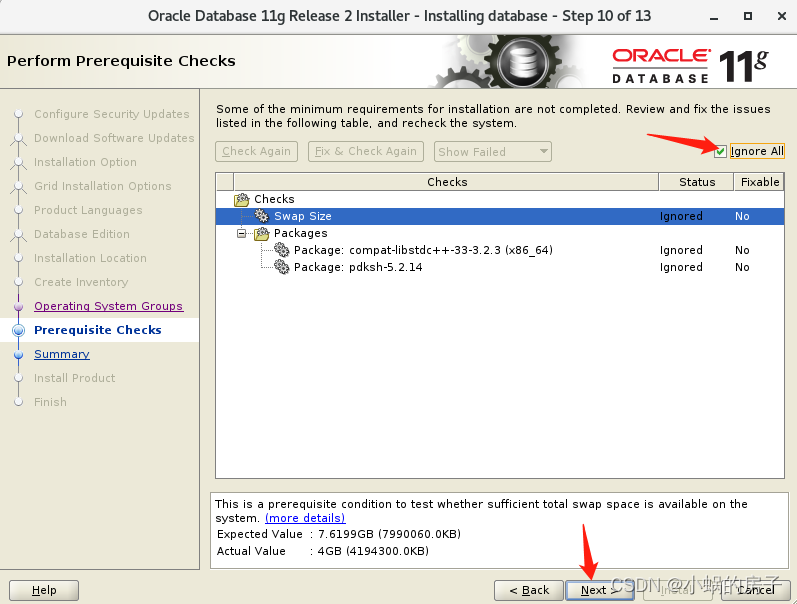 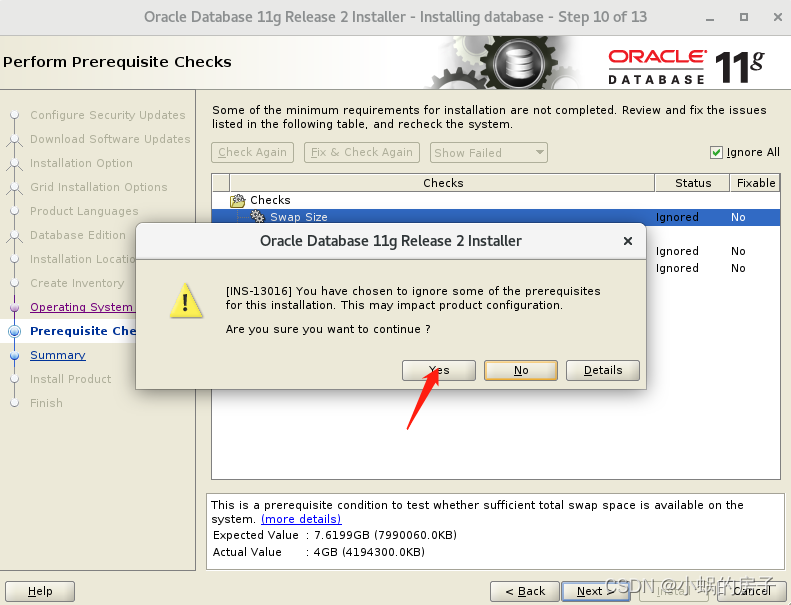
等待安装: 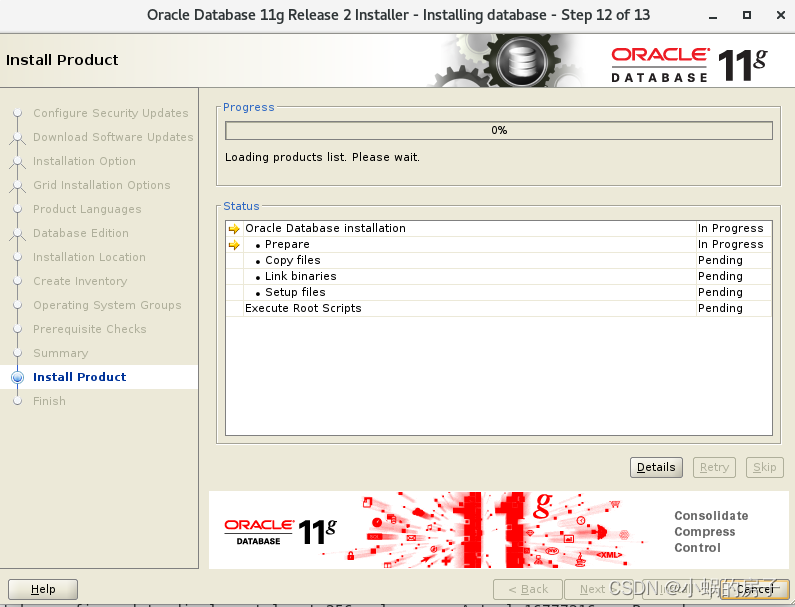 这里有一个错误: 这里有一个错误: 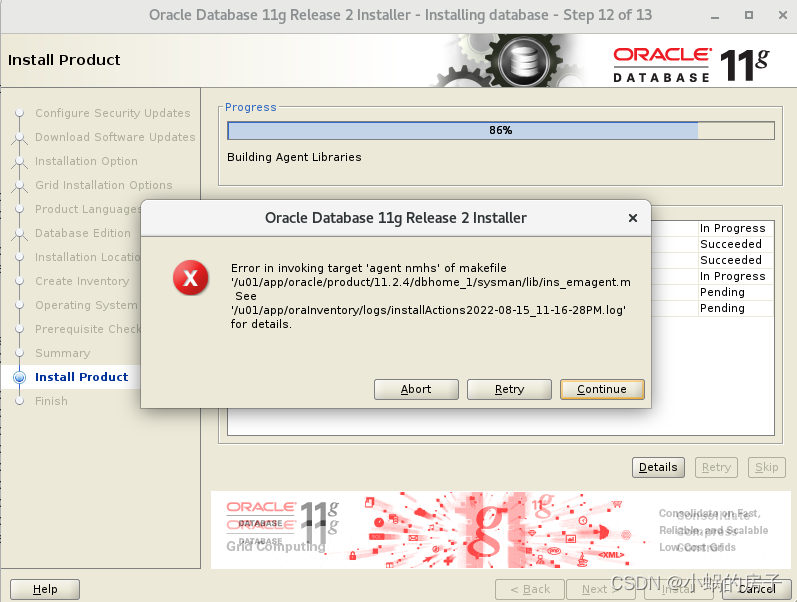 解决办法: 解决办法:
[oracle@CentOS7 ~]$ cd $ORACLE_HOME/sysman/lib
[oracle@CentOS7 lib]$ cp ins_emagent.mk ins_emagent.mk.bak
[oracle@CentOS7 lib]$ vi ins_emagent.mk
找到这一行: 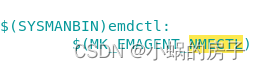
在后面追加参数:-lnnz11  修改好后点击Retry,安装继续: 修改好后点击Retry,安装继续: 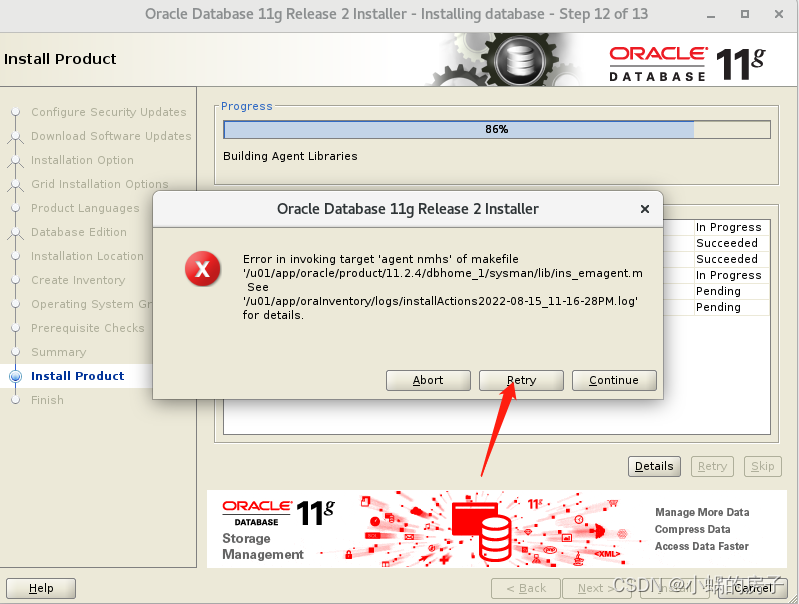 在root用户下执行两条指令: 在root用户下执行两条指令: 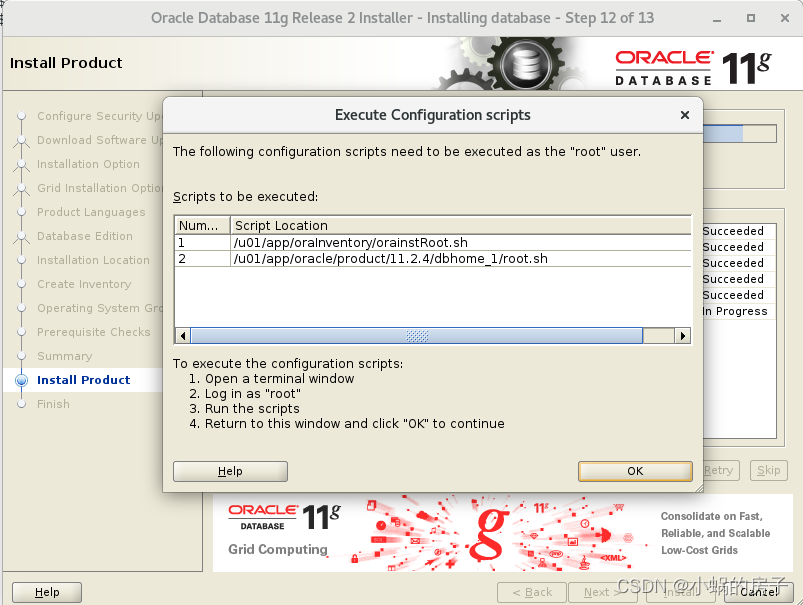
[root@CentOS7 ~]# /u01/app/oraInventory/orainstRoot.sh
Changing permissions of /u01/app/oraInventory.
Adding read,write permissions for group.
Removing read,write,execute permissions for world.
Changing groupname of /u01/app/oraInventory to oinstall.
The execution of the script is complete.
[root@CentOS7 ~]# /u01/app/oracle/product/11.2.4/dbhome_1/root.sh
Performing root user operation for Oracle 11g
The following environment variables are set as:
ORACLE_OWNER= oracle
ORACLE_HOME= /u01/app/oracle/product/11.2.4/dbhome_1
Enter the full pathname of the local bin directory: [/usr/local/bin]:
Copying dbhome to /usr/local/bin ...
Copying oraenv to /usr/local/bin ...
Copying coraenv to /usr/local/bin ...
Creating /etc/oratab file...
Entries will be added to the /etc/oratab file as needed by
Database Configuration Assistant when a database is created
Finished running generic part of root script.
Now product-specific root actions will be performed.
Finished product-specific root actions.
安装成功,点击Close: 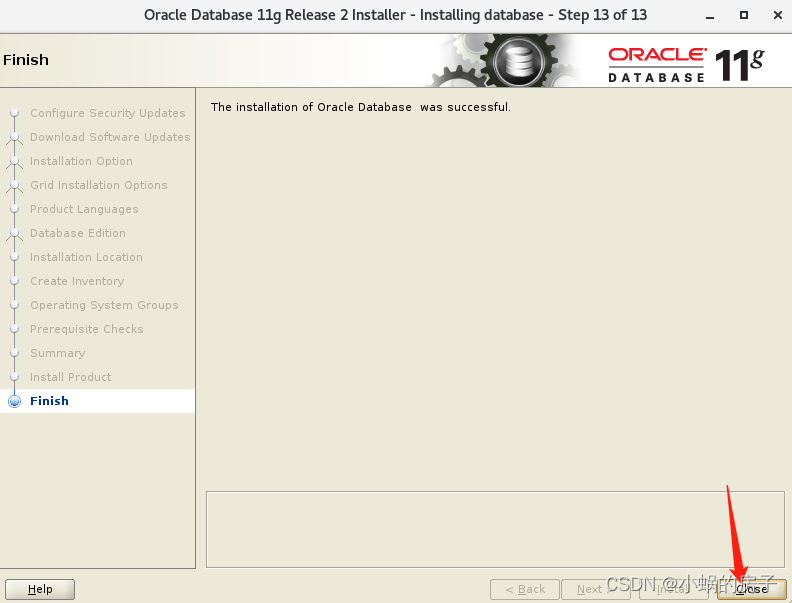
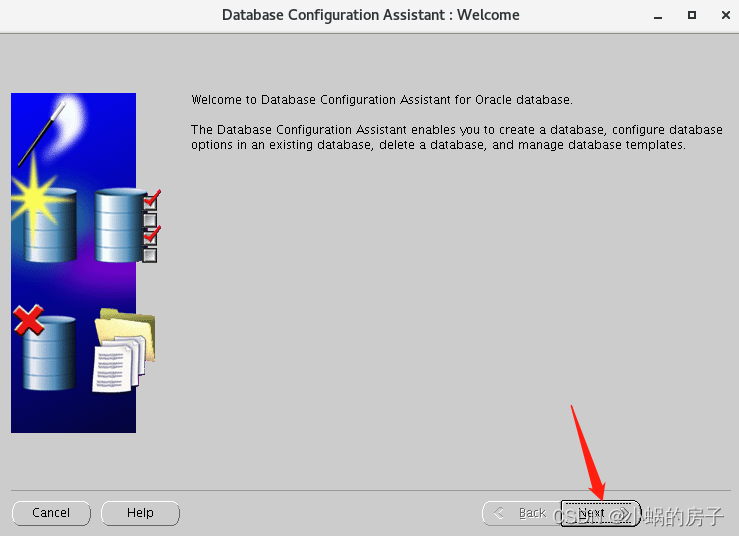
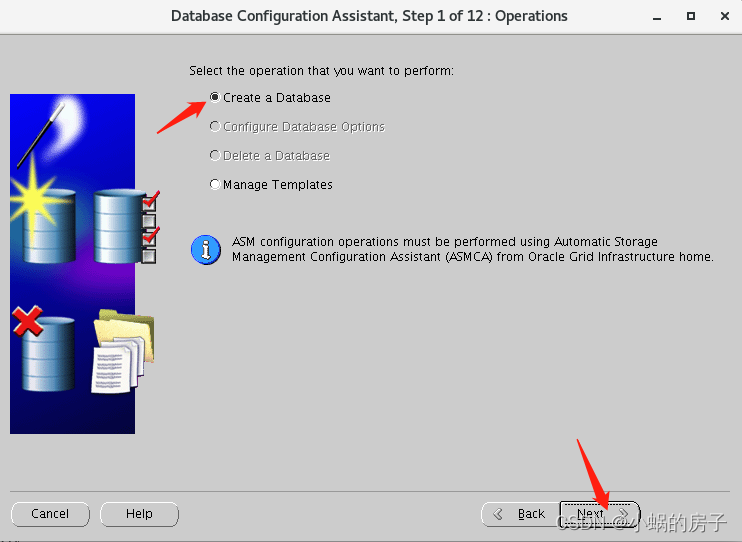
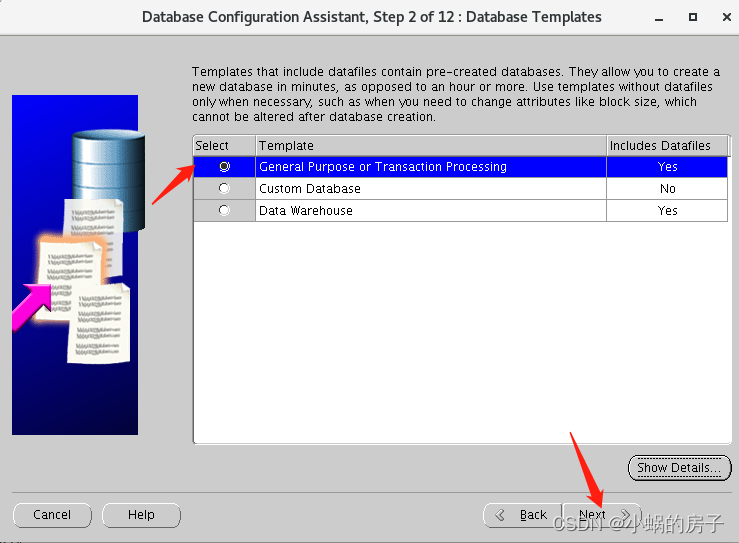
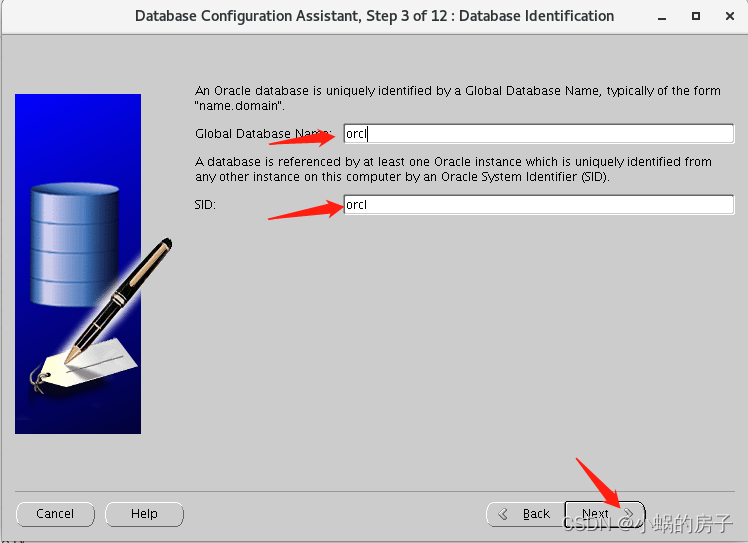
四、DBCA创建数据库
创建步骤:
[oracle@CentOS7 ~]$ dbca

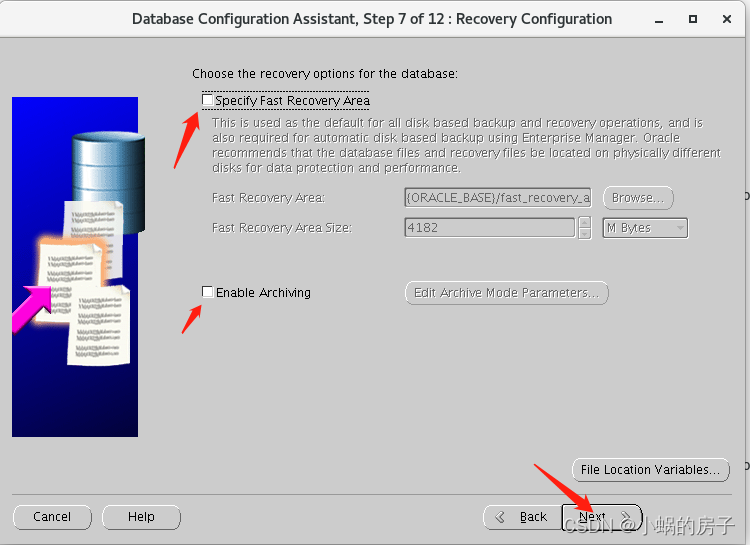 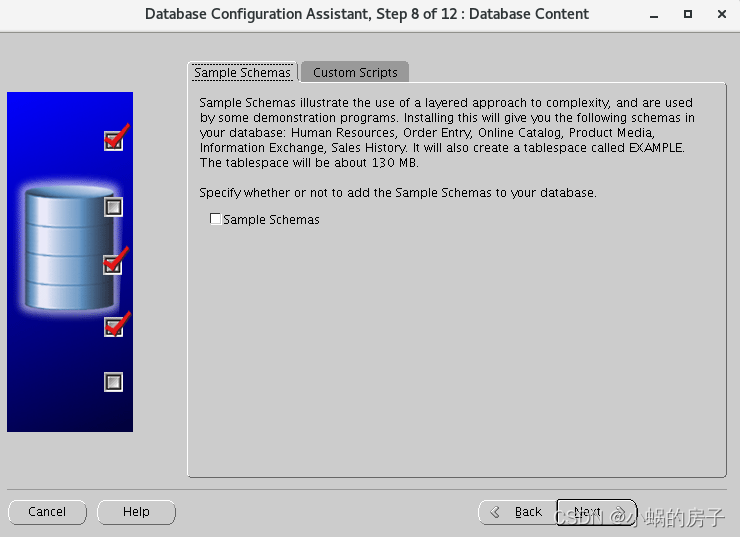
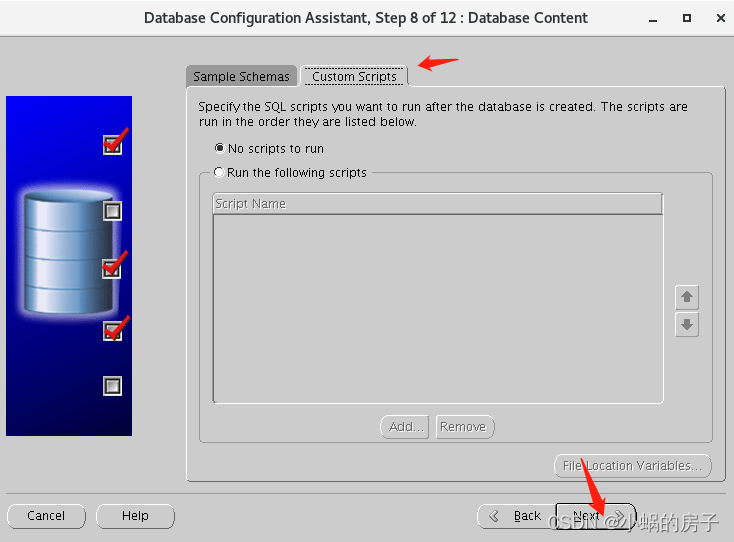  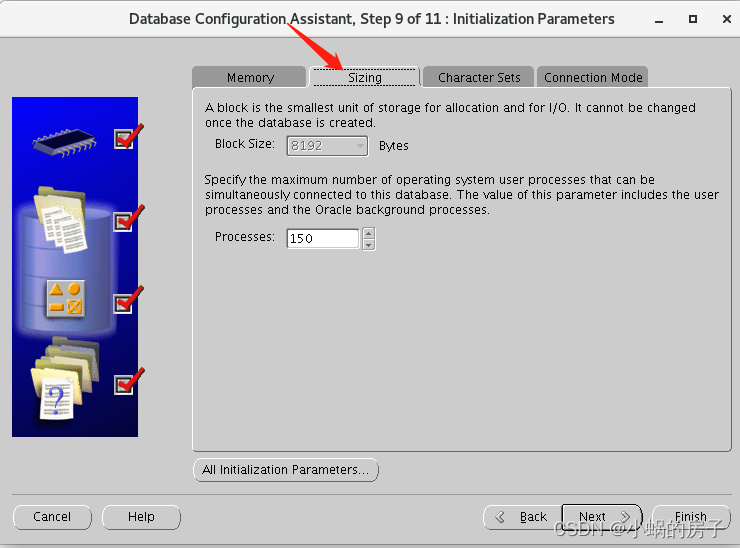  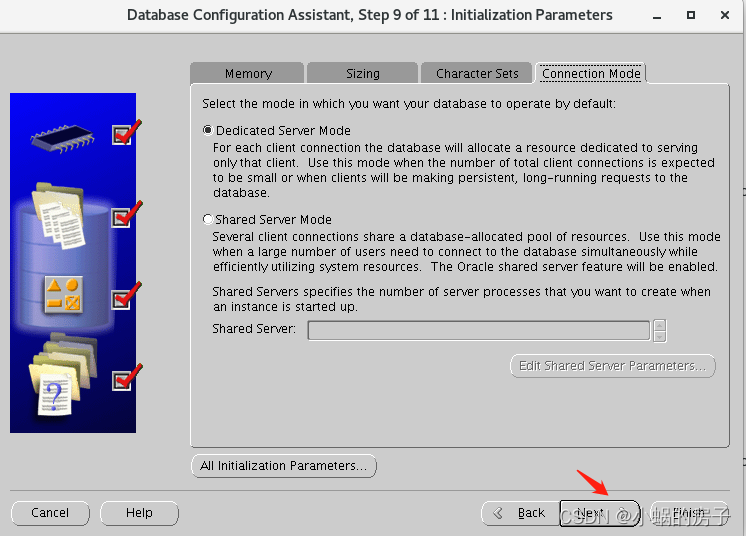 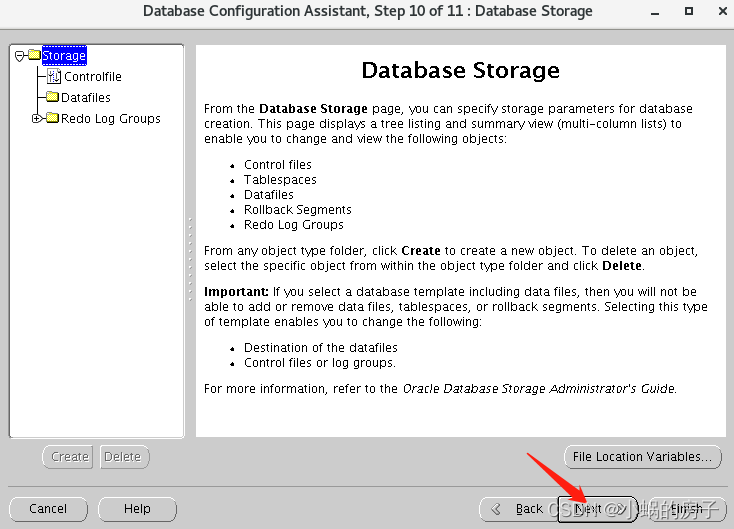
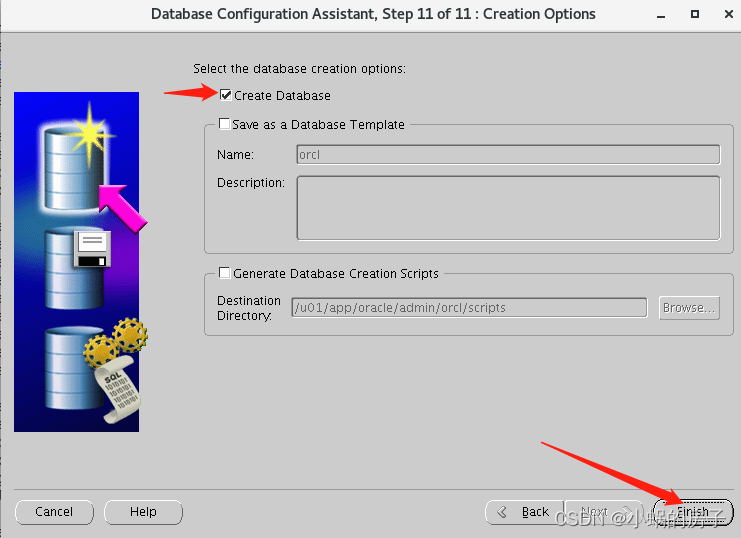 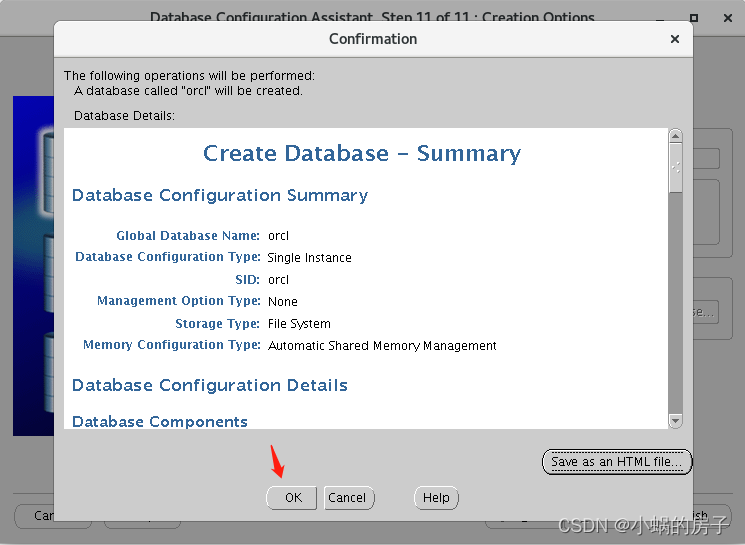 等待创建中: 等待创建中: 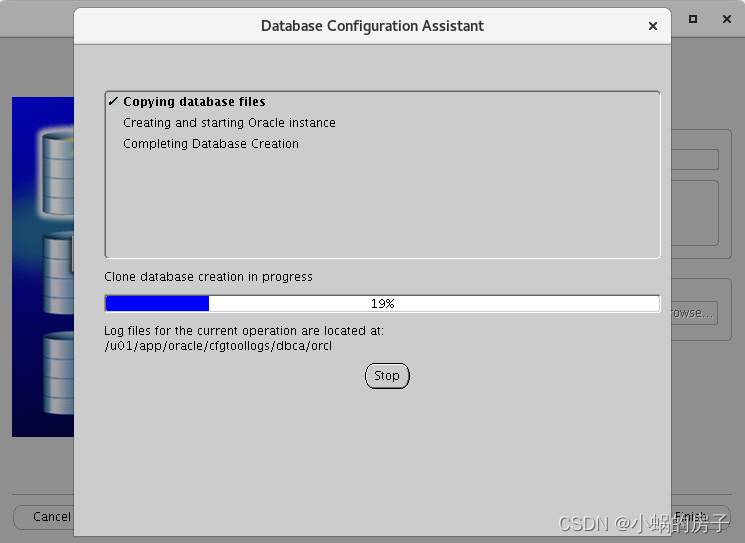 创建成功: 创建成功: 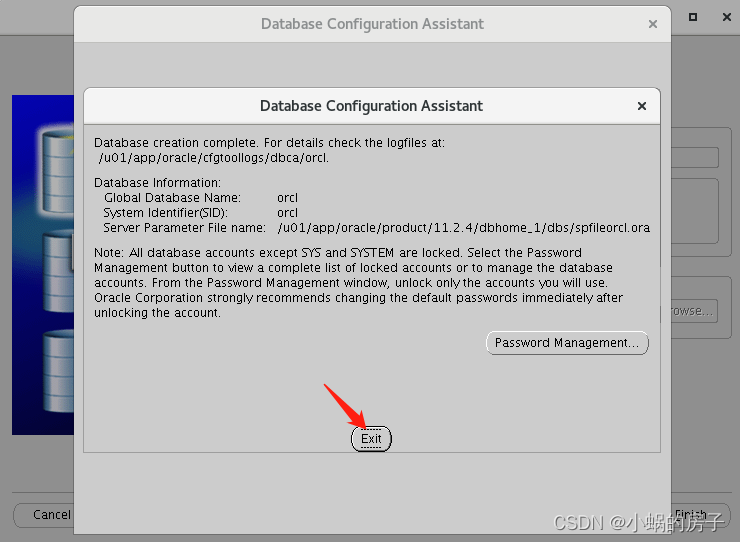 启动数据库实例,检查是否安装成功: 启动数据库实例,检查是否安装成功:
[oracle@CentOS7 ~]$ sqlplus / as sysdba //连接数据库
SQL*Plus: Release 11.2.0.4.0 Production on Mon Aug 15 23:56:35 2022
Copyright (c) 1982, 2013, Oracle. All rights reserved.
Connected to an idle instance.
SQL> startup //启动实例
ORACLE instance started.
Total System Global Area 2455228416 bytes
Fixed Size 2255712 bytes
Variable Size 620758176 bytes
Database Buffers 1811939328 bytes
Redo Buffers 20275200 bytes
Database mounted.
Database opened.
SQL>
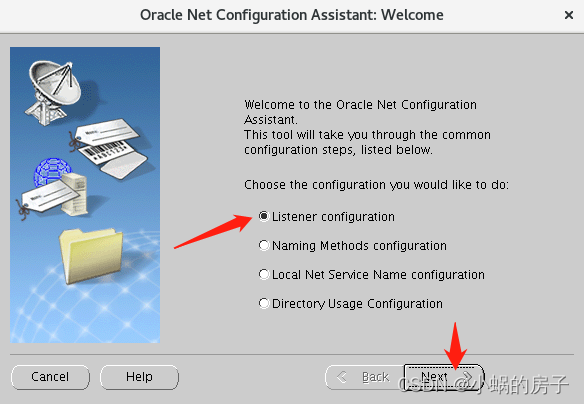
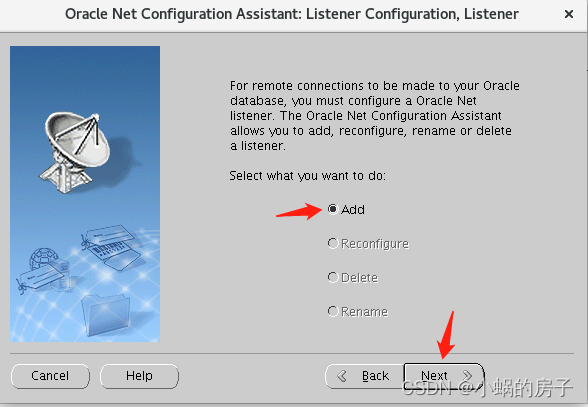
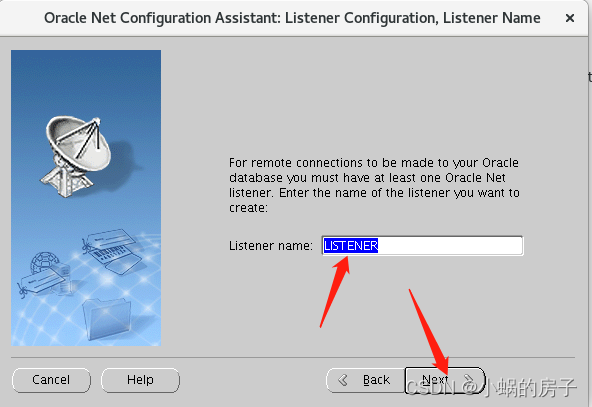
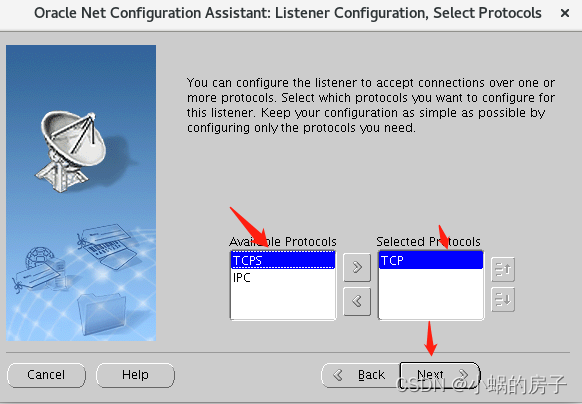
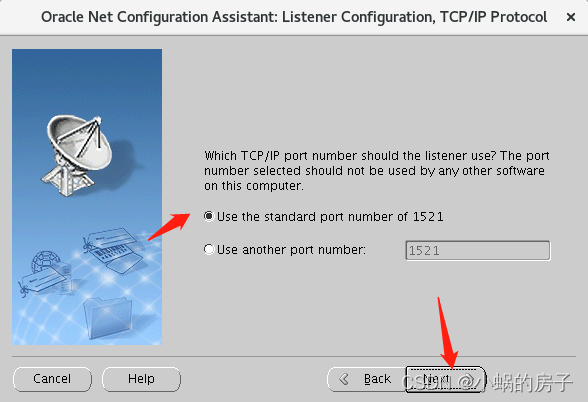
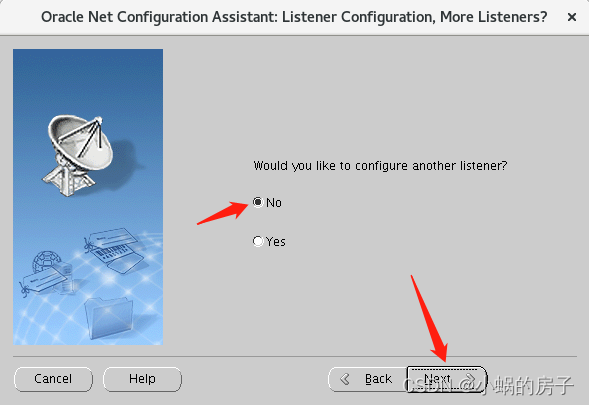
五、Netca创建监听
[oracle@CentOS7 ~]$ netca
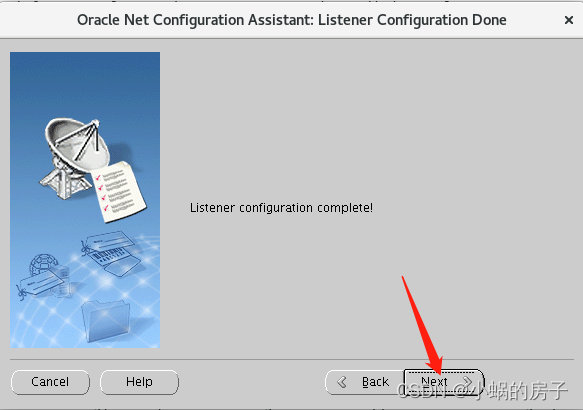
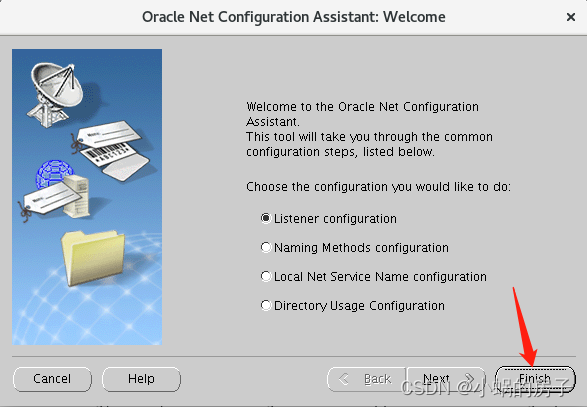 启动监听: 启动监听:
[oracle@CentOS7 ~]$ lsnrctl start
LSNRCTL for Linux: Version 11.2.0.4.0 - Production on 16-AUG-2022 00:03:25
Copyright (c) 1991, 2013, Oracle. All rights reserved.
Starting /u01/app/oracle/product/11.2.4/dbhome_1/bin/tnslsnr: please wait...
TNSLSNR for Linux: Version 11.2.0.4.0 - Production
System parameter file is /u01/app/oracle/product/11.2.4/dbhome_1/network/admin/listener.ora
Log messages written to /u01/app/oracle/diag/tnslsnr/CentOS7/listener/alert/log.xml
Listening on: (DESCRIPTION=(ADDRESS=(PROTOCOL=tcp)(HOST=CentOS7)(PORT=1521)))
Listening on: (DESCRIPTION=(ADDRESS=(PROTOCOL=ipc)(KEY=EXTPROC1521)))
Connecting to (DESCRIPTION=(ADDRESS=(PROTOCOL=TCP)(HOST=CentOS7)(PORT=1521)))
STATUS of the LISTENER
------------------------
Alias LISTENER
Version TNSLSNR for Linux: Version 11.2.0.4.0 - Production
Start Date 16-AUG-2022 00:03:25
Uptime 0 days 0 hr. 0 min. 0 sec
Trace Level off
Security ON: Local OS Authentication
SNMP OFF
Listener Parameter File /u01/app/oracle/product/11.2.4/dbhome_1/network/admin/listener.ora
Listener Log File /u01/app/oracle/diag/tnslsnr/CentOS7/listener/alert/log.xml
Listening Endpoints Summary...
(DESCRIPTION=(ADDRESS=(PROTOCOL=tcp)(HOST=CentOS7)(PORT=1521)))
(DESCRIPTION=(ADDRESS=(PROTOCOL=ipc)(KEY=EXTPROC1521)))
The listener supports no services
The command completed successfully
查看监听状态:
e@CentOS7 ~]$ lsnrctl status
LSNRCTL for Linux: Version 11.2.0.4.0 - Production on 16-AUG-2022 00:05:02
Copyright (c) 1991, 2013, Oracle. All rights reserved.
Connecting to (DESCRIPTION=(ADDRESS=(PROTOCOL=TCP)(HOST=CentOS7)(PORT=1521)))
STATUS of the LISTENER
------------------------
Alias LISTENER
Version TNSLSNR for Linux: Version 11.2.0.4.0 - Production
Start Date 16-AUG-2022 00:04:58
Uptime 0 days 0 hr. 0 min. 3 sec
Trace Level off
Security ON: Local OS Authentication
SNMP OFF
Listener Parameter File /u01/app/oracle/product/11.2.4/dbhome_1/network/admin/listener.ora
Listener Log File /u01/app/oracle/diag/tnslsnr/CentOS7/listener/alert/log.xml
Listening Endpoints Summary...
(DESCRIPTION=(ADDRESS=(PROTOCOL=tcp)(HOST=CentOS7)(PORT=1521)))
(DESCRIPTION=(ADDRESS=(PROTOCOL=ipc)(KEY=EXTPROC1521)))
The listener supports no services
The command completed successfully
刚开启时,立即查看状态监听不到实例,等过一分钟再查看,可成功查看到监听信息:
[oracle@CentOS7 ~]$ lsnrctl status
LSNRCTL for Linux: Version 11.2.0.4.0 - Production on 16-AUG-2022 00:07:44
Copyright (c) 1991, 2013, Oracle. All rights reserved.
Connecting to (DESCRIPTION=(ADDRESS=(PROTOCOL=TCP)(HOST=CentOS7)(PORT=1521)))
STATUS of the LISTENER
------------------------
Alias LISTENER
Version TNSLSNR for Linux: Version 11.2.0.4.0 - Production
Start Date 16-AUG-2022 00:04:58
Uptime 0 days 0 hr. 2 min. 45 sec
Trace Level off
Security ON: Local OS Authentication
SNMP OFF
Listener Parameter File /u01/app/oracle/product/11.2.4/dbhome_1/network/admin/listener.ora
Listener Log File /u01/app/oracle/diag/tnslsnr/CentOS7/listener/alert/log.xml
Listening Endpoints Summary...
(DESCRIPTION=(ADDRESS=(PROTOCOL=tcp)(HOST=CentOS7)(PORT=1521)))
(DESCRIPTION=(ADDRESS=(PROTOCOL=ipc)(KEY=EXTPROC1521)))
Services Summary...
Service "orcl" has 1 instance(s).
Instance "orcl", status READY, has 1 handler(s) for this service...
Service "orclXDB" has 1 instance(s).
Instance "orcl", status READY, has 1 handler(s) for this service...
The command completed successfully
至此,Oracle软件,实例以及监听都安装成功,希望可以帮助到大家,有什么问题可以留言讨论。
|