Canvas 实战: 实现纯前端图形验证码(Graph Verification Code) |
您所在的位置:网站首页 › canvas怎么获取文字 › Canvas 实战: 实现纯前端图形验证码(Graph Verification Code) |
Canvas 实战: 实现纯前端图形验证码(Graph Verification Code)
|
Canvas 实战: 实现纯前端图形验证码(Graph Verification Code)
文章目录
Canvas 实战: 实现纯前端图形验证码(Graph Verification Code)简介参考完整示例代码
正文图形验证码实现要素 & 功能代码实现文件结构 & 页面模版图形验证码实现:GVerify 类引入 GVerify 类工具函数定义GVerify 类结构GVerify 各方法详细实现
事件处理运行截图
结语
简介
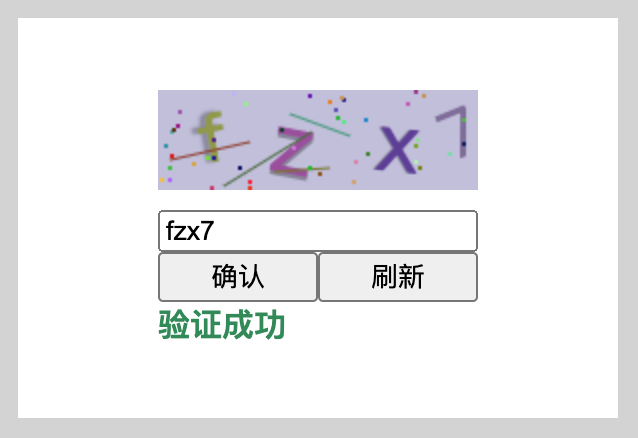
本篇将使用 Canvas 实现纯前端的图形验证码。 在各式各样的系统中总会有登入的场景,然而越热门的网页越容易收到恶意攻击,因此我们希望在登入的过程除了校验用户信息之外,还需要输入额外的验证信息:验证码(Verification Code)就是一种额外验证的手段。 验证码也存在很多种形式,如手机验证码:输入手机号并透过短信接受验证码;邮箱验证码等。本篇将介绍的图形验证码的用途在于方法透过爬虫、恶意脚本大量尝试登入的场景,透过图形需要人用肉眼来判断(当然 OCR 也能起到一定的作用,但多少也能拉低恶意脚本的性能),借此减轻后端服务器因为恶意登入尝试而造成延误、崩溃的情形。 参考 前端生成图形验证码https://www.cnblogs.com/echolife/p/8649213.html 完整示例代码https://github.com/superfreeeee/Blog-code/tree/main/front_end/html/canvas_verify_code 正文 图形验证码实现要素 & 功能首先我们先来明确一下接下来要实现的图形验证码所需要具备的要素和功能 验证码:这是我们的本体,需要随机生成一个字符串作为校验目标变形、干扰线、干扰点:透过将一般字体进行变形、缩放、变色,并绘制干扰线来提升机器识别的难度接下来我们列出图形验证码需要实现的功能点 功能说明生成初始化和刷新时需要随机生成验证码并绘制成图形刷新点击图形或是验证失败时重新生成图形验证码验证验证输入是否与验证码相同 代码实现接下来我们马上就来动手实现纯前端的图形验证码吧! 文件结构 & 页面模版首先先定义好文件结构 /canvas_verify_code ├── index.html // 页面入口 ├── index.js // 事件处理脚本 └── GVerify.js // 验证码类并附上页面模版的基础内容,之后不会再做更动 index.html:页面入口 Document body { margin: 0; background-color: lightgray; } .wrapper { background-color: #fff; width: 300px; height: 200px; margin: 100px auto 0; display: grid; place-content: center; } .wrapper .msg { font-weight: 600; } .verify { width: 160px; height: 50px; margin-bottom: 10px; } .options { display: flex; } .options button { flex-grow: 1; } 确认 刷新 图形验证码实现:GVerify 类下面进入重头戏:图形验证码的详细实现 引入 GVerify 类我们使用 IIFE 立即函数的方式定义 GVerify 类并注册到全局变量当中 GVerify.js:引入方式 ;(function _init () { /* 常量、静态变量可放在此处透过闭包来保存 */ /* 图形验证码类 */ function GVerify () {} /* 工具方法定义 */ function randomInt (from, to) {} function randomColor (min, max) {} /* 注册为全局变量供其他地方使用 */ window.GVerify = GVerify })() 工具函数定义下面我们先定义两个接下来需要用到的工具函数: randomInt(from, to):随机生成一个整数介于闭区间 [from, to] 之内randomColor(min, max):随机生成一个颜色值,rbg 三种颜色的色值都介于闭区间 [from, to] 之内GVerify.js:工具函数 ;(function _init () { function GVerify () {} /* 生成随机整数 */ function randomInt (from = 0, to = 1) { return Math.floor(from + Math.random() * (to - from)) } /* 生成随机颜色 */ function randomColor (min = 0, max = 255) { const [ r, g, b ] = [ randomInt(min, max), randomInt(min, max), randomInt(min, max) ] return `rgb(${r},${g},${b})` } window.GVerify = GVerify })() GVerify 类结构下面我们先根据前面说明的 GVerify 类的功能,划分好类的结构并明确各个方法的职责 GVerify:构造方法,初始化并处理各个参数GVerify.prototype.init:初始化,创建并初始化 canvas 画布GVerify.prototype.refresh:刷新,重新生成验证码并重绘图形GVerify.prototype.validate:验证,验证输入是否正确GVerify.js:类结构 & 方法职责划分 ;(function _init () { /* 类主体,也是构造方法 */ function GVerify () {/* 内容省略 */} /* 初始化 */ GVerify.prototype.init = function () {/* 内容省略 */} /* 刷新 */ GVerify.prototype.refresh = function () {/* 内容省略 */} /* 验证 */ GVerify.prototype.validate = function () {/* 内容省略 */} function randomInt (from = 0, to = 1) {/* 内容省略 */} function randomColor (min = 0, max = 255) {/* 内容省略 */} window.GVerify = GVerify })() GVerify 各方法详细实现相关参数说明或是实现要点都写在注释里面了 GVerify:构造方法 /* 用于验证码的字符列表 */ const nums = new Array(10).fill(0).map((val, idx) => idx) const letters = new Array(26).fill(0).map((val, idx) => String.fromCharCode('a'.charCodeAt() + idx)) function GVerify ({ el, size = 4, type = 'blend' }) { this.options = { el: document.querySelector(el), // el 保存容器的 html 元素 size, // 验证码长度,默认为 4 type, // 验证码类型,可选值有:blend 混合、number 纯数字、letter 纯字符;默认为混合类型 canvasId: `_canvas_${el}`, // 画布 id code: '', // 实际验证码 txts: type === 'number' ? nums : type === 'letter' ? letters : [ ...nums, ...letters ] // 验证码候选字符 } if (!this.options.el) throw new Error('container not found') this.init() // 初始化 this.refresh() // 首次加载时刷新 }GVerify.prototype.init:初始化 GVerify.prototype.init = function () { /* 初始化 canvas 画布 */ const container = this.options.el const canvas = document.createElement('canvas') canvas.id = this.options.canvasId // 设置 id canvas.width = container.offsetWidth // 设置宽度与容器同宽 canvas.height = container.offsetHeight // 设置高度与容器同高 canvas.style.cursor = 'pointer' canvas.innerHTML = '您的的浏览器不支持 canvas' container.appendChild(canvas) const self = this // 可点击刷新 canvas.onclick = function () { self.refresh() } }GVerify.prototype.refresh:刷新 GVerify.prototype.refresh = function () { // 先获取画布元素并设置好相关参数 const canvas = document.getElementById(this.options.canvasId) const { width, height } = canvas const { size, txts } = this.options if (!canvas) return // 获取画布上下文并初始化背景 const ctx = canvas.getContext('2d') ctx.textBaseline = 'middle' ctx.fillStyle = randomColor(180, 240) ctx.fillRect(0, 0, width, height) // 随机背景色 /* 绘制验证码 */ this.options.code = '' for (let i = 0; i randomInt(height / 2, height)}px Simhei` // 随机大小 ctx.fillStyle = randomColor(50, 160) // 随机颜色 ctx.shadowOffsetX = randomInt(-3, 3) // 随机阴影偏移 ctx.shadowOffsetY = randomInt(-3, 3) ctx.shadowBlur = randomInt(-3, 3) // 随机阴影模糊 ctx.shadowColor = 'rgba(0, 0, 0, 0.3)' // 黑色半透明阴影 const x = randomInt(width / size * i, width / size * (i + 0.8)) const y = height / 2 const degree = randomInt(-30, 30) /* 改变坐标系 */ ctx.translate(x, y) // 原点 ctx.rotate(degree * Math.PI / 180) // 旋转 /* 填上数字 */ ctx.fillText(c, 0, 0) /* 恢复坐标系 */ ctx.rotate(-degree * Math.PI / 180) ctx.translate(-x, -y) } /* 绘制干扰线 */ const lineCount = randomInt(4, 8) for (let i = 0; i ctx.fillStyle = randomColor(0, 255) ctx.beginPath() // 随机原点 ctx.arc(randomInt(0, width), randomInt(0, height), 1, 0, 2 * Math.PI) ctx.fill() } }GVerify.prototype.validate:验证 GVerify.prototype.validate = function (code) { console.log(`expected: ${this.options.code}, actual: ${code}`) // 直接校验字符串 return code === this.options.code } 事件处理最后给出主要的实践处理方法 index.js:事件处理脚本 const gVerify = new GVerify({ el: '.verify' }) // 验证码校验 function validate (e) { const input = document.querySelector('.wrapper input') if (!input.validity.valid) { // 默认验证:required return } const code = input.value const msgEl = document.querySelector('.wrapper .msg') const res = gVerify.validate(code) // 透过 gVerify.validate 方法校验 if (res) { msgEl.style.color = 'seagreen' msgEl.textContent = '验证成功' } else { msgEl.style.color = 'red' msgEl.textContent = '验证失败' } e.preventDefault() } // 全部刷新 function resetForm (e) { e.preventDefault() gVerify.refresh() document.querySelector('.wrapper input').value = '' document.querySelector('.wrapper .msg').textContent = '' } 运行截图最后放上两张运行截图展示效果
到此就结束了,其实图形验证码没有想象中的复杂,核心的点在于验证码的大小、颜色、位置、扭曲效果都透过随机实现,供读者参考。 |

【本文地址】
今日新闻 |
推荐新闻 |