React Native JSBundle拆包之原理篇 |
您所在的位置:网站首页 › bundle拆包 › React Native JSBundle拆包之原理篇 |
React Native JSBundle拆包之原理篇
|
概述
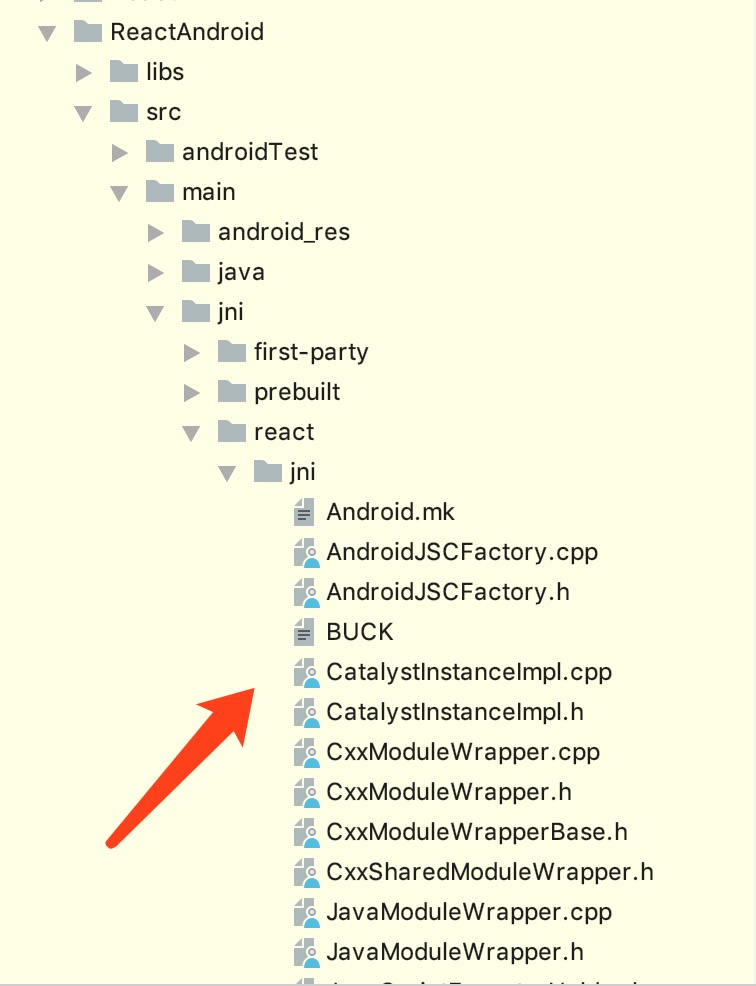
RN作为一款非常优秀的移动端跨平台开发框架,在近几年得到众多开发者的认可。纵观现在接入RN的大厂,如qq音乐、菜鸟、去哪儿,无疑不是将RN作为重点技术栈进行研发。 不过,熟悉RN的开发者也知道,早期的RN版本中打出来的包都只有一个jsbundle,而这个jsbundle里面包含了所有代码(RN源码、第三方库代码和自己的业务代码)。如果是纯RN代码倒没什么关系,但大部分的大厂都是在原生应用内接入RN的,而且一个RN中又包含许多不同的业务,这些不同的业务很可能是不同部门开发的,这样一个库中就有许许多多的重复的RN代码和第三方库代码。 所以,一般做法都是将重复的RN代码和第三方库打包成一个基础包,然后各个业务在基础包的基础上进行开发,这样做的好处是可以降低对内存的占用,减少加载时间,减少热更新时流量带宽等,在优化方面起到了非常大的作用。 拆包流派 moles-packermoles-packer 是由携程框架团队研发的,与携程moles框架配套使用的React Native 打包和拆包工具,同时支持原生的 React Native 项目。 特点:重写了react native自带的打包工具,适合RN0.4.0版本之前的分包。维护少,现在基本没有多少人使用,兼容性差。 diff patchdiff patch大致的做法就是先打个正常的完整的jsbundle,然后再打个只包含了基础引用的基础包,比对一下patch,得出业务包,这样基础包和业务包都有了,更新时更新业务包即可。差分包的工具可以google-diff-match-patch metro bundle目前,最好的RN分包方案还是facebook官方提供的metro bundle,此方案是fb在0.50版本引入的,并随着RN版本的迭代不断完善。也即是说,只要你使用的是0.50以上的RN版本,就可以使用metro bundle进行差分包进行热更新。 配置内容比较多,这里主要看createModuleIdFactory和processModuleFilte两个配置参数。 原理篇 RN启动分析为了更好的理解RN的分包和和加载机制,下面通过源码来看看RN的启动过程。 "dependencies": { "react": "16.6.1", "react-native": "0.57.7", "react-navigation": "^2.0.1" },注:本篇使用基于最新的0.57.7版本进行分析 1,JS端启动流程index.js 作为RN应用的默认入口,源码如下: import {AppRegistry} from 'react-native'; import App from './App'; import {name as appName} from './app.json'; AppRegistry.registerComponent(appName, () => App);AppRegistry是所有 RN应用的 JS 入口,应用的根组件通过AppRegistry.registerComponent方法注册自己,然后原生系统才可以加载应用的代码包并且在启动完成之后通过调用AppRegistry.runApplication来真正运行应用。registerComponent对应的源码如下: /** * Registers an app's root component. * * See http://facebook.github.io/react-native/docs/appregistry.html#registercomponent */ registerComponent( appKey: string, componentProvider: ComponentProvider, section?: boolean, ): string { runnables[appKey] = { componentProvider, run: appParameters => { renderApplication( componentProviderInstrumentationHook(componentProvider), appParameters.initialProps, appParameters.rootTag, wrapperComponentProvider && wrapperComponentProvider(appParameters), appParameters.fabric, ); }, }; if (section) { sections[appKey] = runnables[appKey]; } return appKey; },RN项目index.js文件的在调用registerComponent 方法时默认传入了 appKey、ComponentProvider 两个参数,而section是可以不用传的。然后,registerComponent方法会调用renderApplication方法参数并调用了 renderApplication 方法。renderApplication的源码如下: function renderApplication( RootComponent: React.ComponentType, initialProps: Props, rootTag: any, WrapperComponent?: ?React.ComponentType, fabric?: boolean, showFabricIndicator?: boolean, ) { invariant(rootTag, 'Expect to have a valid rootTag, instead got ', rootTag); let renderable = ( {fabric === true && showFabricIndicator === true ? ( ) : null} );renderApplication中调用了AppContainer组件来封装当前rootVIew组件,并最终调用AppRegistry.runApplication来启动应用程序。 /** * Loads the JavaScript bundle and runs the app. * * See http://facebook.github.io/react-native/docs/appregistry.html#runapplication */ runApplication(appKey: string, appParameters: any): void { const msg = 'Running application "' + appKey + '" with appParams: ' + JSON.stringify(appParameters) + '. ' + '__DEV__ === ' + String(__DEV__) + ', development-level warning are ' + (__DEV__ ? 'ON' : 'OFF') + ', performance optimizations are ' + (__DEV__ ? 'OFF' : 'ON'); infoLog(msg); BugReporting.addSource( 'AppRegistry.runApplication' + runCount++, () => msg, ); invariant( runnables[appKey] && runnables[appKey].run, 'Application ' + appKey + ' has not been registered.\n\n' + "Hint: This error often happens when you're running the packager " + '(local dev server) from a wrong folder. For example you have ' + 'multiple apps and the packager is still running for the app you ' + 'were working on before.\nIf this is the case, simply kill the old ' + 'packager instance (e.g. close the packager terminal window) ' + 'and start the packager in the correct app folder (e.g. cd into app ' + "folder and run 'npm start').\n\n" + 'This error can also happen due to a require() error during ' + 'initialization or failure to call AppRegistry.registerComponent.\n\n', ); SceneTracker.setActiveScene({name: appKey}); runnables[appKey].run(appParameters); },在 runApplication 方法中,RN会通过 runnables[appKey] && runnables[appKey].run 来检查是否可以找到appKey对应的module组件,如果没有,则会抛出异常。 那么,RN编写的页面又是如何在Android系统中显示的呢?那就得看看RN的Android端源码了。 2,Android启动流程打开RN的Android项目,可以发现,Android的src目录下就只有MainActivity和 MainApplication 两个Java类。其中,MainActivity 为原生层应用程序的入口文件,MainApplication为Android应用程序入口文件。 MainActivity.java文件的源码如下: import com.facebook.react.ReactActivity; public class MainActivity extends ReactActivity { @Override protected String getMainComponentName() { return "RNDemo"; } }MainActivity类的代码很简单,该类继承自 ReactActivity 并实现 getMainComponentName 方法,getMainComponentName方法返回与 AppRegistry.registerComponent 的 appKey 相同的名称。 MainApplication类也比较简单,源码如下: import android.app.Application; import com.facebook.react.ReactApplication; import com.facebook.react.ReactNativeHost; import com.facebook.react.ReactPackage; import com.facebook.react.shell.MainReactPackage; import com.facebook.soloader.SoLoader; import java.util.Arrays; import java.util.List; public class MainApplication extends Application implements ReactApplication { private final ReactNativeHost mReactNativeHost = new ReactNativeHost(this) { @Override public boolean getUseDeveloperSupport() { return BuildConfig.DEBUG; } @Override protected List getPackages() { return Arrays.asList( new MainReactPackage() ); } @Override protected String getJSMainModuleName() { return "index"; } }; @Override public ReactNativeHost getReactNativeHost() { return mReactNativeHost; } @Override public void onCreate() { super.onCreate(); SoLoader.init(this, /* native exopackage */ false); } }MainApplication 主要完成了三件事: 实现 ReactApplication 接口,重写 getReactNativeHost 方法,返回ReactNativeHost实例。定义并初始化 ReactNativeHost,实现getUseDeveloperSupport、getPackages、getJSMainModuleName 方法,完成初始化设置。在 onCreate 方法中,调用SoLoader的init方法,启动C++层逻辑代码的初始化加载。 ReactActivityMainActivity 继承 ReactActivity 类,并重写了getMainComponentName 方法,并且方法的返回值需要和我们在JS端的值保持一致。ReactActivity最核心的就是ReactActivityDelegate。 protected ReactActivity() { mDelegate = createReactActivityDelegate(); } /** * 在构造时调用,如果您有自定义委托实现,则覆盖. */ protected ReactActivityDelegate createReactActivityDelegate() { return new ReactActivityDelegate(this, getMainComponentName()); }很明显,ReactActivity 类采用了委托的方式,将所有行为全权交给了 ReactActivityDelegate 去处理。这样做的好处是,降低代码耦合,提升了可扩展性。下面我们看一下ReactActivityDelegate类: public class ReactActivityDelegate { private final @Nullable Activity mActivity; private final @Nullable FragmentActivity mFragmentActivity; private final @Nullable String mMainComponentName; private @Nullable ReactRootView mReactRootView; private @Nullable DoubleTapReloadRecognizer mDoubleTapReloadRecognizer; ... public ReactActivityDelegate(Activity activity, @Nullable String mainComponentName) { mActivity = activity; mMainComponentName = mainComponentName; mFragmentActivity = null; } public ReactActivityDelegate( FragmentActivity fragmentActivity, @Nullable String mainComponentName) { mFragmentActivity = fragmentActivity; mMainComponentName = mainComponentName; mActivity = null; } protected @Nullable Bundle getLaunchOptions() { return null; } protected ReactRootView createRootView() { return new ReactRootView(getContext()); } /** * Get the {@link ReactNativeHost} used by this app. By default, assumes * {@link Activity#getApplication()} is an instance of {@link ReactApplication} and calls * {@link ReactApplication#getReactNativeHost()}. Override this method if your application class * does not implement {@code ReactApplication} or you simply have a different mechanism for * storing a {@code ReactNativeHost}, e.g. as a static field somewhere. */ protected ReactNativeHost getReactNativeHost() { return ((ReactApplication) getPlainActivity().getApplication()).getReactNativeHost(); } public ReactInstanceManager getReactInstanceManager() { return getReactNativeHost().getReactInstanceManager(); } protected void onCreate(Bundle savedInstanceState) { if (mMainComponentName != null) { loadApp(mMainComponentName); } mDoubleTapReloadRecognizer = new DoubleTapReloadRecognizer(); } protected void loadApp(String appKey) { if (mReactRootView != null) { throw new IllegalStateException("Cannot loadApp while app is already running."); } mReactRootView = createRootView(); mReactRootView.startReactApplication( getReactNativeHost().getReactInstanceManager(), appKey, getLaunchOptions()); getPlainActivity().setContentView(mReactRootView); } ... 中间省略生命周期、返回事件、权限请求的方法 private Context getContext() { if (mActivity != null) { return mActivity; } return Assertions.assertNotNull(mFragmentActivity); } private Activity getPlainActivity() { return ((Activity) getContext()); } }ReactActivityDelegate类重点关注loadApp方法, loadApp 方法主要做了三件事: 创建 RootView实例;调用 RootView 实例的 startReactApplication 方法,将ReactInstanceManager实例、appKey、启动时初始化参数作为参数传递过去;将 ReactRootView 设置为 MainActivity 布局视图; ReactRootView在loadApp里面,首先创建一个ReactRootView,这个mReactRootView继承自FrameLayout,作为界面的跟布局,然后调用mReactRootView.startReactApplication()方法启动RN应用。涉及的源码如下: public void startReactApplication( ReactInstanceManager reactInstanceManager, String moduleName, @Nullable Bundle launchOptions) { UiThreadUtil.assertOnUiThread(); Assertions.assertCondition( mReactInstanceManager == null, "This root view has already been attached to a catalyst instance manager"); mReactInstanceManager = reactInstanceManager; mJSModuleName = moduleName; mLaunchOptions = launchOptions; if (!mReactInstanceManager.hasStartedCreatingInitialContext()) { mReactInstanceManager.createReactContextInBackground(); } //执行界面测量 if (mWasMeasured) { attachToReactInstanceManager(); } }这里会执行到mReactInstanceManager.createReactContextInBackground()这个方法去生成reactnative的上下文对象。 public void createReactContextInBackground() { Assertions.assertCondition( !mHasStartedCreatingInitialContext, "createReactContextInBackground should only be called when creating the react " + "application for the first time. When reloading JS, e.g. from a new file, explicitly" + "use recreateReactContextInBackground"); mHasStartedCreatingInitialContext = true; recreateReactContextInBackgroundInner(); }上面代码首先将mHasStartedCreatingInitialContext置为true,然后在 startReactApplication 方法中调用了 ReactInstanceManager 实例的 createReactContextInBackground 方法。 ReactInstanceManager @ThreadConfined(UI) private void recreateReactContextInBackgroundInner() { if (mUseDeveloperSupport && mJSMainModulePath != null && !Systrace.isTracing(TRACE_TAG_REACT_APPS | TRACE_TAG_REACT_JS_VM_CALLS)) { final DeveloperSettings devSettings = mDevSupportManager.getDevSettings(); // 如果启用了远程JS调试,从dev服务器加载。 if (mDevSupportManager.hasUpToDateJSBundleInCache() && !devSettings.isRemoteJSDebugEnabled()) { // 如果从服务器下载了最新的捆绑包,禁用远程JS调试,始终使用它。 onJSBundleLoadedFromServer(null); } else if (mBundleLoader == null) { mDevSupportManager.handleReloadJS(); } else { mDevSupportManager.isPackagerRunning( new PackagerStatusCallback() { @Override public void onPackagerStatusFetched(final boolean packagerIsRunning) { UiThreadUtil.runOnUiThread( new Runnable() { @Override public void run() { if (packagerIsRunning) { mDevSupportManager.handleReloadJS(); } else { //如果dev服务器关闭,请禁用远程JS调试。 devSettings.setRemoteJSDebugEnabled(false); recreateReactContextInBackgroundFromBundleLoader(); } } }); } }); } return; } // 从 本地路径 加载 jsBundle recreateReactContextInBackgroundFromBundleLoader(); } @ThreadConfined(UI) private void recreateReactContextInBackgroundFromBundleLoader() { // 从BundleLoader加载 recreateReactContextInBackground(mJavaScriptExecutorFactory, mBundleLoader); }在 recreateReactContextInBackgroundInner 方法中,首先判断当前环境是否为开发者模式,在开发者模式下会执行 onJSBundleLoadedFromServer 方法从服务器加载 jsBundle文件。否则执行 recreateReactContextInBackgroundFromBundleLoader 方法从本地目录加载。 在 recreateReactContextInBackgroundFromBundleLoader 方法中调用了 recreateReactContextInBackground(mJavaScriptExecutorFactory, mBundleLoader) 方法。jsExecutorFactory 为 C++ 和 JS 双向通信的中转站。 jsBundleLoader 为 bundle 加载器,根据 ReactNativeHost 中的配置决定从哪里加载bundle文件。 private void recreateReactContextInBackground( JavaScriptExecutorFactory jsExecutorFactory, JSBundleLoader jsBundleLoader) { // 创建 ReactContextInitParams 对象 final ReactContextInitParams initParams = new ReactContextInitParams( jsExecutorFactory, jsBundleLoader); if (mCreateReactContextThread == null) { // 开启一个新的线程创建 ReactContext runCreateReactContextOnNewThread(initParams); } else { mPendingReactContextInitParams = initParams; } }接下来,我们看一下 runCreateReactContextOnNewThread 方法。 private void runCreateReactContextOnNewThread(final ReactContextInitParams initParams) { ... mCreateReactContextThread = new Thread( new Runnable() { @Override public void run() { .... //由于 destroy() 可能已经运行并将其设置为false,因此在创建之前确保它为true mHasStartedCreatingInitialContext = true; try { // 标准显示系统优先级,主要是改善UI的刷新 Process.setThreadPriority(Process.THREAD_PRIORITY_DISPLAY); // 创建 ReactApplicationContext 实例 final ReactApplicationContext reactApplicationContext = createReactContext( initParams.getJsExecutorFactory().create(), initParams.getJsBundleLoader()); mCreateReactContextThread = null; final Runnable maybeRecreateReactContextRunnable = new Runnable() { @Override public void run() { if (mPendingReactContextInitParams != null) { runCreateReactContextOnNewThread(mPendingReactContextInitParams); mPendingReactContextInitParams = null; } } }; Runnable setupReactContextRunnable = new Runnable() { @Override public void run() { try { setupReactContext(reactApplicationContext); } catch (Exception e) { mDevSupportManager.handleException(e); } } }; // 开启线程执行 reactApplicationContext.runOnNativeModulesQueueThread(setupReactContextRunnable); UiThreadUtil.runOnUiThread(maybeRecreateReactContextRunnable); } catch (Exception e) { mDevSupportManager.handleException(e); } } }); // 开启线程执行 mCreateReactContextThread.start(); }执行到这个的时候,系统最终会开启异步任务ReactContextInitAsyncTask来创建上下文ReactApplicationContext,在ReactContextInitAsyncTask的doInBackground会调用createReactContext方法 ReactInstanceManager private ReactApplicationContext createReactContext( JavaScriptExecutor jsExecutor, JSBundleLoader jsBundleLoader) { // 创建 ReactApplicationContext 实例 final ReactApplicationContext reactContext = new ReactApplicationContext(mApplicationContext); ... // 把各自的Module添加到对应的注册表中,processPackages方法通过遍历方式将在MainApplication 中 重写的ReactNativeHost的getPackages方法中的packages加入到注册表中 NativeModuleRegistry nativeModuleRegistry = processPackages(reactContext, mPackages, false); // 构建CatalystInstanceImpl实例 CatalystInstanceImpl.Builder catalystInstanceBuilder = new CatalystInstanceImpl.Builder() .setReactQueueConfigurationSpec(ReactQueueConfigurationSpec.createDefault()) // JS 执行通信类 .setJSExecutor(jsExecutor) // 注册 Java 模块 .setRegistry(nativeModuleRegistry) // 设置JSBundle 加载方式 .setJSBundleLoader(jsBundleLoader) // 设置异常处理器 .setNativeModuleCallExceptionHandler(exceptionHandler); final CatalystInstance catalystInstance; // 创建 CatalystInstance 实例 try { catalystInstance = catalystInstanceBuilder.build(); } finally { Systrace.endSection(TRACE_TAG_REACT_JAVA_BRIDGE); } if (mJSIModulePackage != null) { catalystInstance.addJSIModules(mJSIModulePackage .getJSIModules(reactContext, catalystInstance.getJavaScriptContextHolder())); } if (mBridgeIdleDebugListener != null) { catalystInstance.addBridgeIdleDebugListener(mBridgeIdleDebugListener); } // 调用 C++ 层代码,把 Java Registry 转换为Json,再由 C++ 层传送到 JS 层 if (Systrace.isTracing(TRACE_TAG_REACT_APPS | TRACE_TAG_REACT_JS_VM_CALLS)) { catalystInstance.setGlobalVariable("__RCTProfileIsProfiling", "true"); } // 开始加载JSBundle catalystInstance.runJSBundle(); // 关联 ReactContext 与 CatalystInstance reactContext.initializeWithInstance(catalystInstance); return reactContext; }在这个方法里面,先生成nativeModuleRegistryBuilder和jsModulesBuilder,nativeModuleRegistryBuilder用来创建JavaModule注册表,JavaModule注册表将所有的JavaModule注册到CatalystInstance中;jsModulesBuilder用来创建JavaScriptModule注册表,JavaScriptModule注册表将所有的JavaScriptModule注册到CatalystInstance中。接着会执行下到 processPackage(coreModulesPackage,nativeModuleRegistryBuilder,jsModulesBuilder)代码,CoreModulesPackage里面封装了RN Framework(包括native和js端)核心功能,包括:通信、调试等,调用processPackage将coreModulesPackage里面对应的NativeModules注册到JavaModule注册表中,对应的JSModules注册到JavaScriptModule注册表中,底下就会执行用户自定义的ReactPackage,将对应的modules注册到相应的注册表中,JavaModule注册表和JavaScriptModule注册表注册完毕之后,就是去生成一个catalystInstance,这个类主要是负责三端的通信(通过ReactBridge,在catalystInstance的构造函数中调用initializeBridge方法生成),接着调用setGlobalVariable(Native方法)把Java Registry转换为Json,再由C++层传送到JS层。catalystInstance相应的处理执行完之后,将其与reactContext关联起来,最后通过catalystInstance加载bundle文件。 总的来说,createReactContext方法主要完成了以下操作: 构建 ReactApplicationContext;注册 Packages 原生模块;构建 CatalystInstance 实例;通过 CatalystInstance 实例调用C++层代码逻辑;调用 CatalystInstance 实例的 runJSBundle 方法加载 JSBundle。到这里,我们基本开清楚了原生是如何加载JSBundle的:即通过 CatalystInstance 来加载 JSBundle 文件。 下面让我们继续看 runJSBundle方法: @Override public void runJSBundle() { Assertions.assertCondition(!mJSBundleHasLoaded, "JS bundle was already loaded!"); // 通过 JSBundleLoader 去执行加载,不同的加载方式 JSBundleLoader 实现方式不同 mJSBundleLoader.loadScript(CatalystInstanceImpl.this); synchronized (mJSCallsPendingInitLock) { // 在 JS 线程上排队加载 bundle,此时可能还没有运行。 在这里设置它是安全的,因为它所关联的任何工作都将在加载完成之后的JS线程上排队执行。 mAcceptCalls = true; for (PendingJSCall function : mJSCallsPendingInit) { function.call(this); } mJSCallsPendingInit.clear(); mJSBundleHasLoaded = true; } Systrace.registerListener(mTraceListener); }在 runJSBundle 方法中通过JSBundleLoader的 loadScript 方法去加载JSBundle,不同的加载方式 JSBundleLoader 实现方式不同。 JSBundleLoaderJSBundleLoader主要用于存储 JS 包的信息,允许 CatalystInstance 通过 ReactBridge 加载正确的包。 public abstract class JSBundleLoader { /** * 建议将此加载程序用于应用程序的发布版本。 在这种情况下,应该使用本地JS执行程序。 将从本机代码中的资源读取JS包,以节省将大型字符串从java传递到本机内存。 */ public static JSBundleLoader createAssetLoader( final Context context, final String assetUrl, final boolean loadSynchronously) { return new JSBundleLoader() { @Override public String loadScript(CatalystInstanceImpl instance) { instance.loadScriptFromAssets(context.getAssets(), assetUrl, loadSynchronously); return assetUrl; } }; } /** * 此加载程序从文件系统加载包。 将使用本机代码读取该包,以节省将大型字符串从java传递到本机内存。 */ public static JSBundleLoader createFileLoader(final String fileName) { return createFileLoader(fileName, fileName, false); } public static JSBundleLoader createFileLoader( final String fileName, final String assetUrl, final boolean loadSynchronously) { return new JSBundleLoader() { @Override public String loadScript(CatalystInstanceImpl instance) { instance.loadScriptFromFile(fileName, assetUrl, loadSynchronously); return fileName; } }; } /** * 从dev服务器重新加载bundle时使用此加载器。 在这种情况下,加载器期望预取JS包并存储在本地文件中。 * 我们这样做是为了避免在java和本机代码之间传递大字符串,并避免在java中分配内存以适应整个JS包。 * 为了使JS堆栈跟踪能够正常工作并允许源映射正确地对其进行符号化,需要提供正确的下载bundle的sourceURL。 */ public static JSBundleLoader createCachedBundleFromNetworkLoader( final String sourceURL, final String cachedFileLocation) { return new JSBundleLoader() { @Override public String loadScript(CatalystInstanceImpl instance) { try { instance.loadScriptFromFile(cachedFileLocation, sourceURL, false); return sourceURL; } catch (Exception e) { throw DebugServerException.makeGeneric(e.getMessage(), e); } } }; } /** * 此加载程序用于从开发服务器加载增量包。 我们将每个delta消息传递给加载器并在C ++中处理它。 * 将其作为字符串传递会由于内存副本而导致效率低下,这必须在后续处理中解决。 */ public static JSBundleLoader createDeltaFromNetworkLoader( final String sourceURL, final NativeDeltaClient nativeDeltaClient) { return new JSBundleLoader() { @Override public String loadScript(CatalystInstanceImpl instance) { try { instance.loadScriptFromDeltaBundle(sourceURL, nativeDeltaClient, false); return sourceURL; } catch (Exception e) { throw DebugServerException.makeGeneric(e.getMessage(), e); } } }; } /** * 启用代理调试时使用此加载程序。 在这种情况下,从设备获取捆绑包是没有意义的,因为远程执行器无论如何都必须这样做。 */ public static JSBundleLoader createRemoteDebuggerBundleLoader( final String proxySourceURL, final String realSourceURL) { return new JSBundleLoader() { @Override public String loadScript(CatalystInstanceImpl instance) { instance.setSourceURLs(realSourceURL, proxySourceURL); return realSourceURL; } }; } /** * 加载脚本,返回其加载的源的URL。 */ public abstract String loadScript(CatalystInstanceImpl instance); }runJSBundle的源码如下: @Override public void runJSBundle() { Log.d(ReactConstants.TAG, "CatalystInstanceImpl.runJSBundle()"); Assertions.assertCondition(!mJSBundleHasLoaded, "JS bundle was already loaded!"); // incrementPendingJSCalls(); mJSBundleLoader.loadScript(CatalystInstanceImpl.this); synchronized (mJSCallsPendingInitLock) { // Loading the bundle is queued on the JS thread, but may not have // run yet. It's safe to set this here, though, since any work it // gates will be queued on the JS thread behind the load. mAcceptCalls = true; for (PendingJSCall function : mJSCallsPendingInit) { function.call(this); } mJSCallsPendingInit.clear(); mJSBundleHasLoaded = true; } // This is registered after JS starts since it makes a JS call Systrace.registerListener(mTraceListener); }JSBundleLoader 类中提供了很多种 JSBundle 文件的加载方式,并且可以看到每种加载方式都是借助了CatalystInstanceImpl实例来实现。来看 CatalystInstanceImpl 中的具体实现: /* package */ void loadScriptFromAssets(AssetManager assetManager, String assetURL, boolean loadSynchronously) { mSourceURL = assetURL; jniLoadScriptFromAssets(assetManager, assetURL, loadSynchronously); } /* package */ void loadScriptFromFile(String fileName, String sourceURL, boolean loadSynchronously) { mSourceURL = sourceURL; jniLoadScriptFromFile(fileName, sourceURL, loadSynchronously); } /* package */ void loadScriptFromDeltaBundle( String sourceURL, NativeDeltaClient deltaClient, boolean loadSynchronously) { mSourceURL = sourceURL; jniLoadScriptFromDeltaBundle(sourceURL, deltaClient, loadSynchronously); } private native void jniSetSourceURL(String sourceURL); private native void jniRegisterSegment(int segmentId, String path); private native void jniLoadScriptFromAssets(AssetManager assetManager, String assetURL, boolean loadSynchronously); private native void jniLoadScriptFromFile(String fileName, String sourceURL, boolean loadSynchronously); private native void jniLoadScriptFromDeltaBundle(String sourceURL, NativeDeltaClient deltaClient, boolean loadSynchronously);可以看到,下面就调用jni层面的代码CatalystInstanceImpl.cpp里面的代码,C++层的代码我们不用太关心,只需要知道,经过这一步之后,js和java层面就可以相互调用类。如果想要看c++的实现,可以在node_modules的ReactAndroid目录中查看。
在之前的 runCreateReactContextOnNewThread 方法中,在creatReactContext之后还有一句核心的代码。 Runnable setupReactContextRunnable = new Runnable() { @Override public void run() { try { setupReactContext(reactApplicationContext); } catch (Exception e) { mDevSupportManager.handleException(e); } }ReactContext创建完毕之后,ReactContextInitAsyncTask就会执行onPostExecute中的setupReactContext(reactContext)方法。 private void setupReactContext(final ReactApplicationContext reactContext) { Log.d(ReactConstants.TAG, "ReactInstanceManager.setupReactContext()"); synchronized (mReactContextLock) { mCurrentReactContext = Assertions.assertNotNull(reactContext); } CatalystInstance catalystInstance = Assertions.assertNotNull(reactContext.getCatalystInstance()); catalystInstance.initialize(); mDevSupportManager.onNewReactContextCreated(reactContext); mMemoryPressureRouter.addMemoryPressureListener(catalystInstance); // 重置生命周期 moveReactContextToCurrentLifecycleState(); ReactMarker.logMarker(ATTACH_MEASURED_ROOT_VIEWS_START); // mAttachedRootViews 保存的是ReactRootView synchronized (mAttachedRootViews) { for (ReactRootView rootView : mAttachedRootViews) { // 将rootview测量并连接到 catalystInstance attachRootViewToInstance(rootView, catalystInstance); } } ReactMarker.logMarker(ATTACH_MEASURED_ROOT_VIEWS_END); ... 代码省略 }attachRootViewToInstance方法会将 rootview 与 catalystInstance 进行绑定。 private void attachRootViewToInstance( final ReactRootView rootView, CatalystInstance catalystInstance) { Log.d(ReactConstants.TAG, "ReactInstanceManager.attachRootViewToInstance()"); // 获取 UIManager UIManager uiManagerModule = UIManagerHelper.getUIManager(mCurrentReactContext, rootView.getUIManagerType()); // 设置 rootView final int rootTag = uiManagerModule.addRootView(rootView); rootView.setRootViewTag(rootTag); rootView.runApplication(); UiThreadUtil.runOnUiThread(new Runnable() { @Override public void run() { rootView.onAttachedToReactInstance(); } }); } private void attachRootViewToInstance( final ReactRootView rootView) { Log.d(ReactConstants.TAG, "ReactInstanceManager.attachRootViewToInstance()"); Systrace.beginSection(TRACE_TAG_REACT_JAVA_BRIDGE, "attachRootViewToInstance"); // 获取 UIManager UIManager uiManagerModule = UIManagerHelper.getUIManager(mCurrentReactContext, rootView.getUIManagerType()); // 设置 rootView final int rootTag = uiManagerModule.addRootView(rootView); rootView.setRootViewTag(rootTag); rootView.runApplication(); Systrace.beginAsyncSection( TRACE_TAG_REACT_JAVA_BRIDGE, "pre_rootView.onAttachedToReactInstance", rootTag); UiThreadUtil.runOnUiThread(new Runnable() { @Override public void run() { Systrace.endAsyncSection( TRACE_TAG_REACT_JAVA_BRIDGE, "pre_rootView.onAttachedToReactInstance", rootTag); rootView.onAttachedToReactInstance(); } }); Systrace.endSection(TRACE_TAG_REACT_JAVA_BRIDGE); }在 attachRootViewToInstance 方法中 设置 rootView tag,并执行 runApplication 方法。 void runApplication() { try { if (mReactInstanceManager == null || !mIsAttachedToInstance) { return; } // 此时 ReactContext 创建已完成 ReactContext reactContext = mReactInstanceManager.getCurrentReactContext(); if (reactContext == null) { return; } // 获取 catalystInstance CatalystInstance catalystInstance = reactContext.getCatalystInstance(); // 将启动时到初始化参数封装成 Bundle WritableNativeMap appParams = new WritableNativeMap(); appParams.putDouble("rootTag", getRootViewTag()); @Nullable Bundle appProperties = getAppProperties(); if (appProperties != null) { appParams.putMap("initialProps", Arguments.fromBundle(appProperties)); } if (getUIManagerType() == FABRIC) { appParams.putBoolean("fabric", true); } // 获取 moduleName, 设置加载状态 mShouldLogContentAppeared = true; String jsAppModuleName = getJSModuleName(); // 调用 catalystInstance 的 getJSModule 方法获取 AppRegistry,由Java层调用启动流程入口,执行其中的 runApplication 方法 catalystInstance.getJSModule(AppRegistry.class).runApplication(jsAppModuleName, appParams); } finally { Systrace.endSection(TRACE_TAG_REACT_JAVA_BRIDGE); } }runApplication最终调用的是catalystInstance.getJSModule(AppRegistry.class).runApplication(jsAppModuleName, appParams), AppRegistry.class是JS层暴露给Java层的接口方法。它的真正实现在AppRegistry.js里,在文章开始时,我们已经对它进行了简单介绍,AppRegistry.js 是运行所有RN应用的JS层入口。此时调用JS进行渲染,在通过UIManagerModule将JS组件转换成Android组件,最终显示在ReactRootView上。 |
【本文地址】
今日新闻 |
推荐新闻 |