4. Openlayers 点、线、面基本样式渲染(Vue 结合) |
您所在的位置:网站首页 › arcgis矢量图栅格化 › 4. Openlayers 点、线、面基本样式渲染(Vue 结合) |
4. Openlayers 点、线、面基本样式渲染(Vue 结合)
|
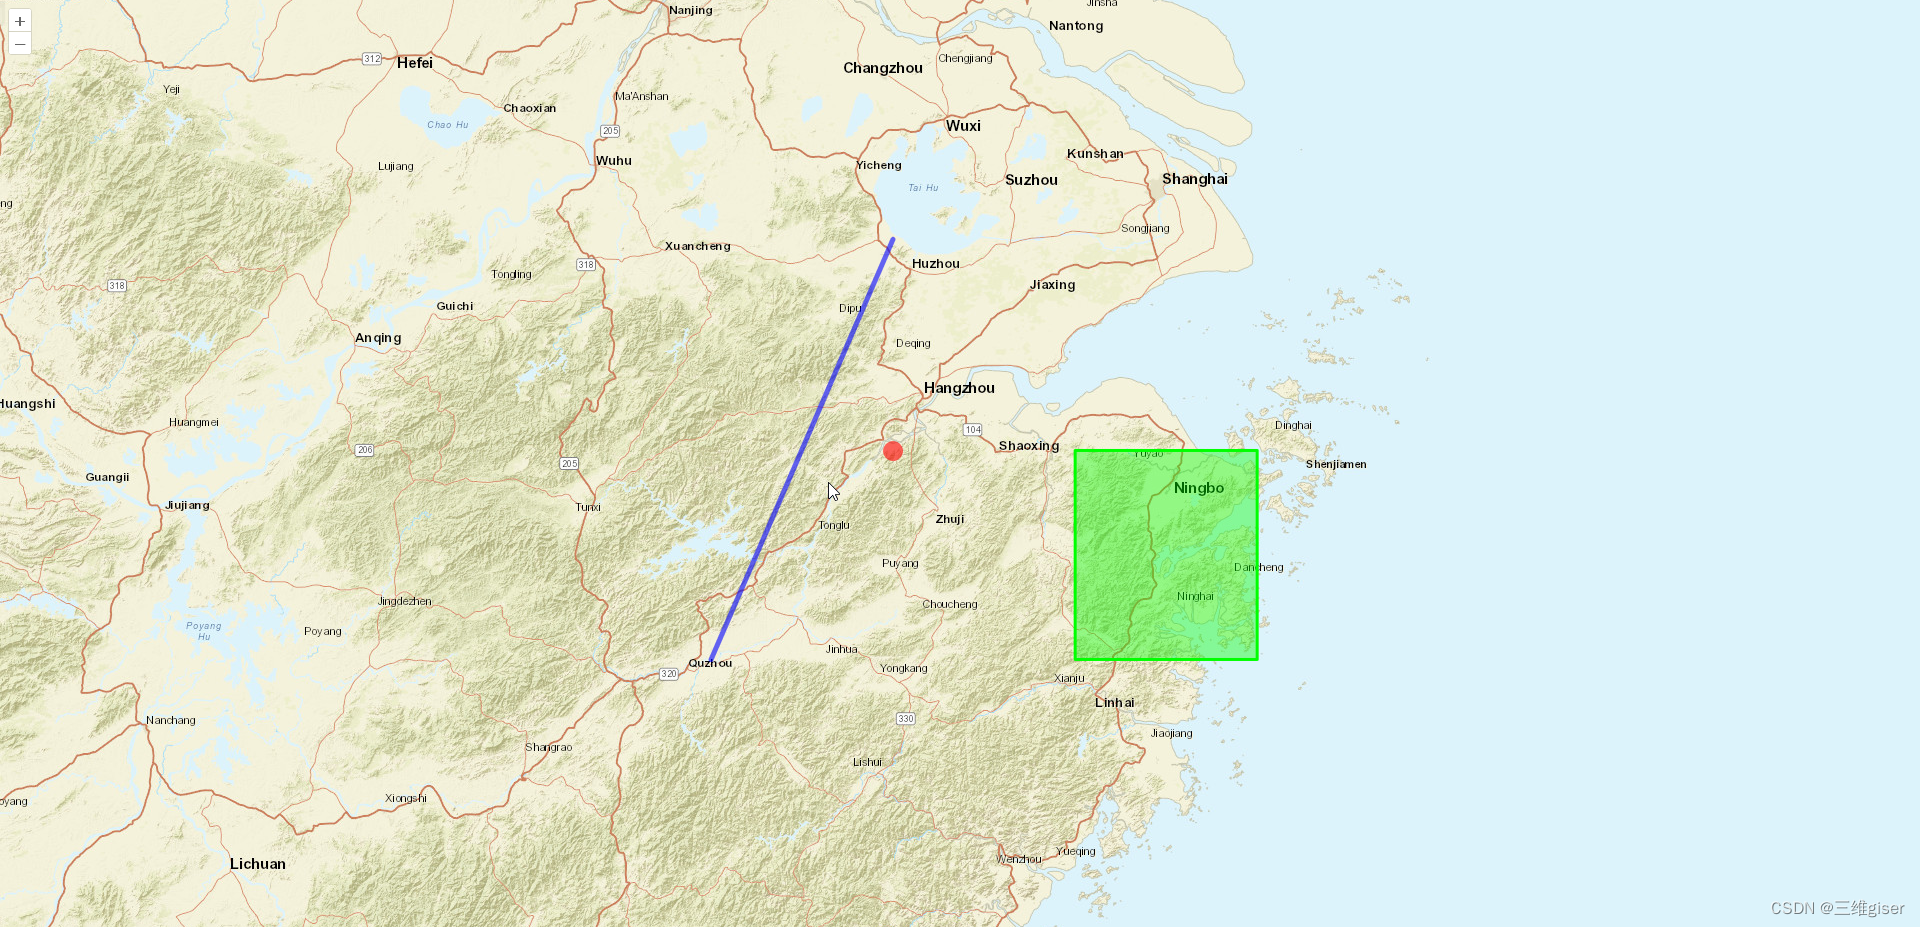
在本篇博客中,我们将学习如何在 OpenLayers 中使用样式系统,并在 Vue 项目中绘制点、线、面的基本样式。首先,我们将学习 OpenLayers 的样式系统,然后使用 Vue 创建一个地图组件,并在地图组件中添加点、线、面要素并为其设置样式。 效果截图:
1. OpenLayers 样式系统 OpenLayers 中的样式(Style)用于定义地图要素的外观。样式系统包括以下几个主要类型: Style:要素的基本样式,可以包括图形(image)、笔触(stroke)、填充(fill)等属性。Image:用于为点要素或标注设置图形。可以使用圆形(Circle)、图标(Icon)等不同类型的图形。Stroke:设置线条样式,例如颜色、宽度、虚线等。Fill:设置填充样式,例如颜色。 2. 创建 Vue 项目并引入 OpenLayers首先,在终端中运行以下命令创建一个新的 Vue 项目: vue create ol-vue-map然后进入项目目录,并安装 ol 和 ol-vue 依赖: cd ol-vue-map npm install ol ol-vue --save 3. 创建地图组件在 src/components 目录下创建一个名为 OlMap.vue 的新组件。接下来我们将在这个组件中创建地图以及绘制带有基本样式的点、线、面要素。 4. 添加地图容器和样式在 OlMap.vue 的模板部分添加一个 div 标签作为地图容器,并设置样式: .map { width: 100vw; height: 100vh; margin: 0; padding: 0; } 5. 添加地图及样式设置在 OlMap.vue 的脚本部分,首先导入所需的 OpenLayers 模块: import "ol/ol.css"; import Map from "ol/Map"; import View from "ol/View"; import TileLayer from "ol/layer/Tile"; import OSM from "ol/source/OSM"; import VectorLayer from "ol/layer/Vector"; import VectorSource from "ol/source/Vector"; import Feature from "ol/Feature"; import Point from "ol/geom/Point"; import LineString from "ol/geom/LineString"; import Polygon from "ol/geom/Polygon"; import { fromLonLat } from "ol/proj"; import { Circle, Fill, Stroke, Style } from "ol/style"; import XYZ from "ol/source/XYZ";接下来添加 createMap 方法,以实现地图的创建并绘制带有基本样式的点、线、面要素: export default { name: "OlMap", mounted() { // 创建地图 this.createMap(); }, methods: { createMap() { // 创建ArcGIS World Street Map图层 const arcGISLayer = new TileLayer({ source: new XYZ({ url: "https://server.arcgisonline.com/ArcGIS/rest/services/World_Street_Map/MapServer/tile/{z}/{y}/{x}" }) }); // 创建地图容器 const map = new Map({ target: this.$refs.map, layers: [arcGISLayer], view: new View({ center: fromLonLat([120, 30]), zoom: 8 }) }); // 绘制点、线、面要素 const pointFeature = new Feature({ geometry: new Point(fromLonLat([120, 30])), name: "Point" }); const lineFeature = new Feature({ geometry: new LineString([fromLonLat([119, 29]), fromLonLat([120, 31])]), name: "Line" }); const polygonFeature = new Feature({ geometry: new Polygon([ [ fromLonLat([121, 29]), fromLonLat([122, 29]), fromLonLat([122, 30]), fromLonLat([121, 30]), fromLonLat([121, 29]) ] ]), name: "Polygon" }); // 样式设置 const styleFunction = feature => { const geometryType = feature.getGeometry().getType(); const styles = { Point: new Style({ image: new Circle({ radius: 10, fill: new Fill({ color: "rgba(255, 0, 0, 0.6)" }) }) }), LineString: new Style({ stroke: new Stroke({ color: "rgba(0, 0, 255, 0.6)", width: 5 }) }), Polygon: new Style({ fill: new Fill({ color: "rgba(0, 255, 0, 0.4)" }), stroke: new Stroke({ color: "rgba(0, 255, 0, 1)", width: 3 }) }) }; return styles[geometryType]; }; // 创建矢量图层 const vectorLayer = new VectorLayer({ source: new VectorSource({ features: [pointFeature, lineFeature, polygonFeature] }), style: styleFunction }); // 将矢量图层添加到地图上 map.addLayer(vectorLayer); } } };将 OlMap.vue 组件导入到项目的主页面,并添加到模板中: import OlMap from "@/components/OlMap.vue"; export default { components: { OlMap, }, }; 6.完整代码 import "ol/ol.css"; import Map from "ol/Map"; import View from "ol/View"; import TileLayer from "ol/layer/Tile"; import OSM from "ol/source/OSM"; import VectorLayer from "ol/layer/Vector"; import VectorSource from "ol/source/Vector"; import Feature from "ol/Feature"; import Point from "ol/geom/Point"; import LineString from "ol/geom/LineString"; import Polygon from "ol/geom/Polygon"; import { fromLonLat } from "ol/proj"; import { Circle, Fill, Stroke, Style } from "ol/style"; import XYZ from "ol/source/XYZ"; export default { name: "OlMap", mounted() { // 创建地图 this.createMap(); }, methods: { createMap() { // 创建ArcGIS World Street Map图层 const arcGISLayer = new TileLayer({ source: new XYZ({ url: "https://server.arcgisonline.com/ArcGIS/rest/services/World_Street_Map/MapServer/tile/{z}/{y}/{x}" }) }); // 创建地图容器 const map = new Map({ target: this.$refs.map, layers: [arcGISLayer], view: new View({ center: fromLonLat([120, 30]), zoom: 8 }) }); // 绘制点、线、面要素 const pointFeature = new Feature({ geometry: new Point(fromLonLat([120, 30])), name: "Point" }); const lineFeature = new Feature({ geometry: new LineString([fromLonLat([119, 29]), fromLonLat([120, 31])]), name: "Line" }); const polygonFeature = new Feature({ geometry: new Polygon([ [ fromLonLat([121, 29]), fromLonLat([122, 29]), fromLonLat([122, 30]), fromLonLat([121, 30]), fromLonLat([121, 29]) ] ]), name: "Polygon" }); // 样式设置 const styleFunction = feature => { const geometryType = feature.getGeometry().getType(); const styles = { Point: new Style({ image: new Circle({ radius: 10, fill: new Fill({ color: "rgba(255, 0, 0, 0.6)" }) }) }), LineString: new Style({ stroke: new Stroke({ color: "rgba(0, 0, 255, 0.6)", width: 5 }) }), Polygon: new Style({ fill: new Fill({ color: "rgba(0, 255, 0, 0.4)" }), stroke: new Stroke({ color: "rgba(0, 255, 0, 1)", width: 3 }) }) }; return styles[geometryType]; }; // 创建矢量图层 const vectorLayer = new VectorLayer({ source: new VectorSource({ features: [pointFeature, lineFeature, polygonFeature] }), style: styleFunction }); // 将矢量图层添加到地图上 map.addLayer(vectorLayer); } } }; .map { width: 100vw; height: 100vh; margin: 0; padding: 0; }完成以上步骤后,在项目中运行主页面,您将看到一个包含点、线、面要素的地图。这些要素使用了自定义的样式进行绘制。希望本篇教程能帮助你了解如何在 Vue 项目中使用 OpenLayers 进行样式与渲染。祝你学习愉快! |
【本文地址】
今日新闻 |
推荐新闻 |