使用ArcGis+Python(GDAL)制作语义分割遥感数据集 |
您所在的位置:网站首页 › arcgis怎么裁剪img影像 › 使用ArcGis+Python(GDAL)制作语义分割遥感数据集 |
使用ArcGis+Python(GDAL)制作语义分割遥感数据集
|
遥感数据集制作ArcGis+Python
一、选择裁剪合适的影像区域二、创建标签shp文件,目视解译勾画标签区域三、标签shp修改属性并转换为tif文件四、使用python滑动裁剪图像及标签五、数据增强六、训练集(图像,标签)和验证集(图像,标签)
制作遥感数据集首先要有遥感影像数据。影像数据种类、来源很多,这里以GF-2的影像数据为例,制作用于
语义分割的数据集。直接获取的遥感影像需要进行预处理,进行大气校正、辐射定标等,这里不再介绍。这里使用预处理过后的GF-2影像(多光谱)进行数据集制作。
一、选择裁剪合适的影像区域
一景影像的数据非常大,我们所要使用的区域可能仅仅是一小部分,多余部分反而对数据集造成影像,而且影像尺寸过大,制作标签非常耗时耗力。因此要选择并裁剪所需要的区域。 选取技巧及原则: 1、选取矩形区域(利于滑动裁剪) 2、选择所要区分地物影像特征较强、对比明显的区域 3、类间差距大,类内差距小 1.1 打开ArcMap,加载影像。注意,实际上是4通道。制作的标签为RGB三通道,后面实际导出了三通道的影像。 1.2 新建shpfie文件,注意设置坐标系与影像一致。!!! 1.3画出所要选择的区域,尽量是矩形 1.4 使用裁剪工具裁剪 影像数据是tif,我们需要的标签数据也应是tif,但是要先通过矢量文件勾画标签区域,再转化为栅格数据。 2.1创建shp面文件,注意,设置坐标系与原始影像一致!! 2.2目视解译勾画区域,需要结合地物在遥感影像上的特点。结合色调(全色影像)、颜色(彩色影像)、阴影*、形状、纹理、大小等特征进行判断。 3.1 我们制作好标签shp后,修改它的属性id字段为255(0-255,RGB)。 结果:标签文件lable_4.tif 注意检查影像与标签的尺寸大小是否相同,必须相同才能进行下一步。 上述获得的影像数据和标签数据尺寸是几千几千,对于模型来说过大,这里使用python+gdal库自动裁剪为256256(或其他尺寸,2的n次方)的图像,并按一定命名方式存储(1,2,3。。。命名) 同时对影像数据和标签数据裁剪。 代码: import os import gdal import numpy as np # 读取tif数据集 def readTif(fileName): dataset = gdal.Open(fileName) if dataset == None: print(fileName + "文件无法打开") return dataset # 保存tif文件函数 def writeTiff(im_data, im_geotrans, im_proj, path): if 'int8' in im_data.dtype.name: datatype = gdal.GDT_Byte elif 'int16' in im_data.dtype.name: datatype = gdal.GDT_UInt16 else: datatype = gdal.GDT_Float32 if len(im_data.shape) == 3: im_bands, im_height, im_width = im_data.shape elif len(im_data.shape) == 2: im_data = np.array([im_data]) im_bands, im_height, im_width = im_data.shape # 创建文件 driver = gdal.GetDriverByName("GTiff") dataset = driver.Create(path, int(im_width), int(im_height), int(im_bands), datatype) if (dataset != None): dataset.SetGeoTransform(im_geotrans) # 写入仿射变换参数 dataset.SetProjection(im_proj) # 写入投影 for i in range(im_bands): dataset.GetRasterBand(i + 1).WriteArray(im_data[i]) del dataset ''' 滑动窗口裁剪函数 TifPath 影像路径 SavePath 裁剪后保存目录 CropSize 裁剪尺寸 RepetitionRate 重复率 ''' def TifCrop(TifPath, SavePath, CropSize, RepetitionRate): dataset_img = readTif(TifPath) width = dataset_img.RasterXSize height = dataset_img.RasterYSize proj = dataset_img.GetProjection() geotrans = dataset_img.GetGeoTransform() img = dataset_img.ReadAsArray(0, 0, width, height) # 获取数据 # 获取当前文件夹的文件个数len,并以len+1命名即将裁剪得到的图像 new_name = len(os.listdir(SavePath)) # 裁剪图片,重复率为RepetitionRate for i in range(int((height - CropSize * RepetitionRate) / (CropSize * (1 - RepetitionRate)))): for j in range(int((width - CropSize * RepetitionRate) / (CropSize * (1 - RepetitionRate)))): # 如果图像是单波段 if (len(img.shape) == 2): cropped = img[ int(i * CropSize * (1 - RepetitionRate)): int(i * CropSize * (1 - RepetitionRate)) + CropSize, int(j * CropSize * (1 - RepetitionRate)): int(j * CropSize * (1 - RepetitionRate)) + CropSize] # 如果图像是多波段 else: cropped = img[:, int(i * CropSize * (1 - RepetitionRate)): int(i * CropSize * (1 - RepetitionRate)) + CropSize, int(j * CropSize * (1 - RepetitionRate)): int(j * CropSize * (1 - RepetitionRate)) + CropSize] # 写图像 writeTiff(cropped, geotrans, proj, SavePath + "/%d.tif" % new_name) # 文件名 + 1 new_name = new_name + 1 # 向前裁剪最后一列 for i in range(int((height - CropSize * RepetitionRate) / (CropSize * (1 - RepetitionRate)))): if (len(img.shape) == 2): cropped = img[int(i * CropSize * (1 - RepetitionRate)): int(i * CropSize * (1 - RepetitionRate)) + CropSize, (width - CropSize): width] else: cropped = img[:, int(i * CropSize * (1 - RepetitionRate)): int(i * CropSize * (1 - RepetitionRate)) + CropSize, (width - CropSize): width] # 写图像 writeTiff(cropped, geotrans, proj, SavePath + "/%d.tif" % new_name) new_name = new_name + 1 # 向前裁剪最后一行 for j in range(int((width - CropSize * RepetitionRate) / (CropSize * (1 - RepetitionRate)))): if (len(img.shape) == 2): cropped = img[(height - CropSize): height, int(j * CropSize * (1 - RepetitionRate)): int(j * CropSize * (1 - RepetitionRate)) + CropSize] else: cropped = img[:, (height - CropSize): height, int(j * CropSize * (1 - RepetitionRate)): int(j * CropSize * (1 - RepetitionRate)) + CropSize] writeTiff(cropped, geotrans, proj, SavePath + "/%d.tif" % new_name) # 文件名 + 1 new_name = new_name + 1 # 裁剪右下角 if (len(img.shape) == 2): cropped = img[(height - CropSize): height, (width - CropSize): width] else: cropped = img[:, (height - CropSize): height, (width - CropSize): width] writeTiff(cropped, geotrans, proj, SavePath + "/%d.tif" % new_name) new_name = new_name + 1 #训练集和验证集都要裁剪 #裁剪出 图像 特征。拿到 影像数据增强中进行数据增强 # 将影像1裁剪为重复率为0.1的256×256的数据集 #图像 TifCrop(r"E:\python\dx_data\area_3.tif", r"E:\python\dx_data\train\image1", 256, 0.1) #标签 # TifCrop(r"E:\python\dx_data\lable.tif", # r"E:\python\dx_data\train\lable1", 256, 0.1) #标签裁剪不正确????标签255问题???? #可能是无背景的原因 #已解决 #见笔记结果: 影像 数据增强是根据上述获得的裁剪后的256*256的影像和标签进行图像变换,实现数据集增多。 代码: import gdal import numpy as np import os import cv2 # 读取tif数据集 def readTif(fileName, xoff=0, yoff=0, data_width=0, data_height=0): dataset = gdal.Open(fileName) if dataset == None: print(fileName + "文件无法打开") # 栅格矩阵的列数 width = dataset.RasterXSize # 栅格矩阵的行数 height = dataset.RasterYSize # 波段数 bands = dataset.RasterCount # 获取数据 if (data_width == 0 and data_height == 0): data_width = width data_height = height data = dataset.ReadAsArray(xoff, yoff, data_width, data_height) # 获取仿射矩阵信息 geotrans = dataset.GetGeoTransform() # 获取投影信息 proj = dataset.GetProjection() return width, height, bands, data, geotrans, proj # 保存tif文件函数 def writeTiff(im_data, im_geotrans, im_proj, path): if 'int8' in im_data.dtype.name: datatype = gdal.GDT_Byte elif 'int16' in im_data.dtype.name: datatype = gdal.GDT_UInt16 else: datatype = gdal.GDT_Float32 if len(im_data.shape) == 3: im_bands, im_height, im_width = im_data.shape elif len(im_data.shape) == 2: im_data = np.array([im_data]) im_bands, im_height, im_width = im_data.shape # 创建文件 driver = gdal.GetDriverByName("GTiff") dataset = driver.Create(path, int(im_width), int(im_height), int(im_bands), datatype) if (dataset != None): dataset.SetGeoTransform(im_geotrans) # 写入仿射变换参数 dataset.SetProjection(im_proj) # 写入投影 for i in range(im_bands): dataset.GetRasterBand(i + 1).WriteArray(im_data[i]) del dataset #训练集的数据及标签 train_image_path = r"E:\python\dx_data\train\image1" train_label_path = r"E:\python\dx_data\train\lable1" # 进行几何变换数据增强 imageList = os.listdir(train_image_path) labelList = os.listdir(train_label_path) tran_num = len(imageList) + 1 for i in range(len(imageList)): # 图像 img_file = train_image_path + "\\" + imageList[i] im_width, im_height, im_bands, im_data, im_geotrans, im_proj = readTif(img_file) # 标签 label_file = train_label_path + "\\" + labelList[i] label = cv2.imread(label_file) # 图像水平翻转 im_data_hor = np.flip(im_data, axis=2) hor_path = train_image_path + "\\" + str(tran_num) + imageList[i][-4:] writeTiff(im_data_hor, im_geotrans, im_proj, hor_path) # 标签水平翻转 Hor = cv2.flip(label, 1) hor_path = train_label_path + "\\" + str(tran_num) + labelList[i][-4:] cv2.imwrite(hor_path, Hor) tran_num += 1 # 图像垂直翻转 im_data_vec = np.flip(im_data, axis=1) vec_path = train_image_path + "\\" + str(tran_num) + imageList[i][-4:] writeTiff(im_data_vec, im_geotrans, im_proj, vec_path) # 标签垂直翻转 Vec = cv2.flip(label, 0) vec_path = train_label_path + "\\" + str(tran_num) + labelList[i][-4:] cv2.imwrite(vec_path, Vec) tran_num += 1 # 图像对角镜像 im_data_dia = np.flip(im_data_vec, axis=2) dia_path = train_image_path + "\\" + str(tran_num) + imageList[i][-4:] writeTiff(im_data_dia, im_geotrans, im_proj, dia_path) # 标签对角镜像 Dia = cv2.flip(label, -1) dia_path = train_label_path + "\\" + str(tran_num) + labelList[i][-4:] cv2.imwrite(dia_path, Dia) tran_num += 1获得的数据将继续按顺序使用数字命名在相同文件夹下 六、训练集(图像,标签)和验证集(图像,标签)结果上述步骤,获得众多影像数据和标签数据。 |


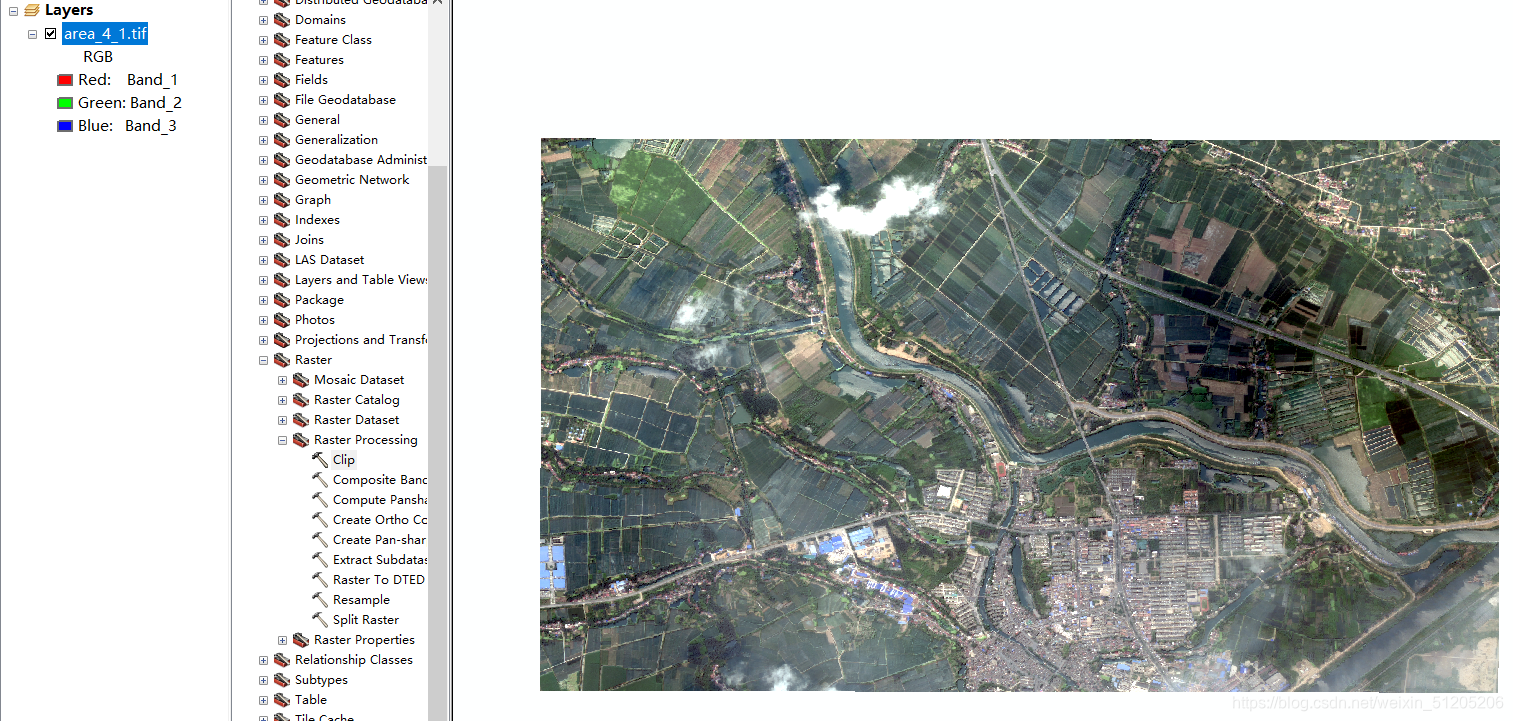
 可使用data export导出三通道tif。
  结果:原始影像area_4_1.tif就做好了,(5332,3587,3)
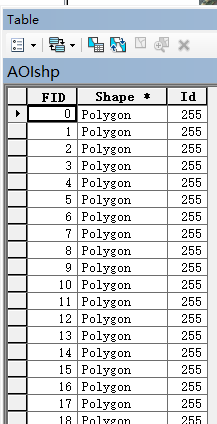 3.2 转换为tif文件,注意:一定要设置像元大小与原始图像一致!! 否则有精度丢失!!
  3.3 使用reclassify工具将生成tif文件的背景Nodata修改为0(0-255)
 标签
标签 
 这里需要手动分割出验证集,新建文件夹存放,按一定比例分割。 注意:影像要与标签一一对应,即名称相同!
  这样就制作好了一份遥感数据集用于语义分割,包括训练集(影像,标签)和验证集(影像,标签) 可在模型训练过程中不断调整数据集。
【本文地址】
今日新闻 |
推荐新闻 |