android 自定义菜单开发 |
您所在的位置:网站首页 › android添加菜单 › android 自定义菜单开发 |
android 自定义菜单开发

android 自定义菜单 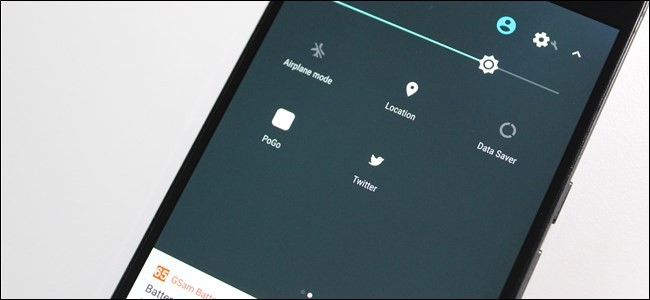
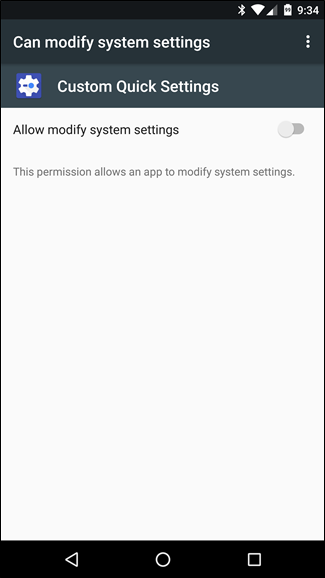
Android 7.0 Nougat brings a lot of new features and refinements to the table, like the ability to customize Android’s Quick Settings panel with custom tile containing unique toggles and even app or web shortcuts. Android 7.0 Nougat为该表带来了许多新功能和改进 ,例如能够使用包含唯一切换键甚至应用程序或Web快捷键的自定义图块自定义Android的“快速设置”面板 。 The introduction of the new Quick Settings Tile API not only makes it possible for the panel to be customized, but also allows developers to create custom tools designed specifically for the Quick Settings area. One such tool is called “Custom Quick Settings,” and it allows users to build just that: custom tiles for the quick settings area—including app shortcuts, browser links, and more. It’s an incredibly powerful, yet easy-to-use tool. 新的快速设置图块API的引入不仅可以自定义面板,还允许开发人员创建专门为“快速设置”区域设计的自定义工具。 一种这样的工具称为“ 自定义快速设置 ”,它允许用户构建以下内容:快速设置区域的自定义磁贴-包括应用程序快捷方式,浏览器链接等。 这是一个功能强大但易于使用的工具。 This guide was written for Android 7.0 Nougat, but the app we’re using also works with Android 6.0 Marshmallow–just under a slightly different set of behind-the-scenes rules. You have to enable the System UI Tuner before using Custom Quick Settings, but otherwise it should work the same as it does on Android 7.0. Also, if your device is rooted, it can add and delete new tiles automatically. For unrooted devices, however, you have to do this manually (which is what we’ll be doing in this guide). 本指南是为Android 7.0牛轧糖编写的,但我们正在使用的应用程序也可与Android 6.0棉花糖一起使用-只是在一组稍有不同的幕后规则下。 你必须启用系统UI调谐器使用自定义快速设置之前,但除此之外,它应该工作一样它在Android 7.0。 同样,如果您的设备已植树,则可以自动添加和删除新的图块。 但是,对于无根设备,您必须手动执行此操作(这将在本指南中进行)。 Before you get started with Custom Quick Settings, you’ll need to install it and get it set up. When you start it up for the first time, the app will guide you through giving it permission to modify system settings so it can create the tiles. 开始使用“自定义快速设置”之前,您需要先安装并进行设置。 首次启动时,该应用程序将指导您完成修改系统设置的权限,以便它可以创建图块。 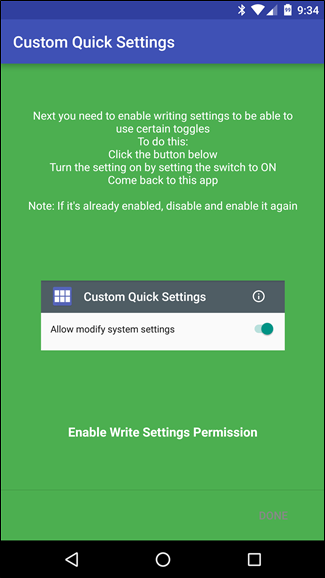
It’s worth noting that there are two versions of Custom Quick Settings: free and pro. While the free version is great to get started with, the pro version ($1.50) really unlocks the app’s full potential with more custom icons and more detailed custom actions. I’m using the pro version in this guide, but you should be able to easily follow along with the free version. 值得注意的是,自定义快速设置有两个版本:免费版和专业版。 免费版非常适合入门,但专业版($ 1.50)可以通过更多自定义图标和更详细的自定义操作来释放应用的全部潜力。 我在本指南中使用的是专业版,但是您应该可以轻松地跟随免费版。 If there’s one thing you should know about Custom Quick Settings before jumping in, it’s that it can be a little touchy. By that, I mean that if you don’t do things in a certain order, it can get a little bit buggy and crash. If you follow along in order, though, it works perfectly. 如果您在进入之前应该对“自定义快速设置”有所了解,那可能会有点动听。 就是说,我的意思是,如果您不按一定的顺序进行操作,则可能会遇到一些小问题并崩溃。 但是,如果您按顺序进行操作,则效果很好。 It’s also worth mentioning that at one point, it somehow duplicated my Bluetooth icon, and I’m not sure why. A reboot fixed the issue and I wasn’t able to replicate it, so I’m not sure what caused it. Either way, a quick reboot will fix it once you’ve finished creating your custom tile. 还值得一提的是,它曾经以某种方式复制了我的蓝牙图标,但我不确定为什么。 重新启动解决了该问题,并且我无法复制它,因此我不确定是什么原因造成的。 无论哪种方式,一旦完成自定义图块的创建,快速重启都将修复它。 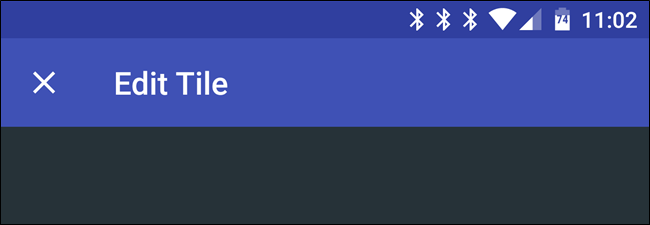
Okay! So with that, let’s get started. With the app in the foreground, tap the little plus sign in the bottom right corner. 好的! 因此,让我们开始吧。 将应用程序置于前台,点击右下角的小加号。 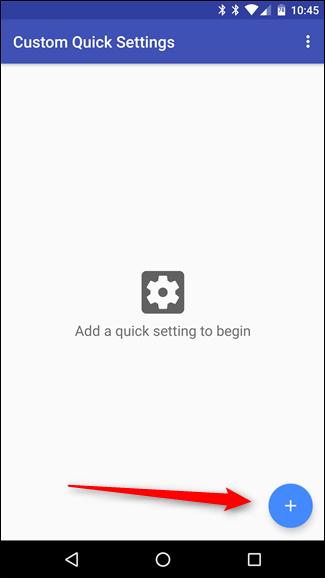
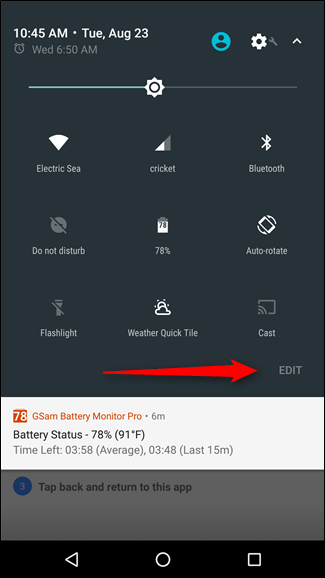
The “Add Tile” dialog will show up telling you exactly what to do: pull down the notification shade twice to show the quick settings menu, then tap “Edit.” 将出现“添加图块”对话框,告诉您确切的操作:两次下拉通知栏以显示快速设置菜单,然后点击“编辑”。 
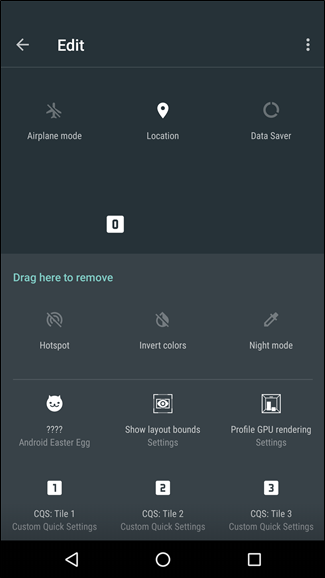
In the Edit menu, scroll down and find the tile titled “CQS: Tile 0” and drag it to the top section. Once it’s in place, tap the back button. 在“编辑”菜单中,向下滚动并找到标题为“ CQS:图块0”的图块,然后将其拖动到顶部。 安装到位后,点击“后退”按钮。 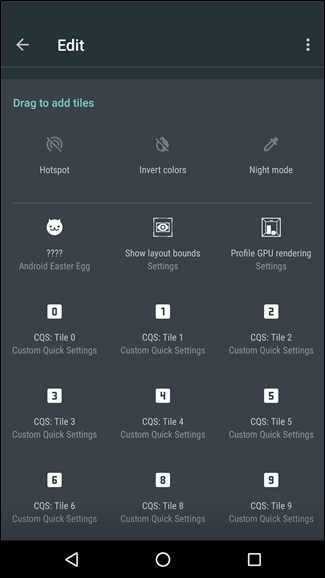
The app should detect the new tile and automatically switch to the “New Tile” edit menu in the Custom Quick Settings app, which is where you’ll start customizing your new button. 该应用程序应该检测到新的图块,并自动切换到“自定义快速设置”应用程序中的“新图块”编辑菜单,从这里开始自定义新按钮。 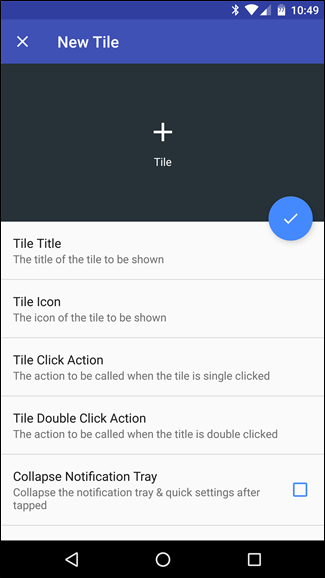
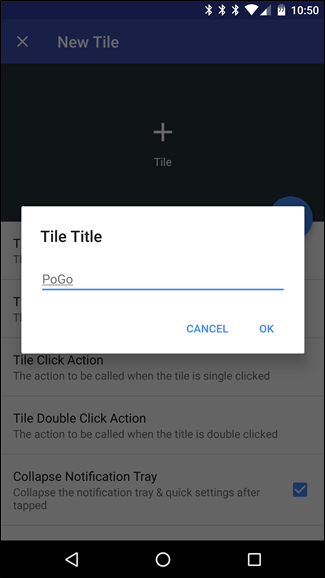
First things first: let’s add a title. I’m going to be creating a quick setting for Pokémon GO, because you never know when a wild rare Pokémon will spawn and you need to access the app right that second. To keep it short and sweet, I’m going to just name it “PoGo”—remember, this is going in a small area, so brevity is key with tile names. Tap the “Tile Title” section to give it a name. 首先,我们要添加一个标题。 我将为PokémonGO创建一个快速设置,因为您永远不知道何时会出现野生稀有的Pokémon,并且您需要立即访问该应用程序。 为了简短易懂,我将其命名为“ PoGo”,请记住,这是在一个较小的区域中进行的,因此简洁是瓷砖名称的关键。 点击“标题”部分为其命名。 
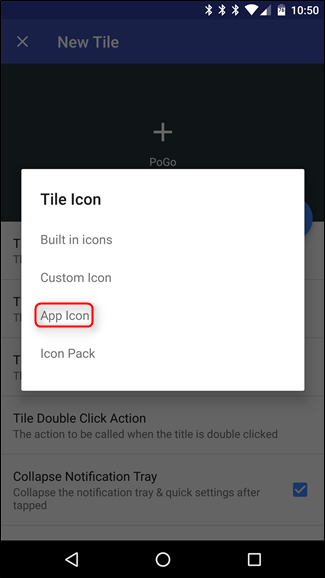
Next, add an icon. Just tap the “Tile Icon” button, which will show a list of options: Built-in icons, Custom icon, App Icon, or Icon Pack. It’s worth noting that some of these are only available in the pro version of the app (like Custom Icons). I’m just going to use the app’s stock icon, so go ahead and choose “App Icon” here. 接下来,添加一个图标。 只需点击“平铺图标”按钮,它将显示选项列表:内置图标,自定义图标,应用程序图标或图标包。 值得注意的是,其中一些仅在应用程序的专业版中可用(例如“自定义图标”)。 我将使用该应用程序的股票图标,因此继续并在此处选择“应用程序图标”。 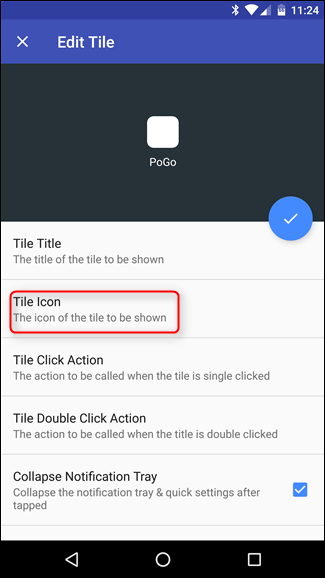
A list will generate, so scroll to the app you want to use and tap it. Note that the QS area only supports white icons, so Custom Quick Settings will basically just white-out the stock icon. It works well with some apps—mostly ones that have transparent backgrounds and a simple icon, like Chrome—but for Pokemon Go I’m going to be stuck with a square. I’m okay with that. 将会生成一个列表,因此滚动至要使用的应用并点击它。 请注意,QS区域仅支持白色图标,因此“自定义快速设置”基本上只会使库存图标变白。 它适用于某些应用程序-大多数应用程序具有透明的背景和一个简单的图标(例如Chrome)-但对于Pokemon Go,我将陷入一个正方形。 我可以。 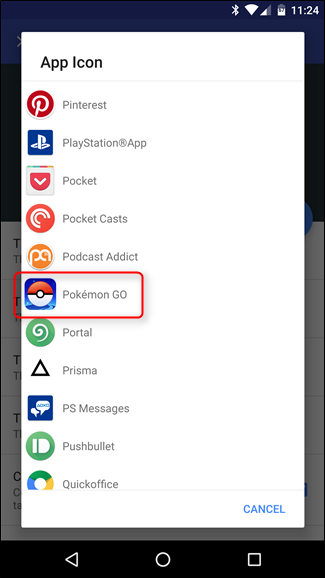
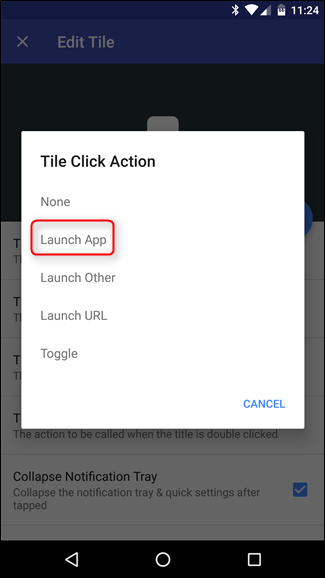
Now for the important stuff: action. Tap on the “Tile Click Action” button to define what you want this shortcut to do. Again, there are a handful of options here: None, Launch app, Launch other, Launch URL, and Toggle. while “none,” “app,” and “toggle” are all pretty self-explanatory, “other” is a little vague. This is basically a more advance settings that can execute things like Nova Actions or other activities. 现在介绍重要内容:行动。 点击“平铺点击操作”按钮,定义您希望此快捷方式执行的操作。 同样,这里有一些选项:无,启动应用,启动其他,启动URL和切换。 “ none”,“ app”和“ toggle”都是不言自明的,而“ other”则有点模糊。 这基本上是一种更高级的设置,可以执行诸如Nova Actions或其他活动之类的操作。 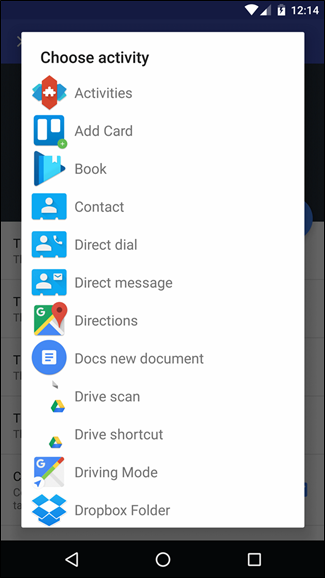
For the sake of simplicity, however, we’re just adding an app. Go ahead and tap “Launch App.” 但是,为了简单起见,我们仅添加一个应用程序。 继续并点击“启动应用程序”。 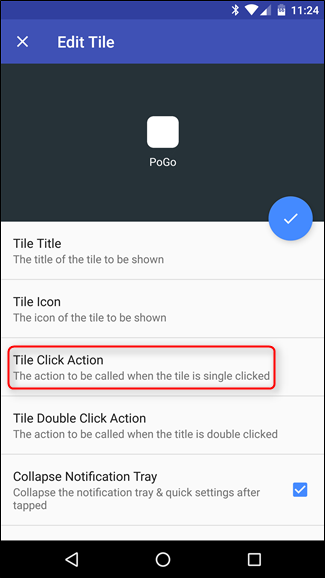
Another list will generate, so just scroll down to the app you want to add to the menu. 将会生成另一个列表,因此只需向下滚动到要添加到菜单的应用程序即可。 
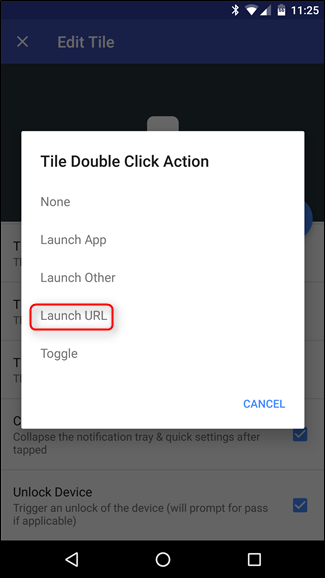
From here, you can also set a double-click action. Basically, this means tapping the tile twice can do a secondary action, making this shortcut super useful. I’m actually going to use this option to launch a custom URL—go ahead and tap “Tile Double Click Action,” then “Launch URL” (assuming you want to add a URL to your tile, if not, skip this step). 在这里,您还可以设置双击动作。 基本上,这意味着轻按两次磁贴可以执行辅助操作,从而使此快捷方式超级有用。 我实际上将使用此选项来启动自定义URL,请继续并依次点击“平铺双击动作”,然后点击“启动URL”(假设您要向图块添加URL,如果没有,请跳过此步骤) 。 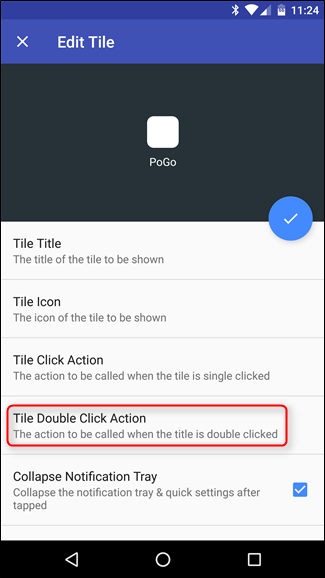
I’m adding PoGoToolkit as my secondary action, because the evolution calculator there is super helpful when trying to decide which of your 74 Eevees to evolve. After you’ve added the URL, just tap “OK.” 我将PoGoToolkit添加为我的辅助操作,因为在尝试确定74个Eevees中的哪个要进化时,那里的进化计算器非常有用。 添加网址后,只需点击“确定”。 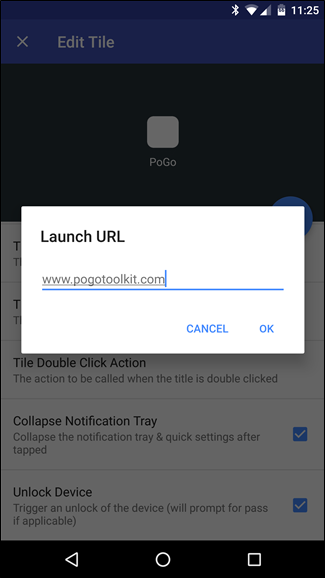
Finally, there are a few extra options you can choose: Collapse Notification Tray and Unlock Device. Those are pretty self-explanatory: if you’d like to close the tray after executing the intended command, check the first box; if you’d also like for it to to unlock the phone, check the second. Easy-peasy. 最后,您可以选择一些其他选项:折叠通知托盘和解锁设备。 这些都是不言自明的:如果您要在执行预期的命令后关闭托盘,请选中第一个框;否则,请单击“确定”。 如果您还希望它解锁手机,请检查第二个。 十分简单。 
With that, your custom tile is finished. Just tap the circular check mark icon at the top. Done. 这样,您的自定义图块就完成了。 只需点击顶部的圆形复选标记图标。 做完了 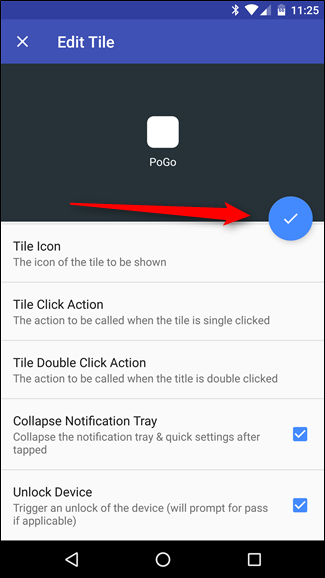
The new tile will now be in place in the Quick Settings menu. Exit the Custom Quick Settings app, pull down the shade, and give it a go. 现在,新的磁贴将在“快速设置”菜单中就位。 退出“自定义快速设置”应用程序,拉下阴影,然后松开它。 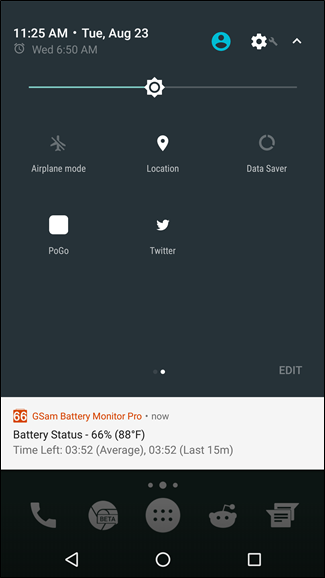
This is just the tip of the iceberg for what’s really possible with the Quick Settings API. As Android 7.0 gains adoption, we’re likely going to see more and more developers release unique and interesting apps that utilize this new API. Unfortunately, it’s still unclear how this will work with manufacturer skins (Samsung and LG have both disabled the System UI tuner on Marshmallow, so apps like Custom Quick Settings won’t work), so that’s something we’ll just have to wait to find out. 这只是冰山一角,而使用Quick Settings API确实可以实现。 随着Android 7.0的采用,我们可能会看到越来越多的开发人员发布利用此新API的独特而有趣的应用程序。 不幸的是,目前尚不清楚这将如何与制造商的皮肤一起使用(三星和LG均已禁用了棉花糖上的系统UI调谐器,因此“自定义快速设置”之类的应用将无法正常工作),因此我们只需要等待发现即可。出来。 翻译自: https://www.howtogeek.com/268406/how-to-create-custom-tiles-for-androids-quick-settings-menu/ android 自定义菜单 |
【本文地址】
今日新闻 |
推荐新闻 |