分享一个围绕物体旋转的方案以及现成的组件 |
您所在的位置:网站首页 › ai怎么围绕一个点旋转 › 分享一个围绕物体旋转的方案以及现成的组件 |
分享一个围绕物体旋转的方案以及现成的组件
|
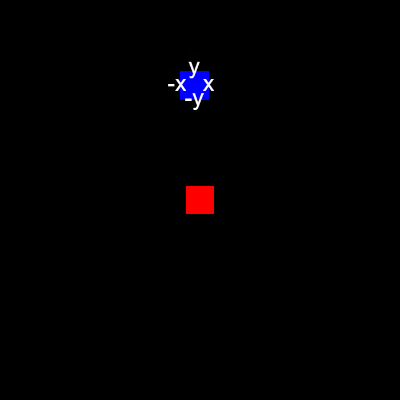
前排提示:由于不太懂MD排版,想要看排版好一点的可以前往微信公众号推文 传送门 前言在游戏开发过程中,可能会有让一个物体围绕另一个物体旋转的需求,就比如 月球围绕着地球旋转,同时地球也在围绕着太阳旋转 。 本文给大家分享一个实现 围绕物体旋转 的方案以及 可直接使用的组件 。 效果展示节点层级( A 为被围绕节点):
成品组件(挂载在节点 B 上):
运行效果图(动图录制帧率较低):
对于这类持续运动的实现,我们都可以在 update 中每帧进行操作。 首先假定有两个物体 A 与 B ,且二者处于同一层级或者将 A 作为 B 的父节点。我们每帧都根据 A 的位置、两者的角度以及他们之间的距离来计算 B 的位置,这样即使 A 的位置发生变化 B 也能在正确的轨道上运动。 如果两个节点处于不同的层级则可能需要经过坐标系的转换,但是原理是相同的,所以本文不讨论该情况。 并且我们可以根据二者之间的角度来让 B 的某一面始终指向 A 。 代码实现提示:完整组件文件链接在文章底部 ↓ 首先定义一个枚举 Axis 来作为旋转时的指向选项,同时导出给外部调用: export enum Axis { PositiveX, // 正 X 轴 PositiveY, // 正 Y 轴 NegativeX, // 负 X 轴 NegativeY, // 负 Y 轴 } 定义我们需要用到的属性和参数(只有 faceToTarget 为 true 时才会显示 faceAxis 选项): @property({ type: cc.Node, tooltip: '围绕旋转的目标' }) public target: cc.Node = null; @property({ tooltip: '顺时针旋转' }) public clockwise: boolean = true; @property({ tooltip: '旋转一圈花费的时间' }) public timePerRound: number = 10; @property({ tooltip: '是否始终面向目标节点' }) public faceToTarget: boolean = false; @property({ type: cc.Enum(Axis), tooltip: '面向目标节点的轴:\n- PositiveX:正 X 轴\n- PositiveY:正 Y 轴\n- NegativeX:负 X 轴\n- NegativeY:负 Y 轴', visible() { return this.faceToTarget } }) public faceAxis: Axis = Axis.NegativeY; @property({ tooltip: '自动开始旋转' }) public autoStart: boolean = false; public angle: number = 0; // 角度 public radius: number = 0; // 半径 private isRotating: boolean = false; // 标志位,是否正在旋转 然后我们需要一个 public 的 run 函数来作为启动函数,这样就可以在其他脚本主动调用该函数了。并且在启动函数里先获取初始的角度和半径: /** * 开始围绕目标节点旋转 * @param target 目标节点 * @param clockwise 是否顺时针旋转 * @param timePerRound 旋转一圈的时间 * @param faceToTarget 是否始终面向目标节点 * @param faceAxis 面向目标节点的轴 */ public run(target?: cc.Node, clockwise?: boolean, timePerRound?: number, faceToTarget?: boolean, faceAxis?: Axis) { if (target) this.target = target; if (clockwise) this.clockwise = clockwise; if (timePerRound) this.timePerRound = timePerRound; if (faceToTarget) this.faceToTarget = faceToTarget; if (faceAxis) this.faceAxis = faceAxis; if (!this.target) { cc.log('No target!'); return; } // 计算初始角度和半径 this.angle = this.getAngle(this.target.getPosition(), this.node.getPosition()); this.radius = this.getDistance(this.target.getPosition(), this.node.getPosition()); // 开始 this.isRotating = true; } 其中的 getAngle 函数用来计算两个点之间的角度: /** * 获取两点间的角度 * @param p1 点1 * @param p2 点2 */ private getAngle(p1: cc.Vec2, p2: cc.Vec2): number { return Math.atan(p2.y - p1.y / p2.x - p1.x); } 而 getDistance 函数用来计算两个点之间的距离: /** * 获取两点间的距离 * @param p1 点1 * @param p2 点2 */ private getDistance(p1: cc.Vec2, p2: cc.Vec2): number { return Math.sqrt(Math.pow(p2.x - p1.x, 2) + Math.pow(p2.y - p1.y, 2)); } 接下来在 update 中实现主要逻辑: update(dt: number) { if (!this.isRotating || !this.target) return; // 将角度转换为弧度 let radian = Math.PI / 180 * this.angle; // 更新节点的位置 this.node.x = this.target.x + this.radius * Math.cos(radian); this.node.y = this.target.y + this.radius * Math.sin(radian); // 更新节点的角度 if (this.faceToTarget) { switch (this.faceAxis) { case Axis.PositiveX: this.node.angle = this.angle + 180; break; case Axis.PositiveY: this.node.angle = this.angle + 90; break; case Axis.NegativeX: this.node.angle = this.angle; break; case Axis.NegativeY: this.node.angle = this.angle - 90; break; } } // 计算下一帧的角度 let anglePerFrame = dt * (360 / this.timePerRound); if (this.clockwise) this.angle -= anglePerFrame; else this.angle += anglePerFrame; // 重置角度,避免数值过大 if (this.angle >= 360) this.angle %= 360; else if (this.angle |
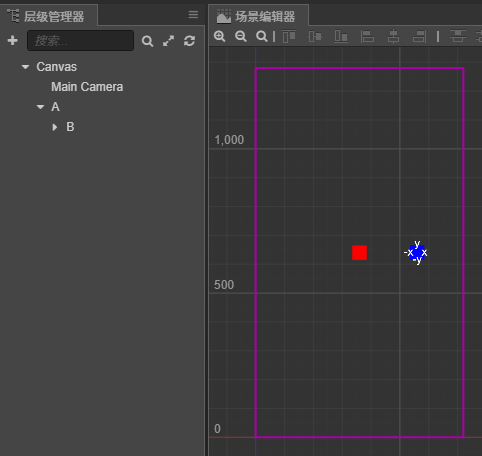
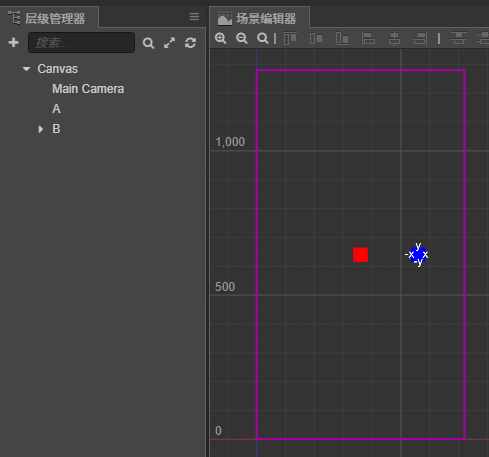 左:B 为 A 的子节点 丨 右:两者在同一层级
 RotateAround 组件
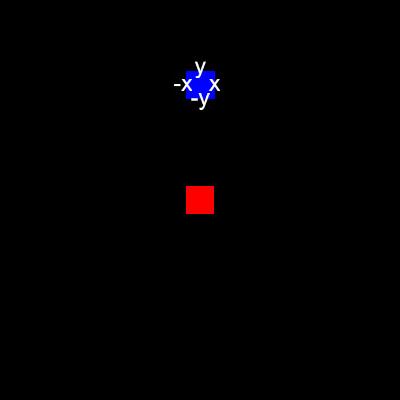
 左:顺时针旋转且6秒转一圈 丨 右:顺时针旋转且-y轴指向目标

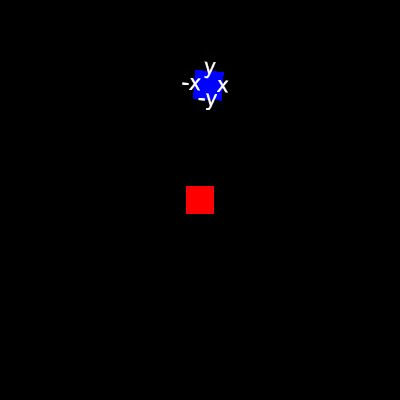
 左:逆时针旋转且x轴指向目标 丨 右:逆时针旋转且10秒转一圈
【本文地址】
今日新闻 |
推荐新闻 |