ArchLinux下i3wm简单配置和美化 |
您所在的位置:网站首页 › Ubuntu安装配置i3 › ArchLinux下i3wm简单配置和美化 |
ArchLinux下i3wm简单配置和美化
|
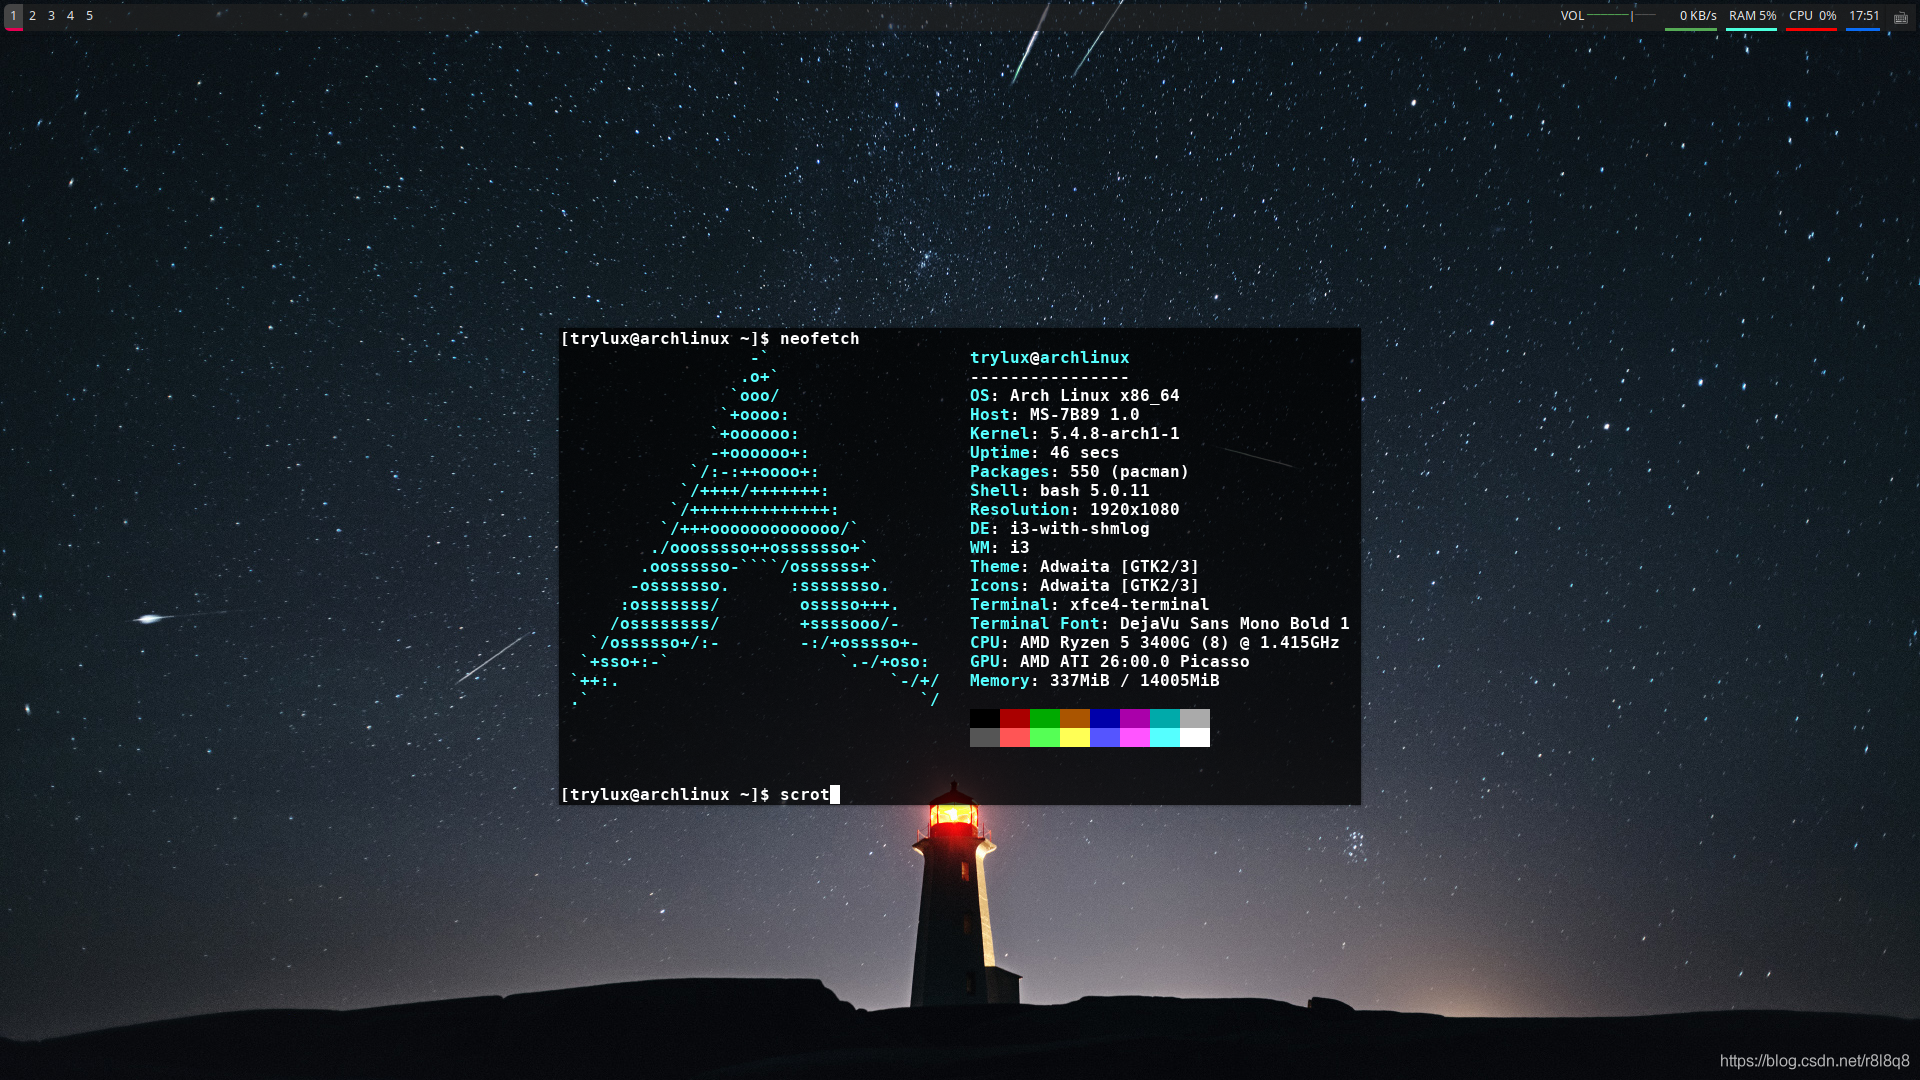
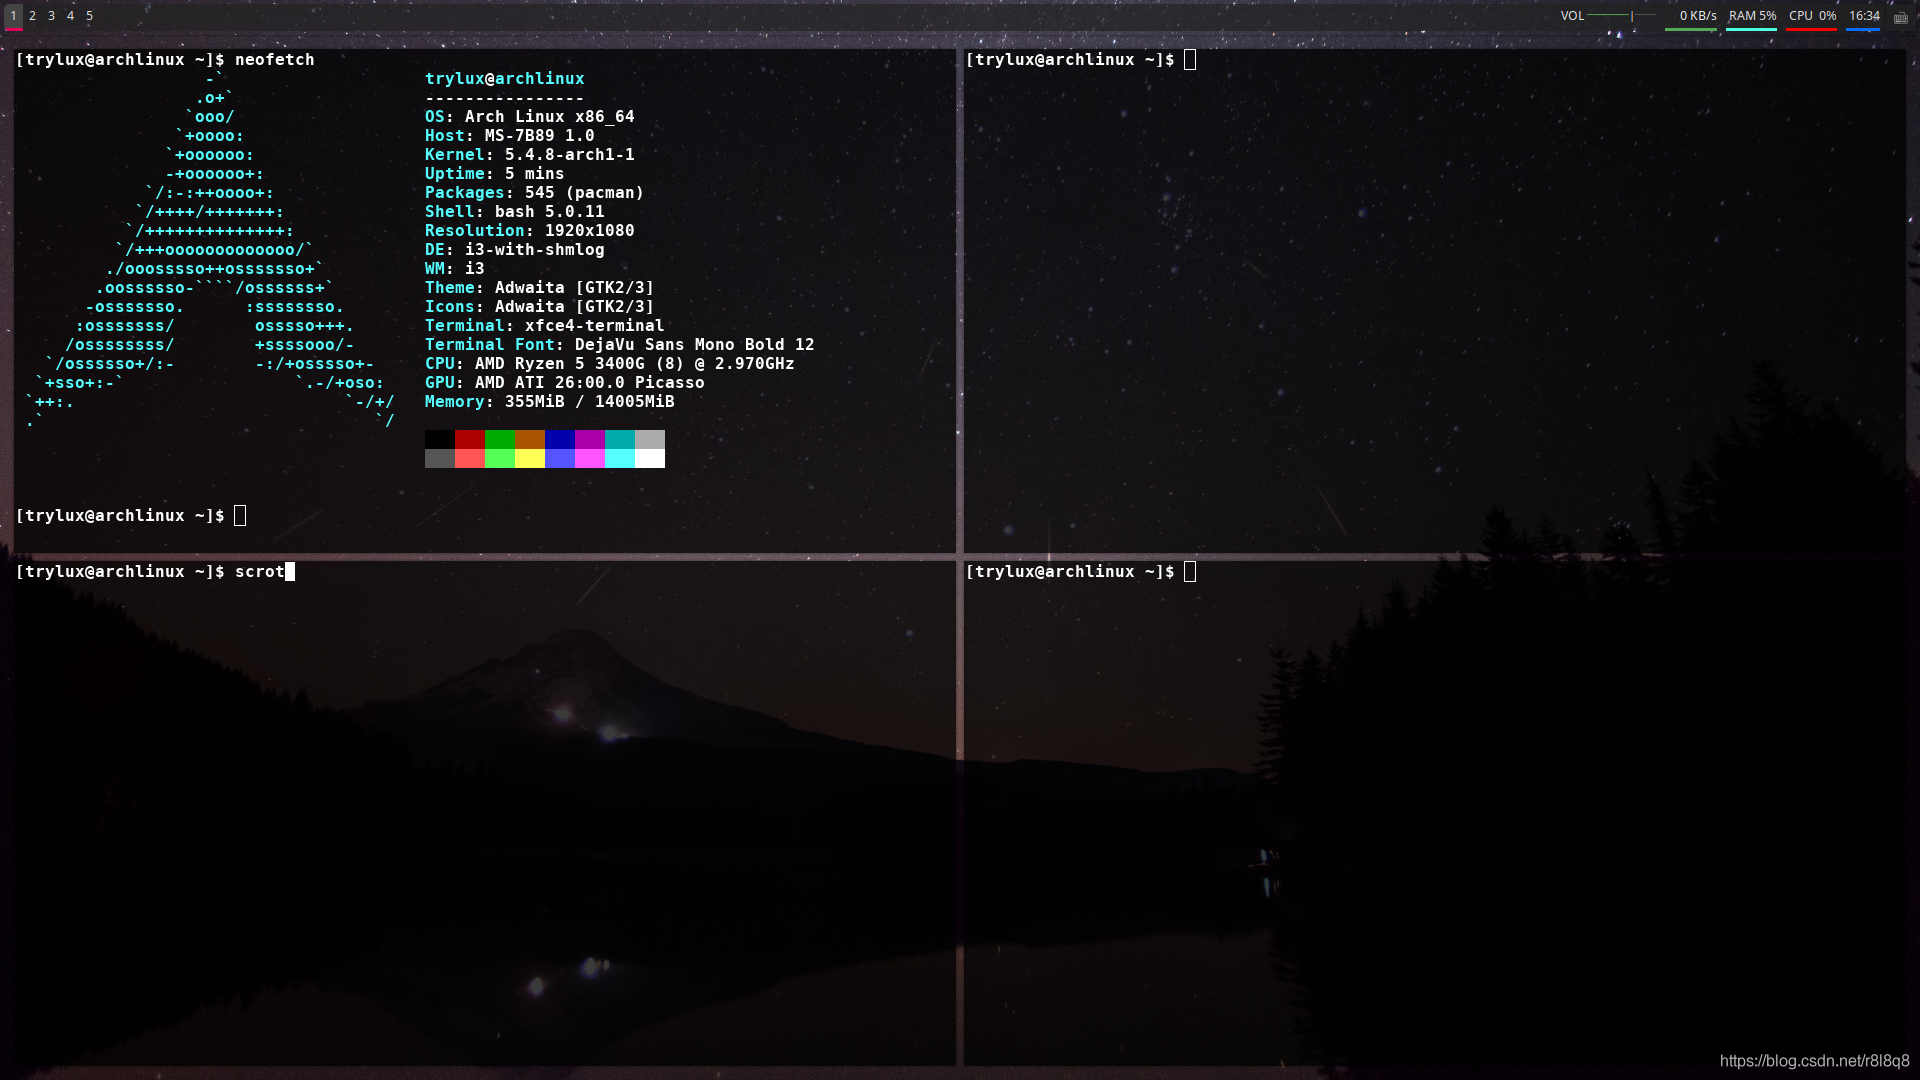
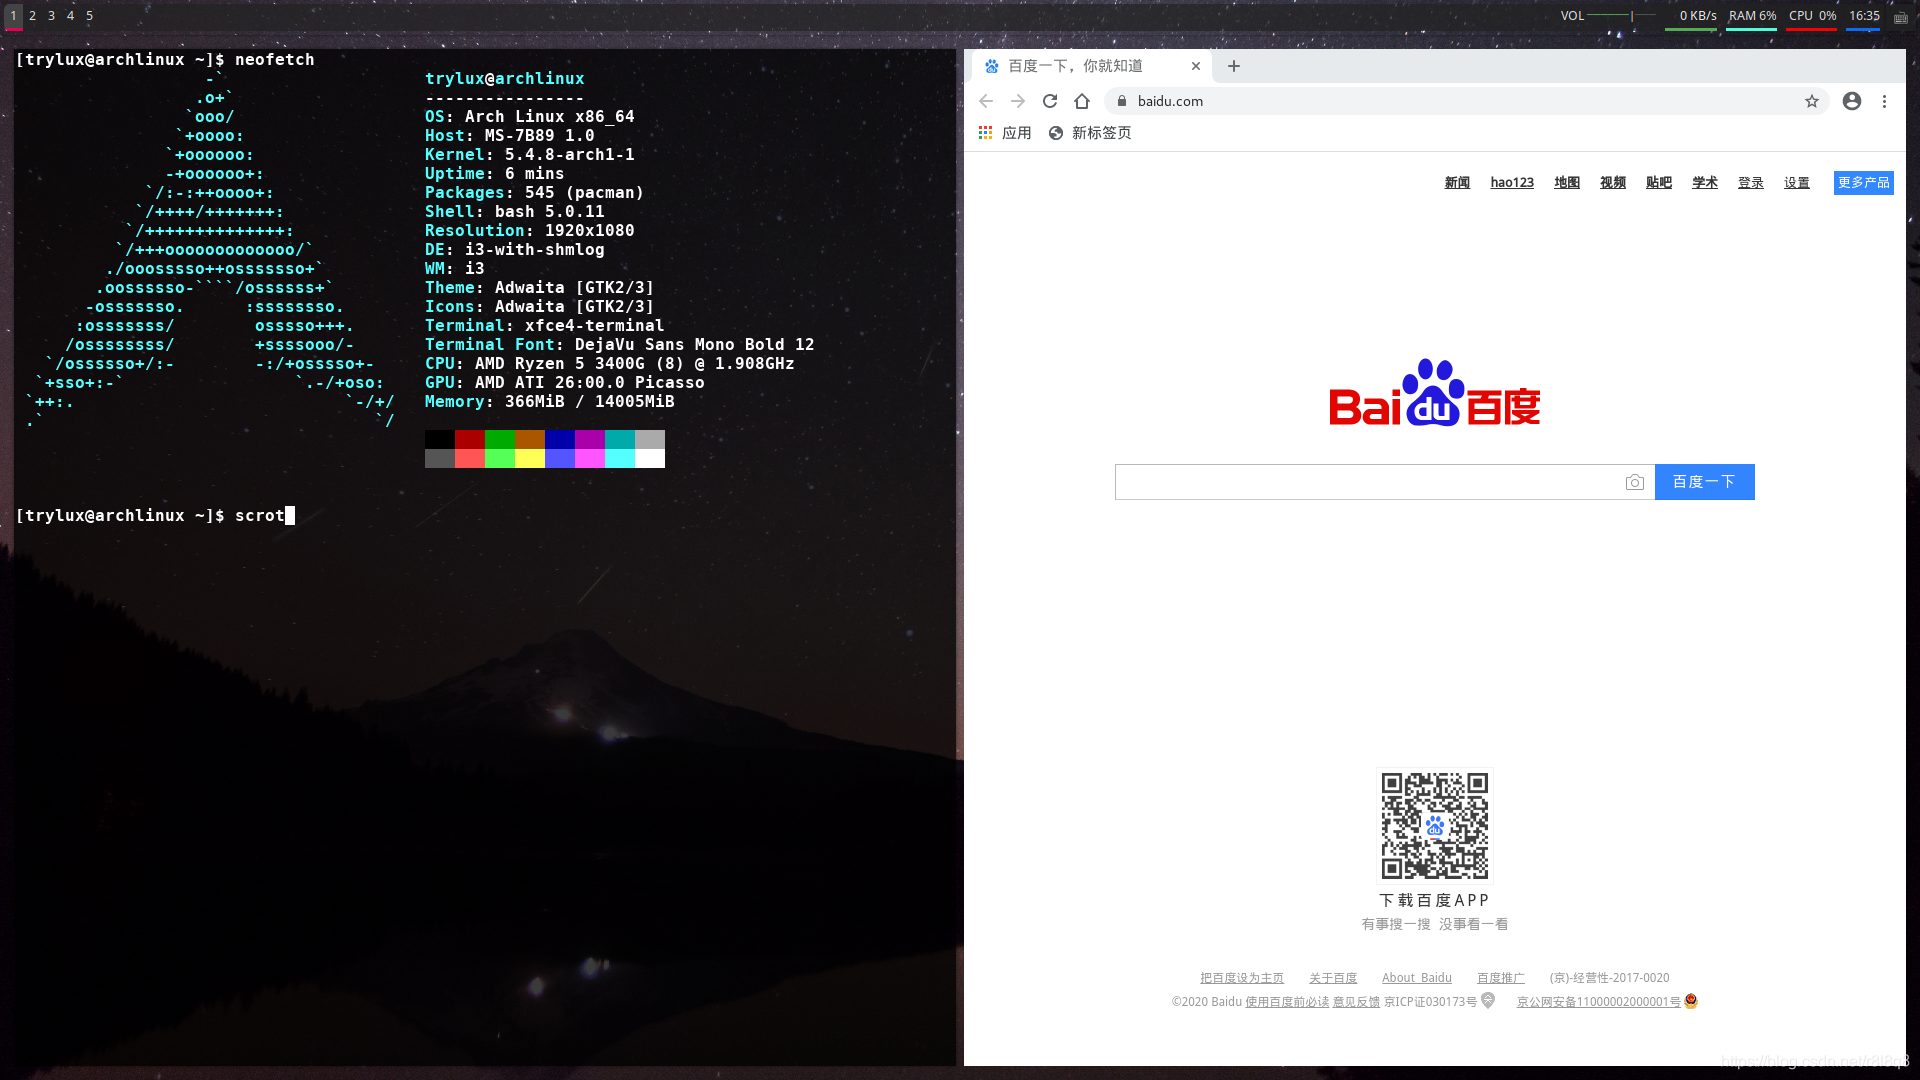
先show下自己配置的截图,简单弄了下,凑合用。
(1)安装显卡驱动 确定显卡型号 执行: # lspci | grep VGA执行: $ sudo pacman -S 驱动包官方仓库提供的驱动包: 通用----------------------------------xf86-video-vesa intel----------------------------------xf86-video-intel Geforce7±-------------------------xf86-video-nouveau Geforce6/7-------------------------xf86-video-304xx
(1)安装sddm登录管理器,可以选择其他登录管理器或者不装用startx启动,具体参见arch wiki 执行 $ sudo pacman -S sddm $ sudo systemctl enable sddm安装并启用sddm服务 (2)安装i3wm 执行 $ sudo pacman -S i3-gaps安装i3-gaps(i3-gaps为i3wm的分支,提供了更多特性) (3)安装终端 执行 $ sudo pacman -S mate-terminal安装mate-terminal(可选其他终端,这里安装的是mate桌面的终端,相比其他xterm urxvt等轻量级终端略为大一些,但是配置方便,自己用鼠标点几下就ok了) (4)重启 reboot至此基础的i3安装已经完成 4.开始安装简单美化所需的软件 软件名简介compton提供窗口透明支持polybar状态条,类似于windows那个任务栏,也可以用默认的i3bar或者装别的panelrofi快捷程序启动,也可以装dmenufeh墙纸设置(1)安装窗口透明支持软件 $ sudo pacman -S compton(2)安装状态条 先添加archlinuxcn源, polybar在archlinuxcn源里。 $ sudo nano /etc/pacman.conf在 /etc/pacman.conf 文件末尾添加两行: [archlinuxcn] SigLevel=Never Server = https://mirrors.ustc.edu.cn/archlinuxcn/$arch(先执行sudo pacman -S firefox 安装浏览器,然后打开本文复制一下文中archlinuxcn源,在nano 里ctrl+shift+v粘贴以下) 然后执行 $ sudo pacman -Syy更新下仓库信息 执行 $ sudo pacman -S polybar安装polybar (3)安装快捷程序启动 $ sudo pacman -S rofi(4)安装墙纸设置软件 $ sudo pacman -S feh其中执行 feh --randomize --bg-fill ~/Pictures/DesktopBackground会随机切换一张图片作为墙纸,可以配合linux的crontab 设置成每隔10分钟自动切换壁纸。crontab的安装使用很简单,请自行百度。 (5)安装输入法 执行 $ sudo pacman -S fcitx-im fcitx-configtool安装输入法引擎。 官方仓库里的输入法: fcitx-cloudpinyin fcitx-googlepinyin fcitx-libpinyin fcitx-sunpinyin ArchLinuxCN源里有搜狗拼音 fcitx-sogoupinyin 选择一个安装. 执行 $ nano ~/.xprofile添加以下内容 export GTK_IM_MODULE=fcitx export QT_IM_MODULE=fcitx export XMODIFIERS="@im=fcitx" 5.修改配置文件(1)修改i3配置文件 执行 $ nano ~/.config/i3/config打开配置文件。 汉字注释部分为在原来配置文件基础上修改添加的内容 # This file has been auto-generated by i3-config-wizard(1). # It will not be overwritten, so edit it as you like. # # Should you change your keyboard layout some time, delete # this file and re-run i3-config-wizard(1). # # i3 config file (v4) # # Please see https://i3wm.org/docs/userguide.html for a complete reference! set $mod Mod4 #设置窗口边框等等 new_window none new_float normal hide_edge_borders both #设置窗口间距 gaps inner 8 gaps outer 6 # 设置截图快捷键 ,先安装mate-utils, sudo pacman -S mate-utils bindsym $mod+p exec mate-screenshot -i #登录时 启用窗口透明 exec --no-startup-id compton -b #登陆时 随机选择壁纸 ,~/Pictures/DesktopBackground 下要放几张图片 exec --no-startup-id feh --randomize --bg-fill ~/Pictures/DesktopBackground # 登陆时启动polybar exec --no-startup-id ~/.config/polybar/launch.sh #登录时启动fcitx exec --no-startup-id fcitx # Font for window titles. Will also be used by the bar unless a different font # is used in the bar {} block below. font pango:monospace 8 # This font is widely installed, provides lots of unicode glyphs, right-to-left # text rendering and scalability on retina/hidpi displays (thanks to pango). #font pango:DejaVu Sans Mono 8 # The combination of xss-lock, nm-applet and pactl is a popular choice, so # they are included here as an example. Modify as you see fit. # xss-lock grabs a logind suspend inhibit lock and will use i3lock to lock the # screen before suspend. Use loginctl lock-session to lock your screen. exec --no-startup-id xss-lock --transfer-sleep-lock -- i3lock --nofork # NetworkManager is the most popular way to manage wireless networks on Linux, # and nm-applet is a desktop environment-independent system tray GUI for it. exec --no-startup-id nm-applet # Use pactl to adjust volume in PulseAudio. set $refresh_i3status killall -SIGUSR1 i3status bindsym XF86AudioRaiseVolume exec --no-startup-id pactl set-sink-volume @DEFAULT_SINK@ +10% && $refresh_i3status bindsym XF86AudioLowerVolume exec --no-startup-id pactl set-sink-volume @DEFAULT_SINK@ -10% && $refresh_i3status bindsym XF86AudioMute exec --no-startup-id pactl set-sink-mute @DEFAULT_SINK@ toggle && $refresh_i3status bindsym XF86AudioMicMute exec --no-startup-id pactl set-source-mute @DEFAULT_SOURCE@ toggle && $refresh_i3status # Use Mouse+$mod to drag floating windows to their wanted position floating_modifier $mod # start a terminal bindsym $mod+Return exec i3-sensible-terminal # kill focused window bindsym $mod+Shift+q kill #设置快捷程序启动为rofi # start dmenu (a program launcher) #bindsym $mod+d exec dmenu_run # There also is the (new) i3-dmenu-desktop which only displays applications # shipping a .desktop file. It is a wrapper around dmenu, so you need that # installed. # bindsym $mod+d exec --no-startup-id i3-dmenu-desktop bindsym $mod+d exec --no-startup-id rofi -show drun # change focus bindsym $mod+j focus left bindsym $mod+k focus down bindsym $mod+l focus up bindsym $mod+semicolon focus right # alternatively, you can use the cursor keys: bindsym $mod+Left focus left bindsym $mod+Down focus down bindsym $mod+Up focus up bindsym $mod+Right focus right # move focused window bindsym $mod+Shift+j move left bindsym $mod+Shift+k move down bindsym $mod+Shift+l move up bindsym $mod+Shift+semicolon move right # alternatively, you can use the cursor keys: bindsym $mod+Shift+Left move left bindsym $mod+Shift+Down move down bindsym $mod+Shift+Up move up bindsym $mod+Shift+Right move right # split in horizontal orientation bindsym $mod+h split h # split in vertical orientation bindsym $mod+v split v # enter fullscreen mode for the focused container bindsym $mod+f fullscreen toggle # change container layout (stacked, tabbed, toggle split) bindsym $mod+s layout stacking bindsym $mod+w layout tabbed bindsym $mod+e layout toggle split # toggle tiling / floating bindsym $mod+Shift+space floating toggle # change focus between tiling / floating windows bindsym $mod+space focus mode_toggle # focus the parent container bindsym $mod+a focus parent # focus the child container #bindsym $mod+d focus child # Define names for default workspaces for which we configure key bindings later on. # We use variables to avoid repeating the names in multiple places. set $ws1 "1" set $ws2 "2" set $ws3 "3" set $ws4 "4" set $ws5 "5" set $ws6 "6" set $ws7 "7" set $ws8 "8" set $ws9 "9" set $ws10 "10" # switch to workspace bindsym $mod+1 workspace number $ws1 bindsym $mod+2 workspace number $ws2 bindsym $mod+3 workspace number $ws3 bindsym $mod+4 workspace number $ws4 bindsym $mod+5 workspace number $ws5 bindsym $mod+6 workspace number $ws6 bindsym $mod+7 workspace number $ws7 bindsym $mod+8 workspace number $ws8 bindsym $mod+9 workspace number $ws9 bindsym $mod+0 workspace number $ws10 # move focused container to workspace bindsym $mod+Shift+1 move container to workspace number $ws1 bindsym $mod+Shift+2 move container to workspace number $ws2 bindsym $mod+Shift+3 move container to workspace number $ws3 bindsym $mod+Shift+4 move container to workspace number $ws4 bindsym $mod+Shift+5 move container to workspace number $ws5 bindsym $mod+Shift+6 move container to workspace number $ws6 bindsym $mod+Shift+7 move container to workspace number $ws7 bindsym $mod+Shift+8 move container to workspace number $ws8 bindsym $mod+Shift+9 move container to workspace number $ws9 bindsym $mod+Shift+0 move container to workspace number $ws10 # reload the configuration file bindsym $mod+Shift+c reload # restart i3 inplace (preserves your layout/session, can be used to upgrade i3) bindsym $mod+Shift+r restart # exit i3 (logs you out of your X session) bindsym $mod+Shift+e exec "i3-nagbar -t warning -m 'You pressed the exit shortcut. Do you really want to exit i3? This will end your X session.' -B 'Yes, exit i3' 'i3-msg exit'" # resize window (you can also use the mouse for that) mode "resize" { # These bindings trigger as soon as you enter the resize mode # Pressing left will shrink the window’s width. # Pressing right will grow the window’s width. # Pressing up will shrink the window’s height. # Pressing down will grow the window’s height. bindsym j resize shrink width 10 px or 10 ppt bindsym k resize grow height 10 px or 10 ppt bindsym l resize shrink height 10 px or 10 ppt bindsym semicolon resize grow width 10 px or 10 ppt # same bindings, but for the arrow keys bindsym Left resize shrink width 10 px or 10 ppt bindsym Down resize grow height 10 px or 10 ppt bindsym Up resize shrink height 10 px or 10 ppt bindsym Right resize grow width 10 px or 10 ppt # back to normal: Enter or Escape or $mod+Shift+r bindsym Return mode "default" bindsym Escape mode "default" bindsym $mod+r mode "default" } bindsym $mod+r mode "resize" # 关掉i3bar # Start i3bar to display a workspace bar (plus the system information i3status # finds out, if available) #bar { # status_command i3status #} # exec --no-startup-id conky -c ~/.conkyrc(2)修改polybar配置文件 polybar自带默认配置文件在/usr/share/doc/polybar/config, 执行 $ mkdir ~/.config/polybar $ cp /usr/share/doc/polybar/config ~/.config/polybar/添加polybar配置文件 执行 $ nano ~/.config/polybar/config打开polybar配置文件 [module/eth] 为有线网卡,[module/wlan] 为无线网卡 执行 $ ip link show查看自己的网卡设备,并将[module/eth] 或[module/wlan]下的interface设置为自己的网卡设备名字 执行 $ nano ~/.config/polybar/launch.sh添加polybar的启动脚本. 内容如下: #!/bin/bash # Terminate already running bar instances killall -q polybar # Wait until the processes have been shut down while pgrep -u $UID -x polybar >/dev/null; do sleep 1; done # Launch Polybar, using default config location ~/.config/polybar/config polybar mybar添加完成后,执行 $ sudo chmod +x ~/.config/polybar/launch.sh 添加可执行权限 polybar配置文件我几乎没修改,只是修改了下透明背景色和网卡,让其显示网速,并禁用了一些没用的组件,polybar配置文件中 ; 为注释符号。汉字注释内容为修改添加的部分。 ;========================================================== ; ; ; ██████╗ ██████╗ ██╗ ██╗ ██╗██████╗ █████╗ ██████╗ ; ██╔══██╗██╔═══██╗██║ ╚██╗ ██╔╝██╔══██╗██╔══██╗██╔══██╗ ; ██████╔╝██║ ██║██║ ╚████╔╝ ██████╔╝███████║██████╔╝ ; ██╔═══╝ ██║ ██║██║ ╚██╔╝ ██╔══██╗██╔══██║██╔══██╗ ; ██║ ╚██████╔╝███████╗██║ ██████╔╝██║ ██║██║ ██║ ; ╚═╝ ╚═════╝ ╚══════╝╚═╝ ╚═════╝ ╚═╝ ╚═╝╚═╝ ╚═╝ ; ; ; To learn more about how to configure Polybar ; go to https://github.com/polybar/polybar ; ; The README contains a lot of information ; ;========================================================== [colors] ;background = ${xrdb:color0:#222} ;background = #222 ;设置背景色为半透明 background= #b0222222 background-alt = #444 ;foreground = ${xrdb:color7:#222} foreground = #dfdfdf foreground-alt = #555 primary = #ffb52a secondary = #e60053 alert = #bd2c40 [bar/mybar] ;monitor = ${env:MONITOR:HDMI-1} width = 100% height = 27 ;offset-x = 1% ;offset-y = 1% radius = 6.0 fixed-center = false background = ${colors.background} foreground = ${colors.foreground} line-size = 3 line-color = #f00 border-size = 4 border-color = #00000000 padding-left = 0 padding-right = 2 module-margin-left = 1 module-margin-right = 2 font-0 = fixed:pixelsize=10;1 font-1 = unifont:fontformat=truetype:size=8:antialias=false;0 font-2 = siji:pixelsize=10;1 modules-left = bspwm i3 ;mpd音乐播放器插件,懒得配置,直接禁用 ;modules-center = mpd ;组件排列顺序,eth为有线网卡,下面为默认设置,把自己用不到的删除,台式机没有wlan所以直接删除了 ;modules-right = filesystem xbacklight alsa pulseaudio xkeyboard memory cpu wlan eth battery temperature date powermenu modules-right = alsa eth memory cpu date tray-position = right tray-padding = 2 ;tray-background = #0063ff ;wm-restack = bspwm ;wm-restack = i3 ;override-redirect = true ;scroll-up = bspwm-desknext ;scroll-down = bspwm-deskprev ;scroll-up = i3wm-wsnext ;scroll-down = i3wm-wsprev cursor-click = pointer cursor-scroll = ns-resize [module/xwindow] type = internal/xwindow label = %title:0:30:...% [module/xkeyboard] type = internal/xkeyboard blacklist-0 = num lock format-prefix = " " format-prefix-foreground = ${colors.foreground-alt} format-prefix-underline = ${colors.secondary} label-layout = %layout% label-layout-underline = ${colors.secondary} label-indicator-padding = 2 label-indicator-margin = 1 label-indicator-background = ${colors.secondary} label-indicator-underline = ${colors.secondary} [module/filesystem] type = internal/fs interval = 25 mount-0 = / label-mounted = %{F#0a81f5}%mountpoint%%{F-}: %percentage_used%% label-unmounted = %mountpoint% not mounted label-unmounted-foreground = ${colors.foreground-alt} [module/bspwm] type = internal/bspwm label-focused = %index% label-focused-background = ${colors.background-alt} label-focused-underline= ${colors.primary} label-focused-padding = 2 label-occupied = %index% label-occupied-padding = 2 label-urgent = %index%! label-urgent-background = ${colors.alert} label-urgent-padding = 2 label-empty = %index% label-empty-foreground = ${colors.foreground-alt} label-empty-padding = 2 ; Separator in between workspaces ; label-separator = | [module/i3] type = internal/i3 format = index-sort = true wrapping-scroll = false ; Only show workspaces on the same output as the bar ;pin-workspaces = true label-mode-padding = 2 label-mode-foreground = #000 label-mode-background = ${colors.primary} ; focused = Active workspace on focused monitor label-focused = %index% label-focused-background = ${colors.background-alt} label-focused-underline= ${colors.secondary} label-focused-padding = 2 ; unfocused = Inactive workspace on any monitor label-unfocused = %index% label-unfocused-padding = 2 ; visible = Active workspace on unfocused monitor label-visible = %index% label-visible-background = ${self.label-focused-background} label-visible-underline = ${self.label-focused-underline} label-visible-padding = ${self.label-focused-padding} ; urgent = Workspace with urgency hint set label-urgent = %index% label-urgent-background = ${colors.alert} label-urgent-padding = 2 ; Separator in between workspaces ; label-separator = | [module/mpd] type = internal/mpd format-online = icon-prev = icon-stop = icon-play = icon-pause = icon-next = label-song-maxlen = 25 label-song-ellipsis = true [module/xbacklight] type = internal/xbacklight format = label = BL bar-width = 10 bar-indicator = | bar-indicator-foreground = #fff bar-indicator-font = 2 bar-fill = ─ bar-fill-font = 2 bar-fill-foreground = #9f78e1 bar-empty = ─ bar-empty-font = 2 bar-empty-foreground = ${colors.foreground-alt} [module/backlight-acpi] inherit = module/xbacklight type = internal/backlight card = intel_backlight [module/cpu] type = internal/cpu interval = 1 format-prefix = " " format-prefix-foreground = ${colors.foreground-alt} format-underline = #f90000 label =CPU %percentage:2%% [module/memory] type = internal/memory interval = 1 format-prefix = " " format-prefix-foreground = ${colors.foreground-alt} format-underline = #4bffdc label =RAM %percentage_used%% ;无线网卡设备 [module/wlan] type = internal/network ;请将interface设为自己的网卡名称 interface = net1 interval = 3.0 format-connected = format-connected-underline = #9f78e1 label-connected = %essid% format-disconnected = ;format-disconnected = ;format-disconnected-underline = ${self.format-connected-underline} ;label-disconnected = %ifname% disconnected ;label-disconnected-foreground = ${colors.foreground-alt} ramp-signal-0 = ramp-signal-1 = ramp-signal-2 = ramp-signal-3 = ramp-signal-4 = ramp-signal-foreground = ${colors.foreground-alt} ;有线网卡 [module/eth] type = internal/network ;请将interface设为自己的网卡名称; interface = enp34s0 interval = 2.0 format-connected-underline = #55aa55 format-connected-prefix = " " format-connected-prefix-foreground = ${colors.foreground-alt} ;label-connected = %local_ip% ; Seconds to sleep between updates ; Default: 1 ;interval = 3.0 ; Test connectivity every Nth update ; A value of 0 disables the feature ; NOTE: Experimental (needs more testing) ; Default: 0 ;ping-interval = 3 ; @deprecated: Define min width using token specifiers (%downspeed:min% and %upspeed:min%) ; Minimum output width of upload/download rate ; Default: 3 udspeed-minwidth = 5 ; Accumulate values from all interfaces ; when querying for up/downspeed rate ; Default: false accumulate-stats = true ; Consider an `UNKNOWN` interface state as up. ; Some devices like USB network adapters have ; an unknown state, even when they're running ; Default: false unknown-as-up = true ; Available tags: ; (default) ; format-connected = ; Available tags: ; (default) format-disconnected = ; Available tags: ; (default) ; ; format-packetloss = ; All labels support the following tokens: ; %ifname% [wireless+wired] ; %local_ip% [wireless+wired] ; %local_ip6% [wireless+wired] ; %essid% [wireless] ; %signal% [wireless] ; %upspeed% [wireless+wired] ; %downspeed% [wireless+wired] ; %linkspeed% [wired] ; Default: %ifname% %local_ip% label-connected = %downspeed:9% label-connected-foreground = #eefafafa ; Default: (none) label-disconnected = not connected label-disconnected-foreground = #66ffffff ; Default: (none) ;label-packetloss = %essid% ;label-packetloss-foreground = #eefafafa ; Only applies if is used ramp-signal-0 = 😱 ramp-signal-1 = 😠 ramp-signal-2 = 😒 ramp-signal-3 = 😊 ramp-signal-4 = 😃 ramp-signal-5 = 😈 ; Only applies if is used animation-packetloss-0 = ⚠ animation-packetloss-0-foreground = #ffa64c animation-packetloss-1 = 📶 animation-packetloss-1-foreground = #000000 ; Framerate in milliseconds animation-packetloss-framerate = 500 ;format-disconnected = ;format-disconnected = ;format-disconnected-underline = ${self.format-connected-underline} ;label-disconnected = %ifname% disconnected ;label-disconnected-foreground = ${colors.foreground-alt} [module/date] type = internal/date interval = 5 date = date-alt = " %Y-%m-%d" time = %H:%M time-alt = %H:%M:%S format-prefix = format-prefix-foreground = ${colors.foreground-alt} format-underline = #0a6cf5 label = %date% %time% [module/pulseaudio] type = internal/pulseaudio format-volume = label-volume = VOL %percentage%% label-volume-foreground = ${root.foreground} label-muted = 🔇 muted label-muted-foreground = #666 bar-volume-width = 10 bar-volume-foreground-0 = #55aa55 bar-volume-foreground-1 = #55aa55 bar-volume-foreground-2 = #55aa55 bar-volume-foreground-3 = #55aa55 bar-volume-foreground-4 = #55aa55 bar-volume-foreground-5 = #f5a70a bar-volume-foreground-6 = #ff5555 bar-volume-gradient = false bar-volume-indicator = | bar-volume-indicator-font = 2 bar-volume-fill = ─ bar-volume-fill-font = 2 bar-volume-empty = ─ bar-volume-empty-font = 2 bar-volume-empty-foreground = ${colors.foreground-alt} [module/alsa] type = internal/alsa format-volume = label-volume = VOL label-volume-foreground = ${root.foreground} format-muted-prefix = " " format-muted-foreground = ${colors.foreground-alt} label-muted = sound muted bar-volume-width = 10 bar-volume-foreground-0 = #55aa55 bar-volume-foreground-1 = #55aa55 bar-volume-foreground-2 = #55aa55 bar-volume-foreground-3 = #55aa55 bar-volume-foreground-4 = #55aa55 bar-volume-foreground-5 = #f5a70a bar-volume-foreground-6 = #ff5555 bar-volume-gradient = false bar-volume-indicator = | bar-volume-indicator-font = 2 bar-volume-fill = ─ bar-volume-fill-font = 2 bar-volume-empty = ─ bar-volume-empty-font = 2 bar-volume-empty-foreground = ${colors.foreground-alt} [module/battery] type = internal/battery battery = BAT0 adapter = ADP1 full-at = 98 format-charging = format-charging-underline = #ffb52a format-discharging = format-discharging-underline = ${self.format-charging-underline} format-full-prefix = " " format-full-prefix-foreground = ${colors.foreground-alt} format-full-underline = ${self.format-charging-underline} ramp-capacity-0 = ramp-capacity-1 = ramp-capacity-2 = ramp-capacity-foreground = ${colors.foreground-alt} animation-charging-0 = animation-charging-1 = animation-charging-2 = animation-charging-foreground = ${colors.foreground-alt} animation-charging-framerate = 750 animation-discharging-0 = animation-discharging-1 = animation-discharging-2 = animation-discharging-foreground = ${colors.foreground-alt} animation-discharging-framerate = 750 [module/temperature] type = internal/temperature thermal-zone = 0 warn-temperature = 60 format = format-underline = #f50a4d format-warn = format-warn-underline = ${self.format-underline} label = %temperature-c% label-warn = %temperature-c% label-warn-foreground = ${colors.secondary} ramp-0 = ramp-1 = ramp-2 = ramp-foreground = ${colors.foreground-alt} [module/powermenu] type = custom/menu expand-right = true format-spacing = 1 label-open =Power label-open-foreground = ${colors.secondary} label-close = cancel label-close-foreground = ${colors.secondary} label-separator = | label-separator-foreground = ${colors.foreground-alt} menu-0-0 = reboot menu-0-0-exec = menu-open-1 menu-0-1 = power off menu-0-1-exec = menu-open-2 menu-1-0 = cancel menu-1-0-exec = menu-open-0 menu-1-1 = reboot menu-1-1-exec = sudo reboot menu-2-0 = power off menu-2-0-exec = sudo poweroff menu-2-1 = cancel menu-2-1-exec = menu-open-0 [settings] screenchange-reload = true ;compositing-background = xor ;compositing-background = screen ;compositing-foreground = source ;compositing-border = over ;pseudo-transparency = false [global/wm] margin-top = 5 margin-bottom = 5 ; vim:ft=dosini到这里基本配置美化完成了。 6.安装一些常用的软件这个根据自己喜好去安装就行,有的比较人洁癖,用了i3窗口管理器,其他软件几乎清一色轻量级的,甚至只用gtk的不用qt的。以下是我个人安装的常用软件。 软件名描述cajamate桌面默认的文件管理器engrampamate桌面默认压缩管理器mate-calc计算器eom图片浏览器mate-utils提供 查看磁盘容量 截图 搜索文件等工具mate-system-monitormate桌面的任务管理器(系统监视器)或者直接一条命令 $ sudo pacman -S mate-extra将Mate桌面的常用工具软件全套安装。 其中文件管理器为caja,rofi检索不出来,还有mate-system-monitor(任务管理器)等个别mate工具软件无法检索,建议在i3配置文件里设置快捷键启动。例如:文件管理器,可以在i3配置文件中添加 #设置文件管理器快捷键 bindsym $mod+m exec caja快捷打开文件管理器。 终端可以安装Oh-My-Zsh 美化以下,具体请百度或者访问Oh-My-Zsh官网,很简单的。 简单用了下Oh-My-Zsh后 下载链接: https://download.csdn.net/download/r8l8q8/12090544 |
 本文默认你已经安装了基本的archlinux系统,只是没有配置桌面环境。所以跳过前面archlinux的基础安装过程。 ArchLinux的具体安装请参见我的博客 https://blog.csdn.net/r8l8q8/article/details/76516523
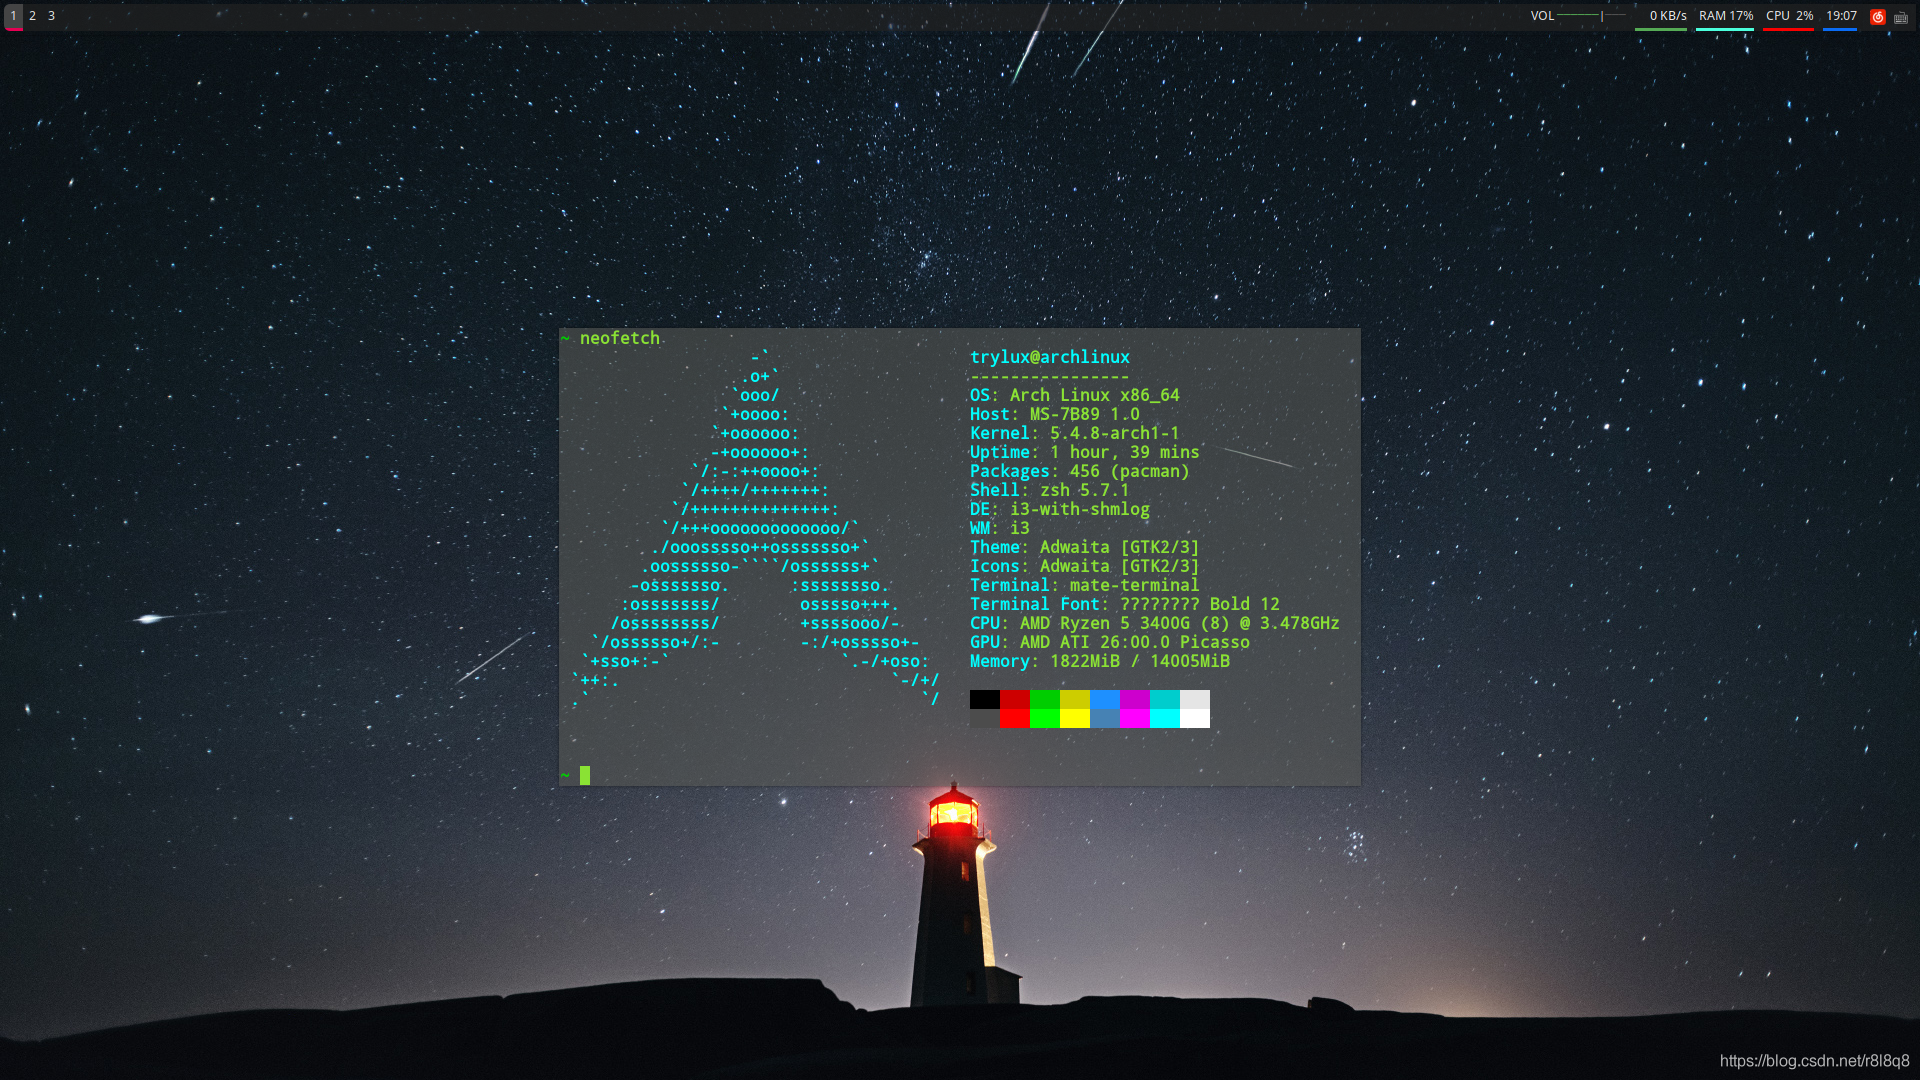

【本文地址】
今日新闻 |
推荐新闻 |